¶ What is QIDI Maker?
QIDI Maker is an all-in-one mobile app tailored for QIDI 3D printers. It enables remote monitoring and management of your 3D printers. Additionally, users can efficiently initiate previous projects, make real-time adjustments to ongoing prints, and streamline the overall printing process.
¶ Download & Installation
QIDI Maker is available for download on the Play Store or App Store. Click on the official website link for a quick redirection to the download page.
Download QIDI Maker: https://qidi3d.com/pages/qidi-maker
¶ First Time Setup
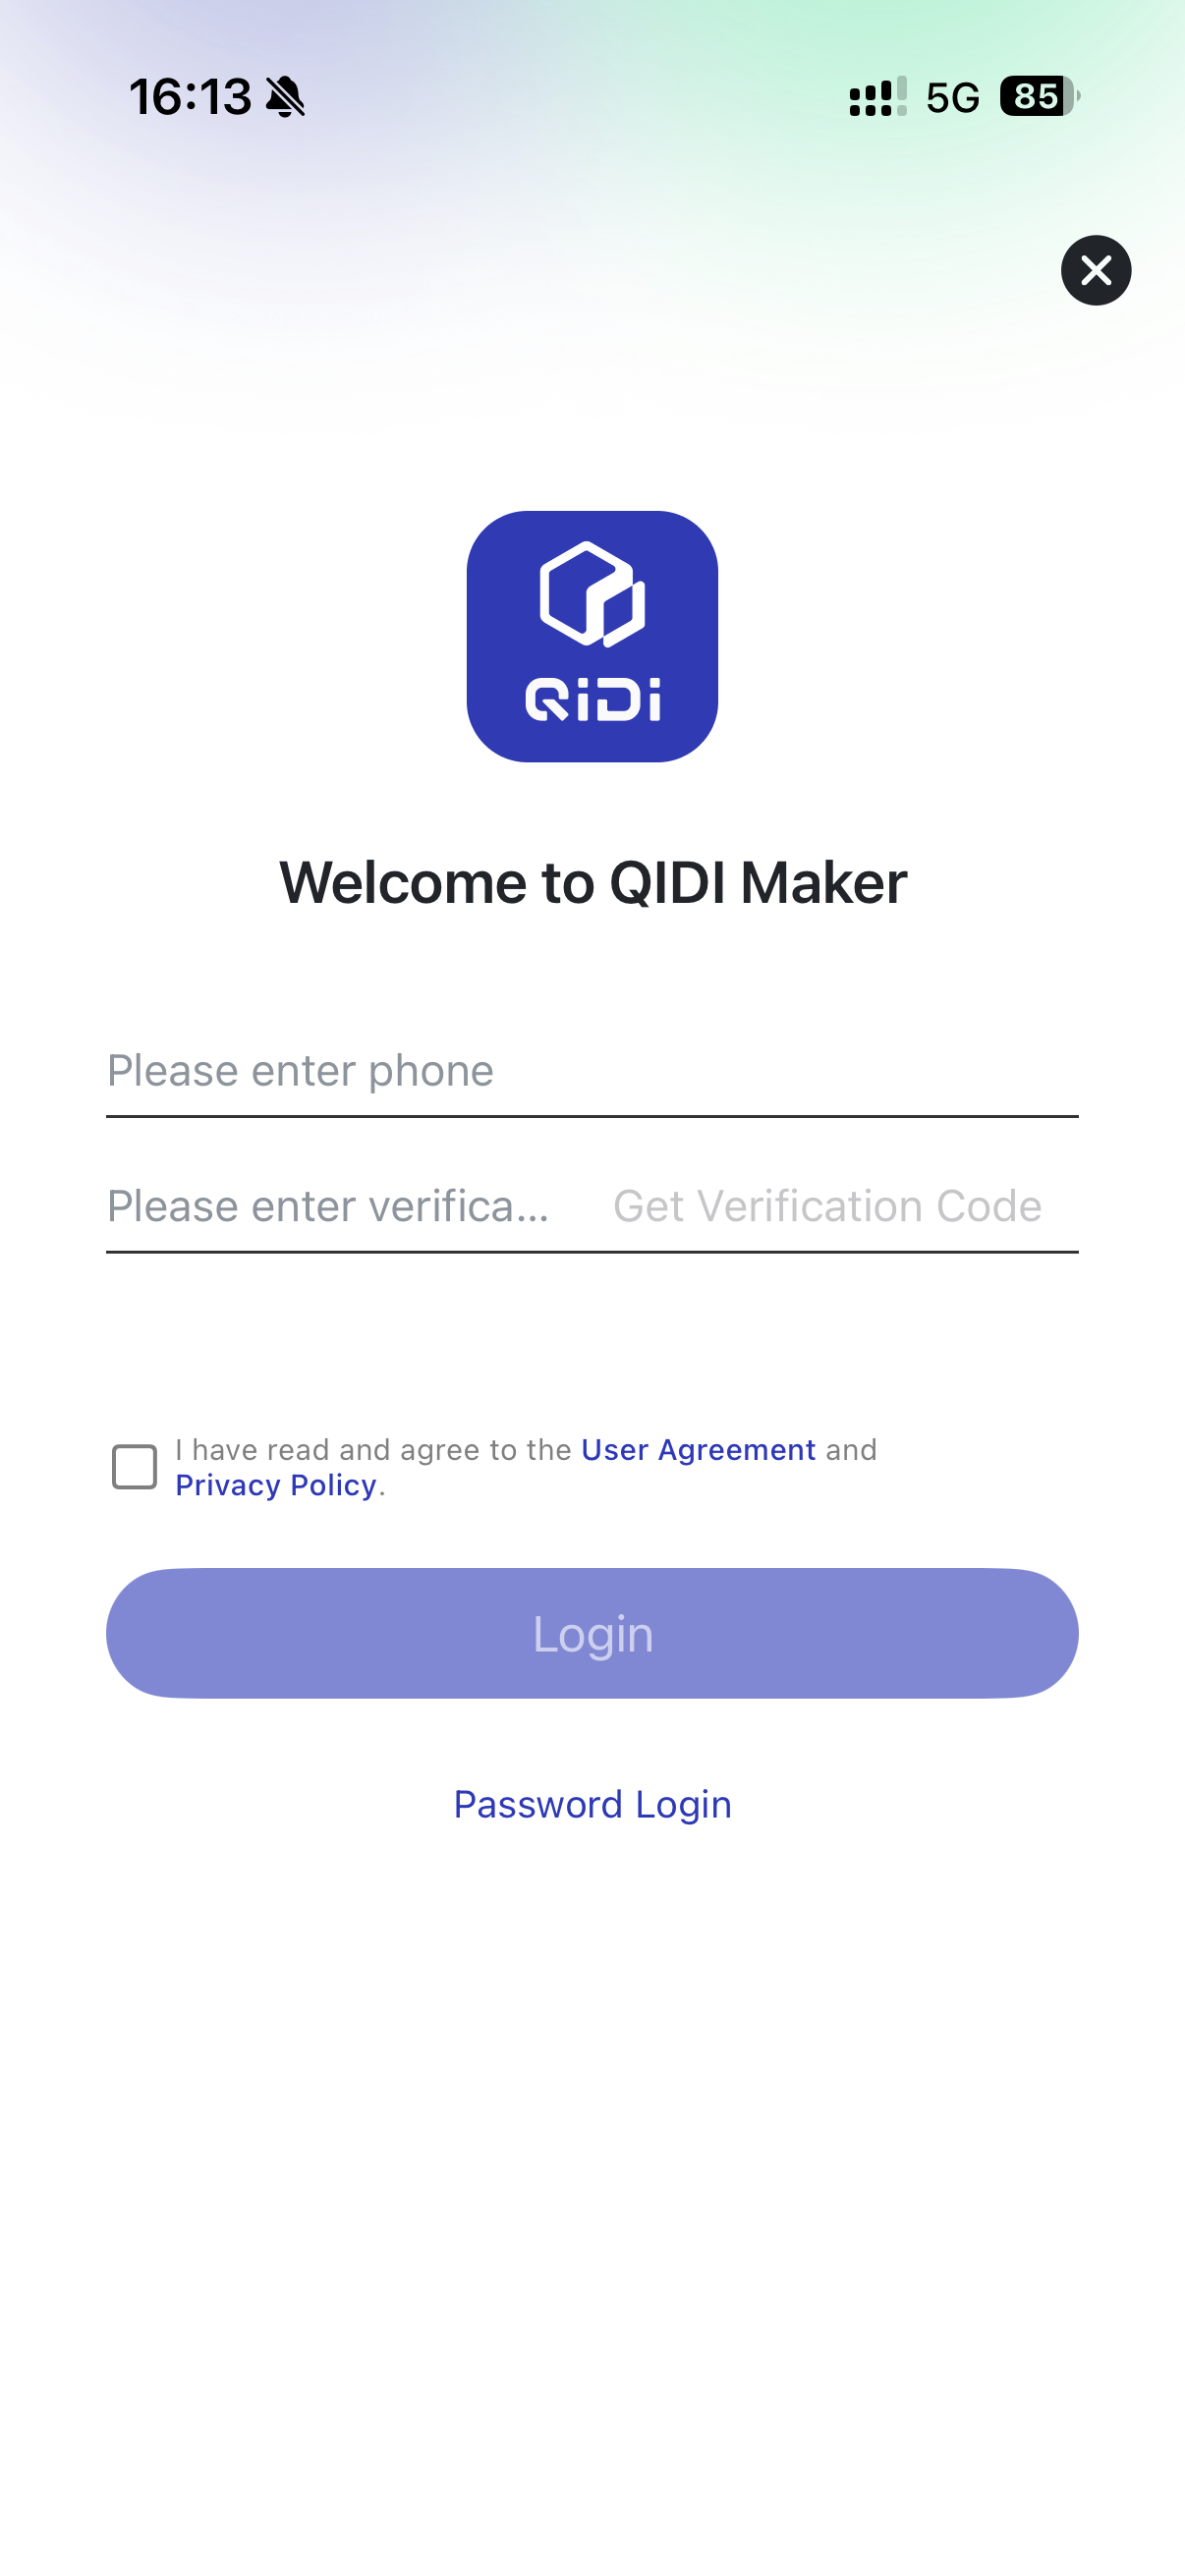
Before accessing the app for the first time, it is necessary to agree and accept the User Privacy Protection Agreement. Upon choosing to agree, the app will request permission to enable notifications. We recommend enabling notifications to receive important information, such as the printer's print status. After this, the app will automatically enter the main screen
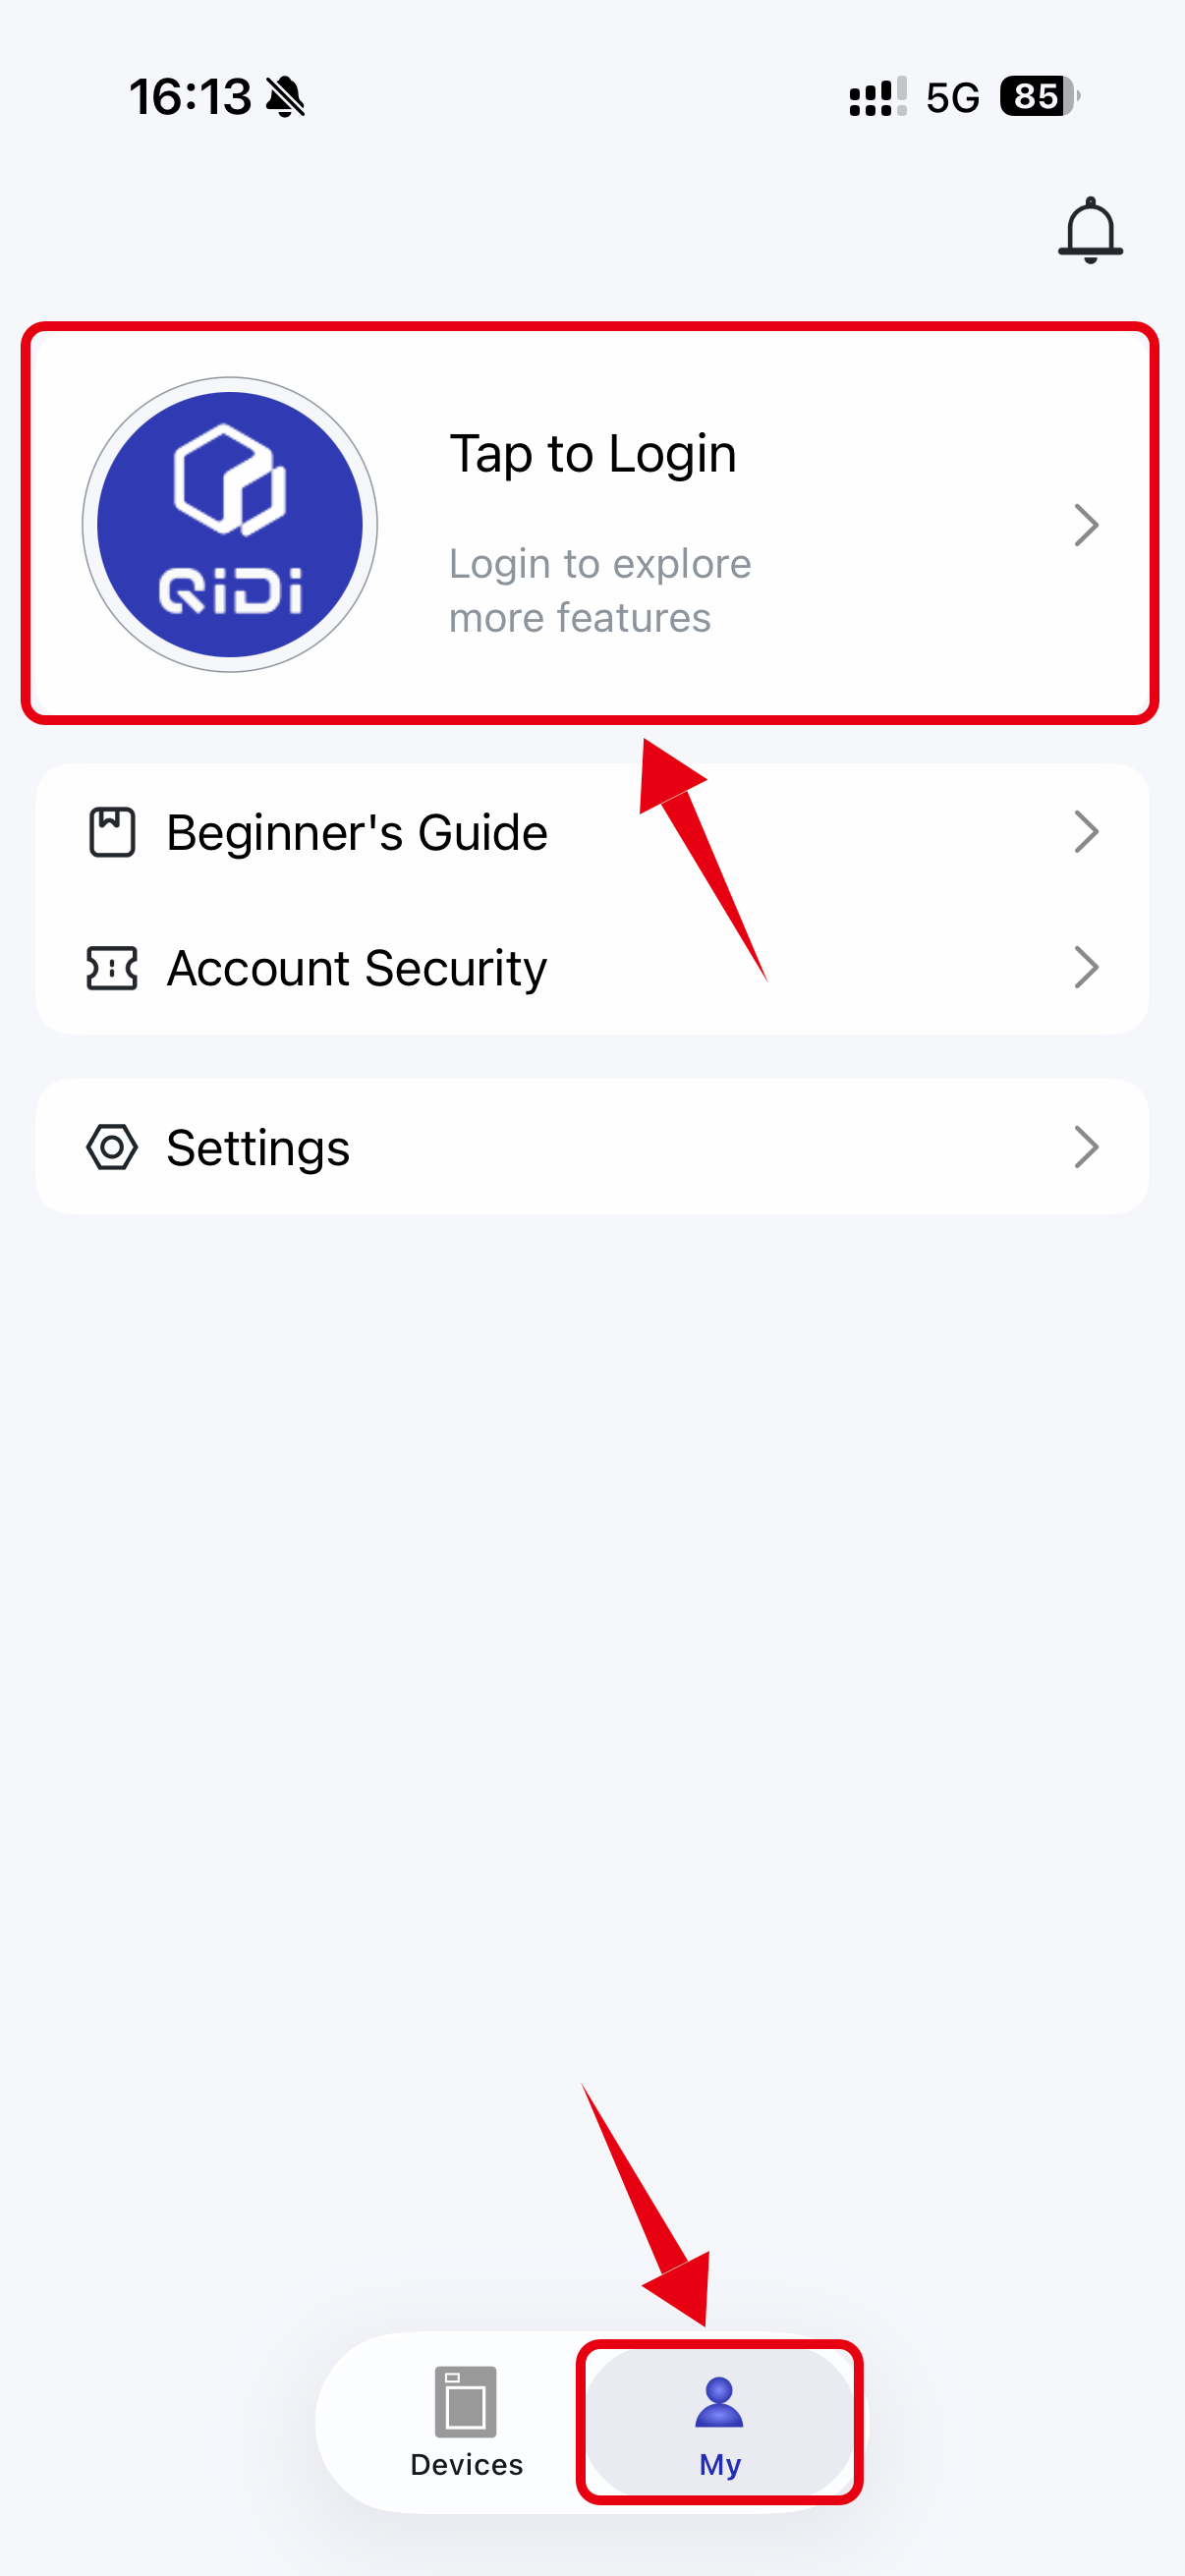
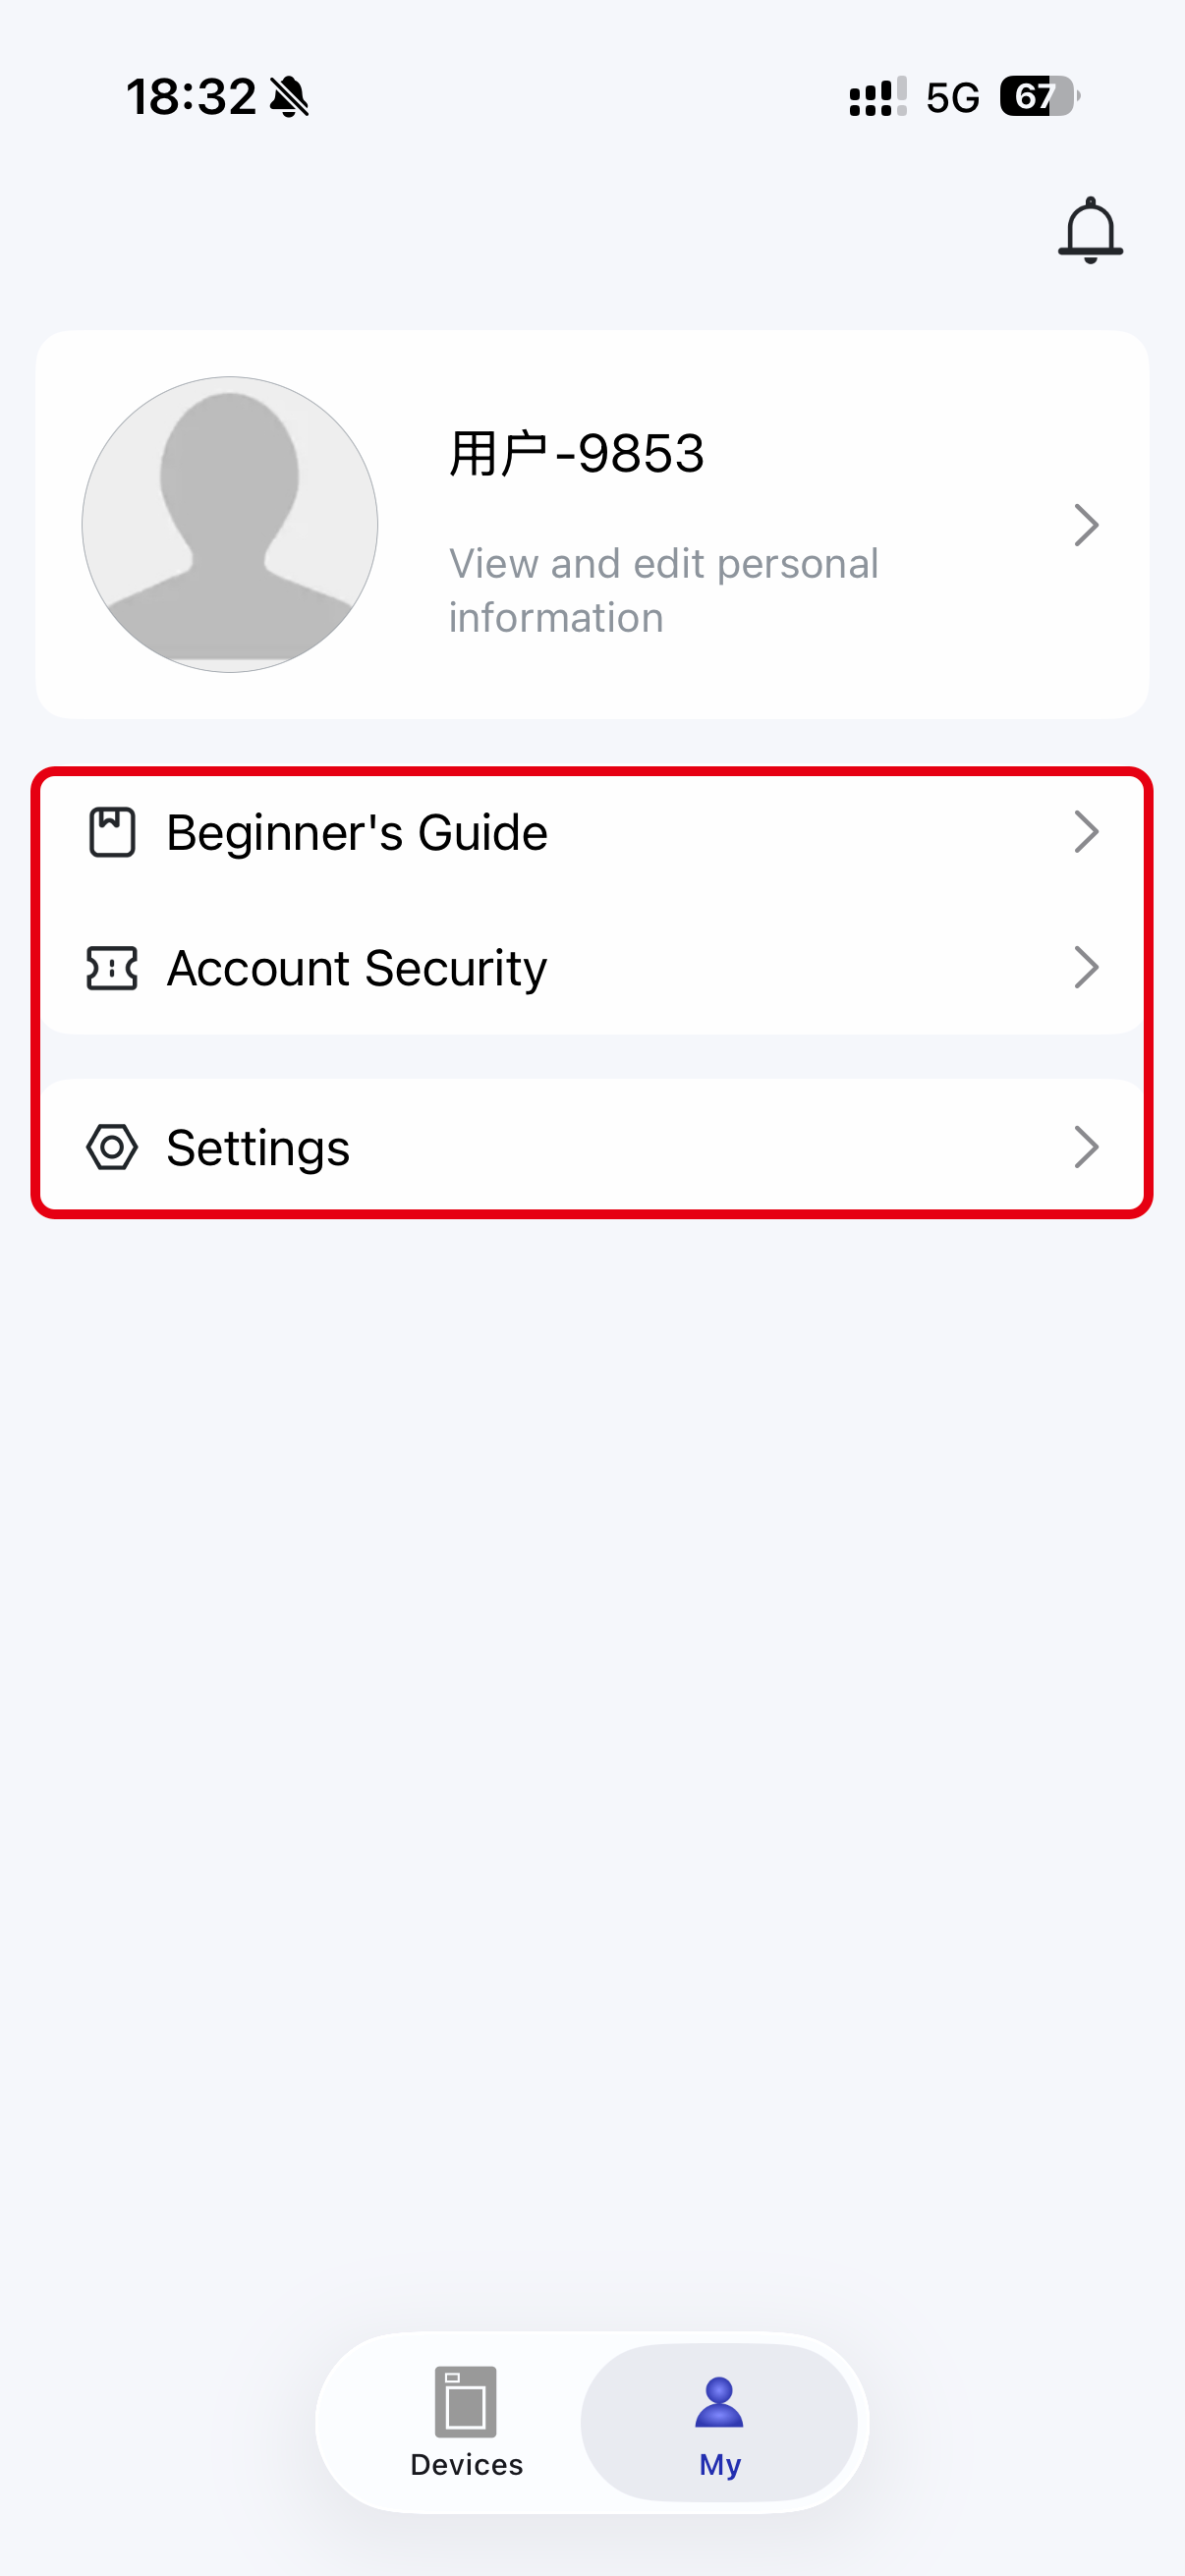
¶ Sign In/Sign Up
After entering the main interface, click on "Login/Register" at the top of the screen to complete account registration or login.
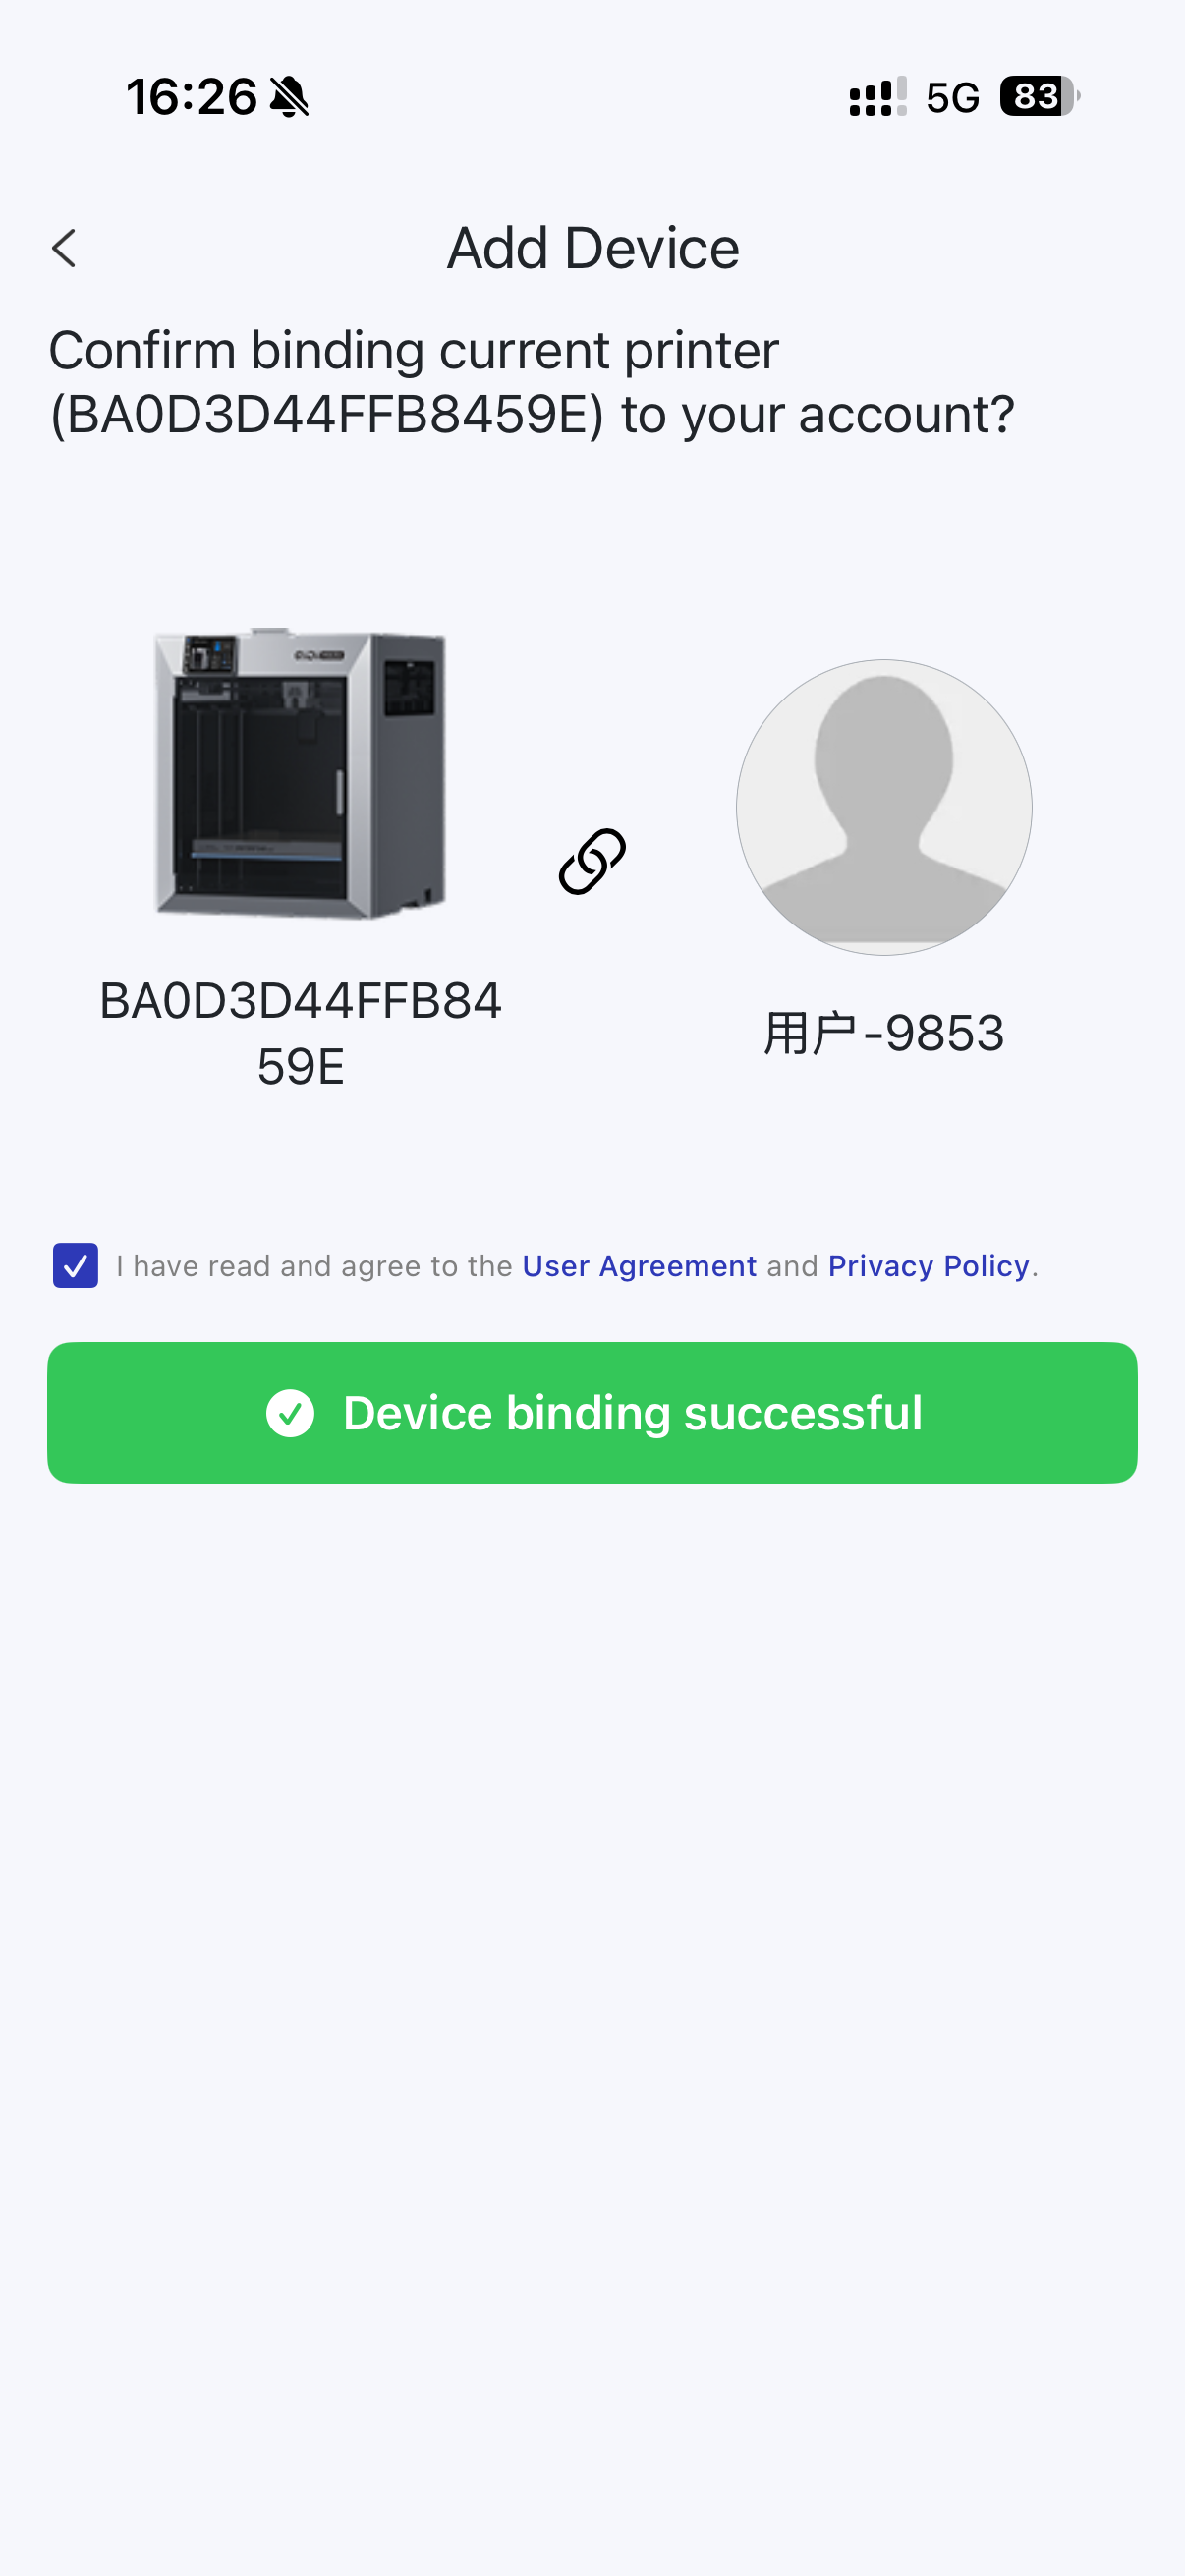
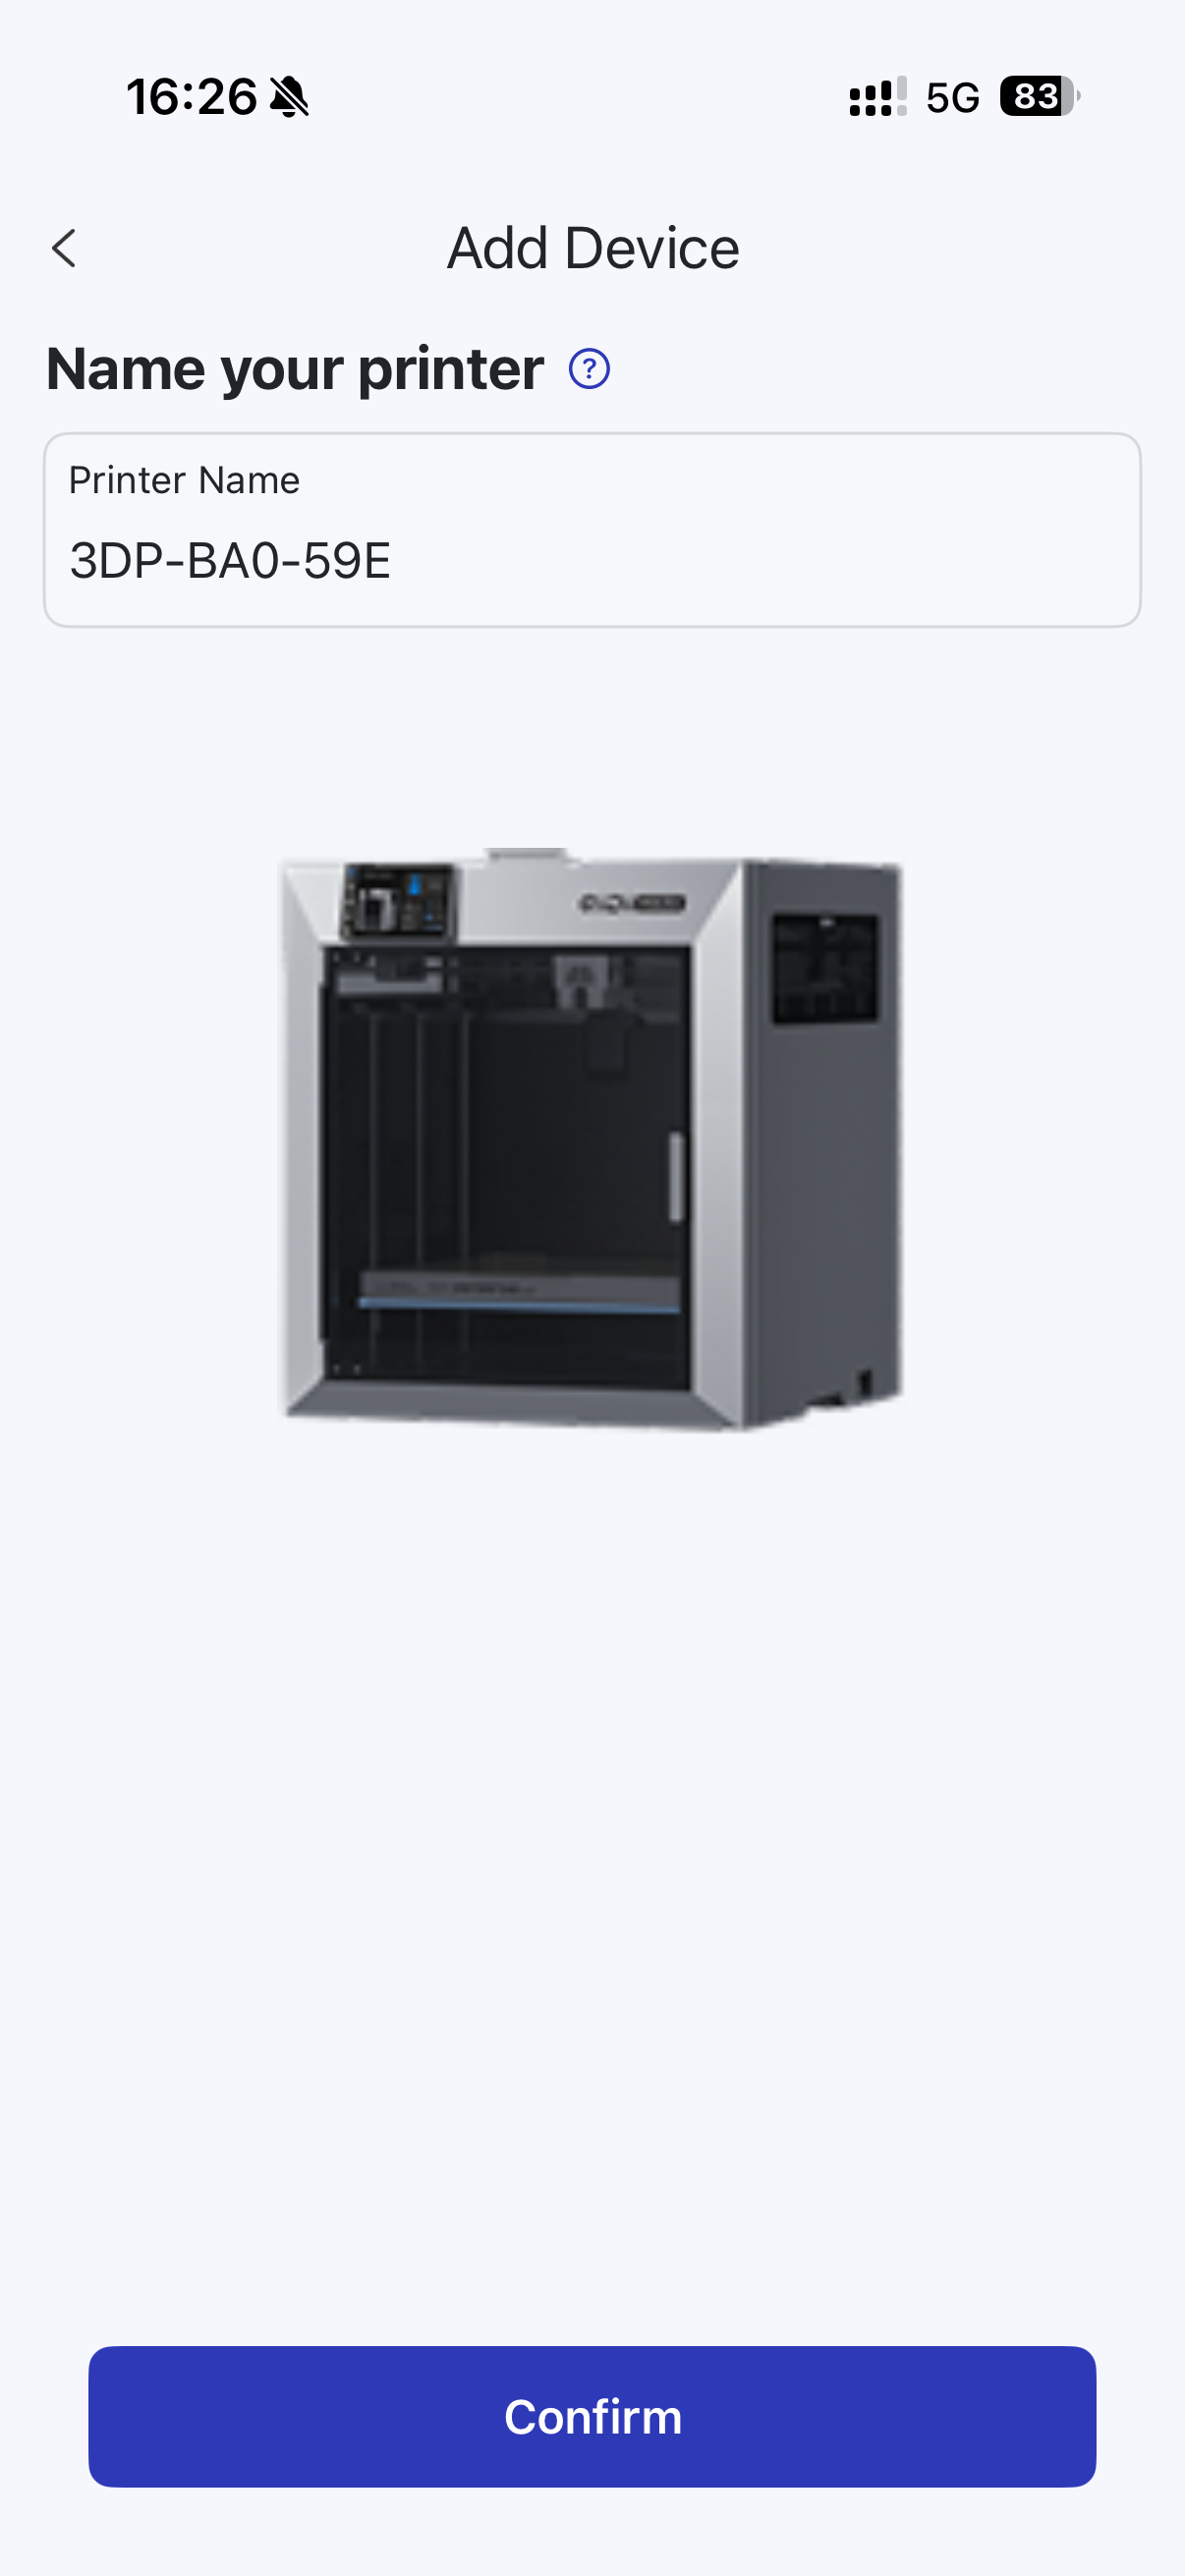
¶ Add Printer
After successfully logging in to your account, click the Devices button in the bottom navigation bar to enter the "Devices" page, and then click Bind Printer to add a printer.
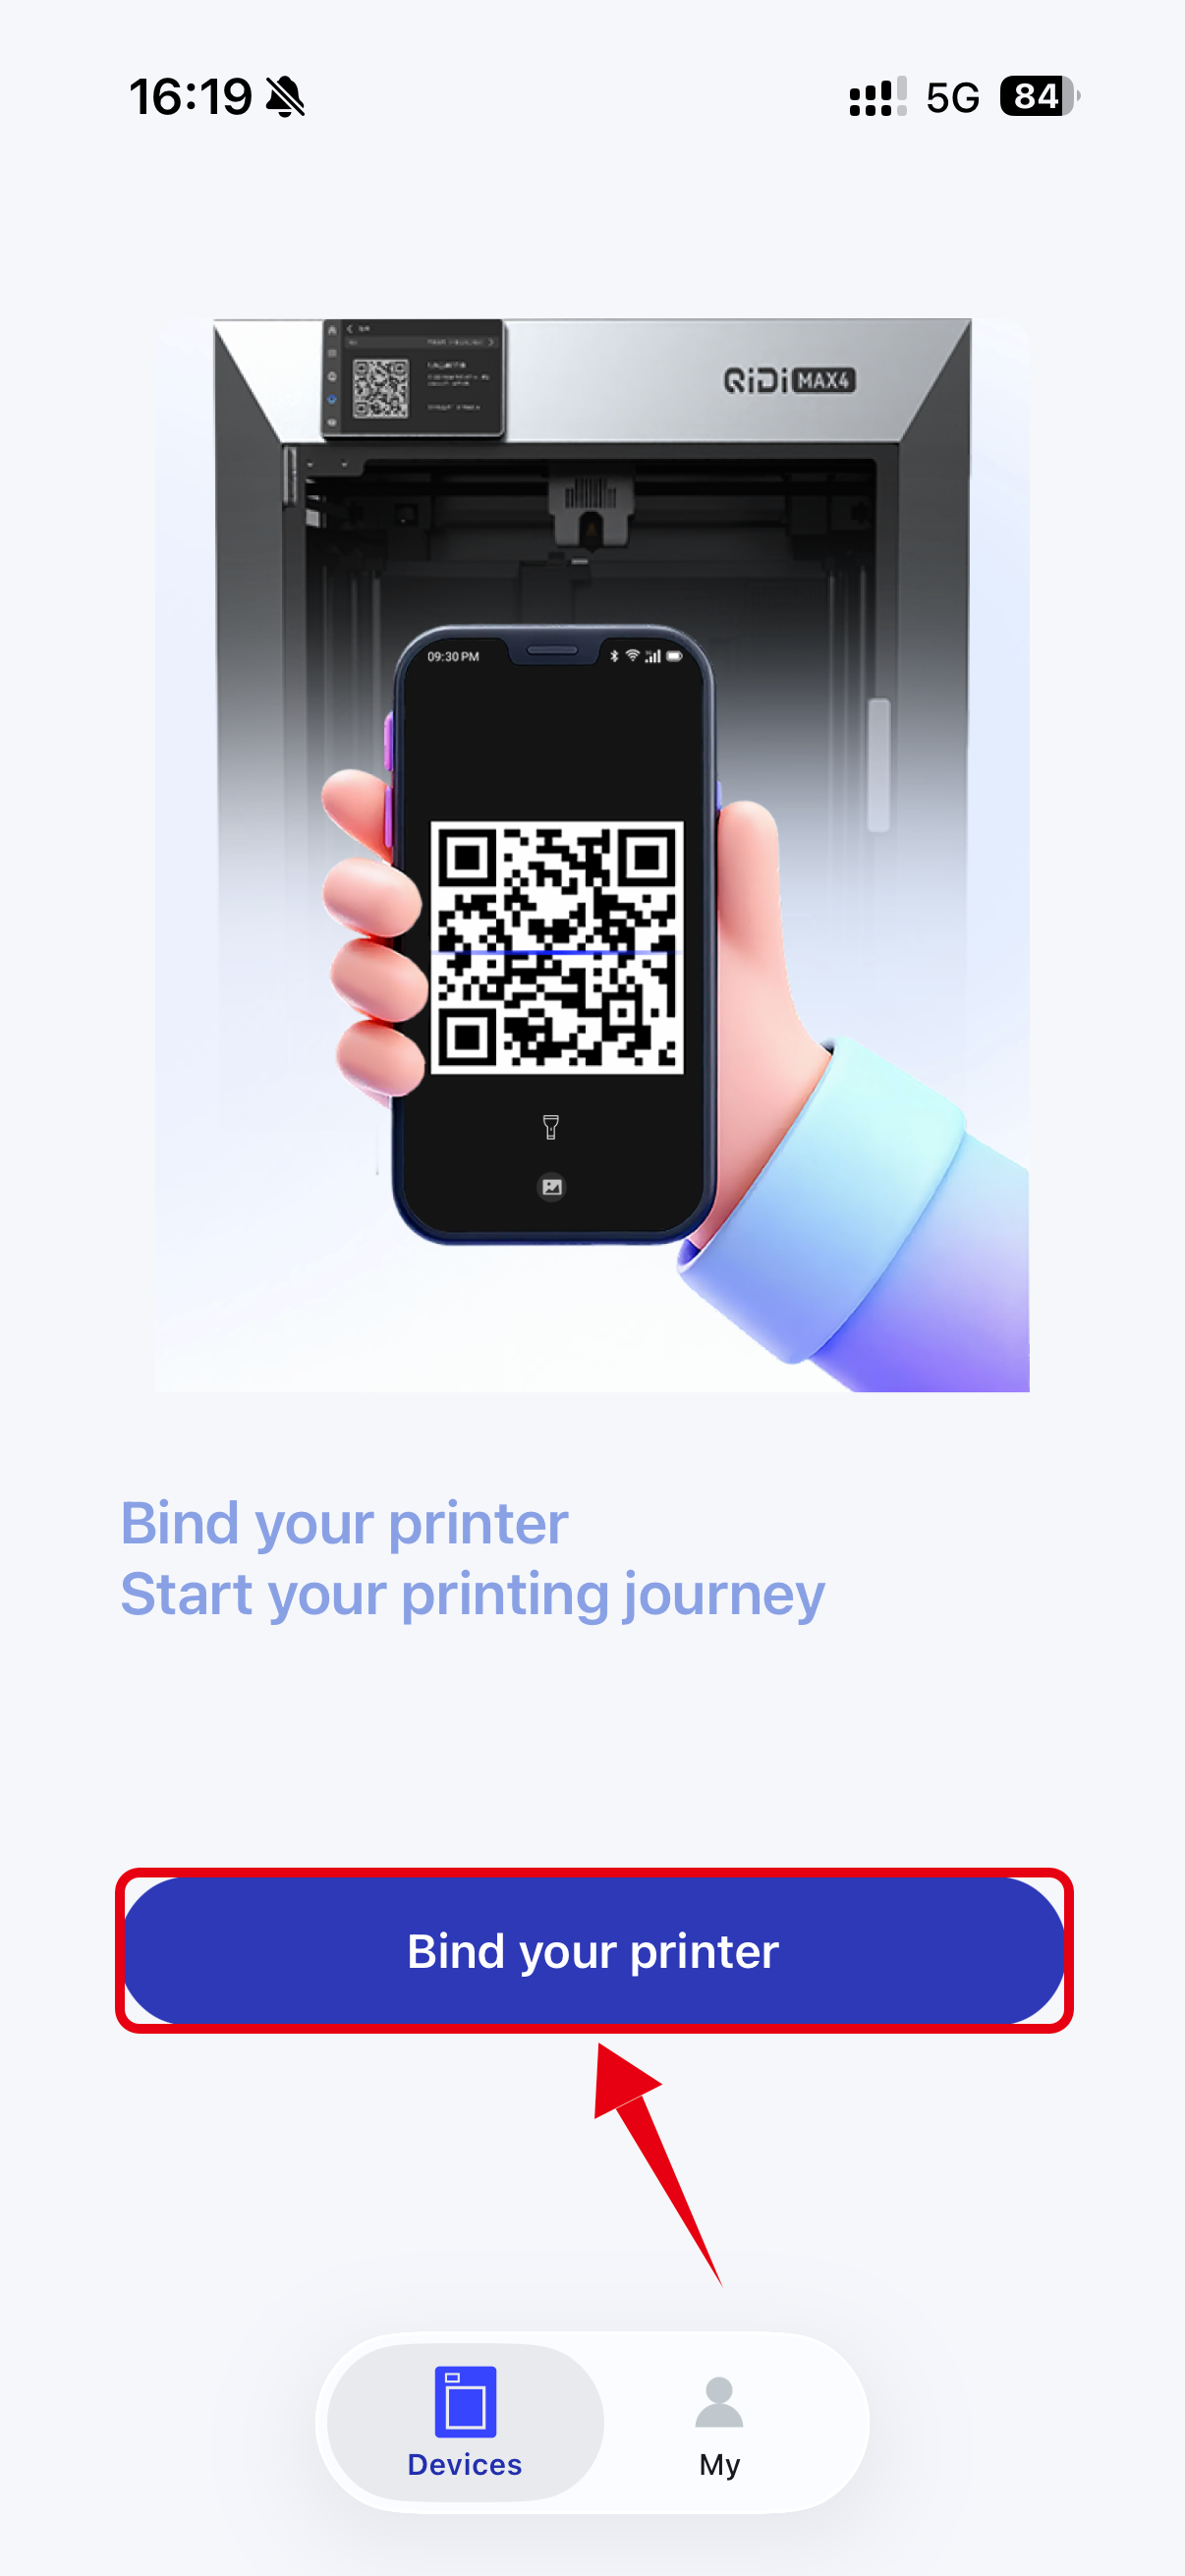
¶ Scan QR code
Find the login QR code on the printer screen and scan it.
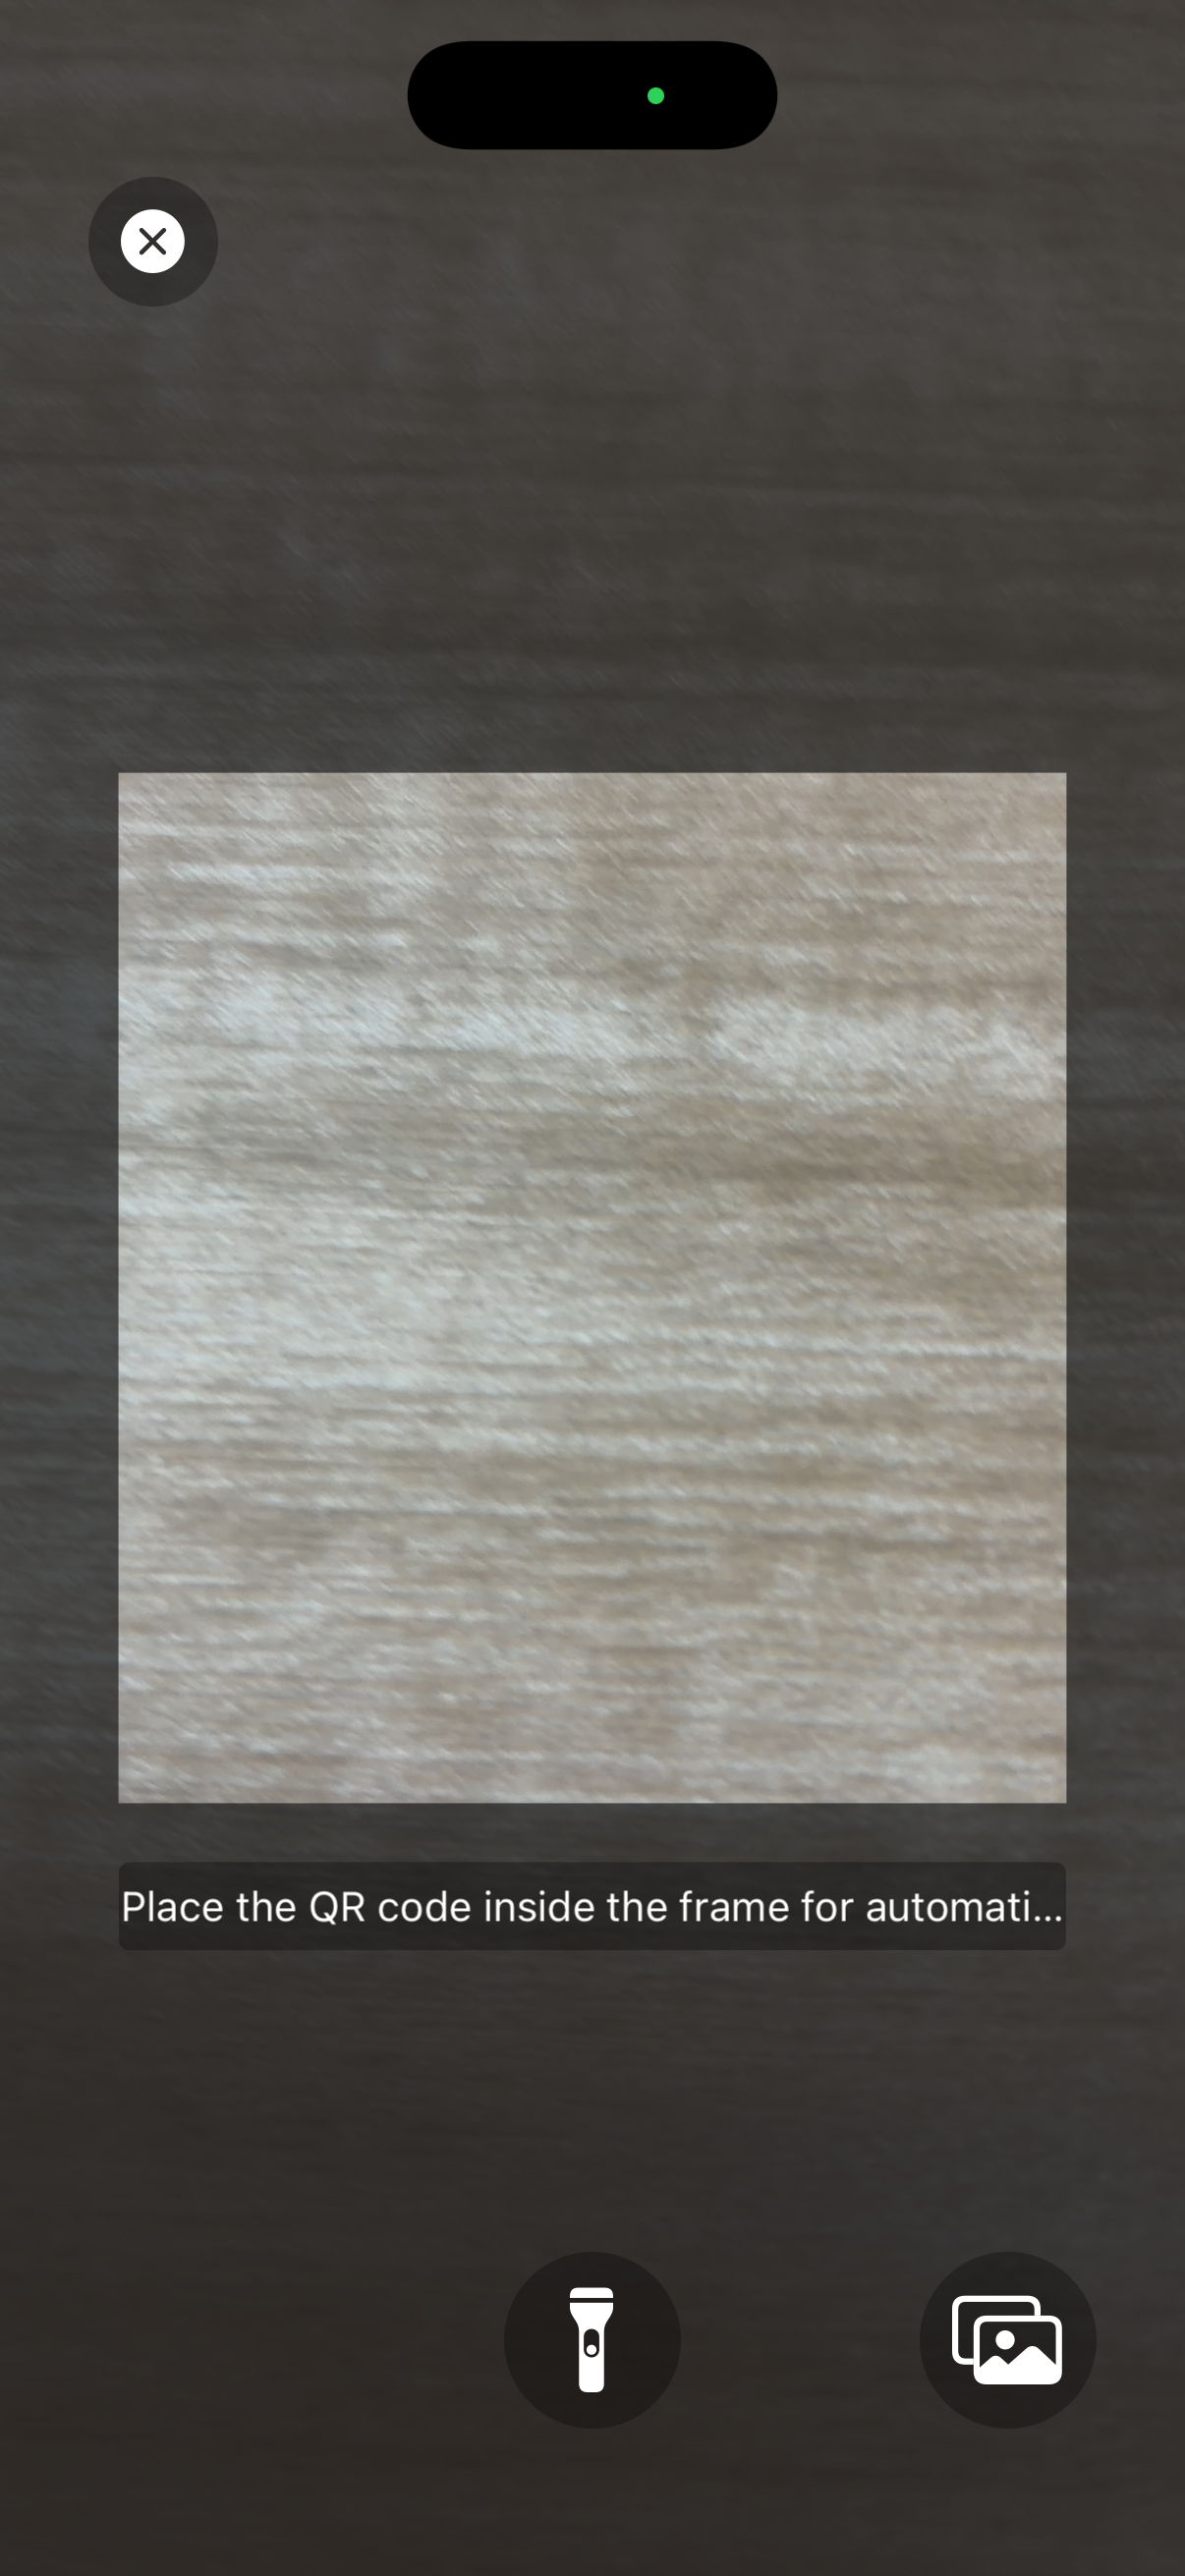
- Note: If the code scan fails, you can zoom in or out on the “Scan QR code” page, or clean the camera.
After completing the binding process, if this is your first time using the 3D printer, you may need to follow the app prompts to remove any limiting parts that were installed on the printer during transit. If you are already familiar with the printer and have used it before, you can skip this step by clicking Confirm.
¶ Page Introduction
¶ [Model]Interface function introduction
You can browse the models on this page and select the one you like for printing.
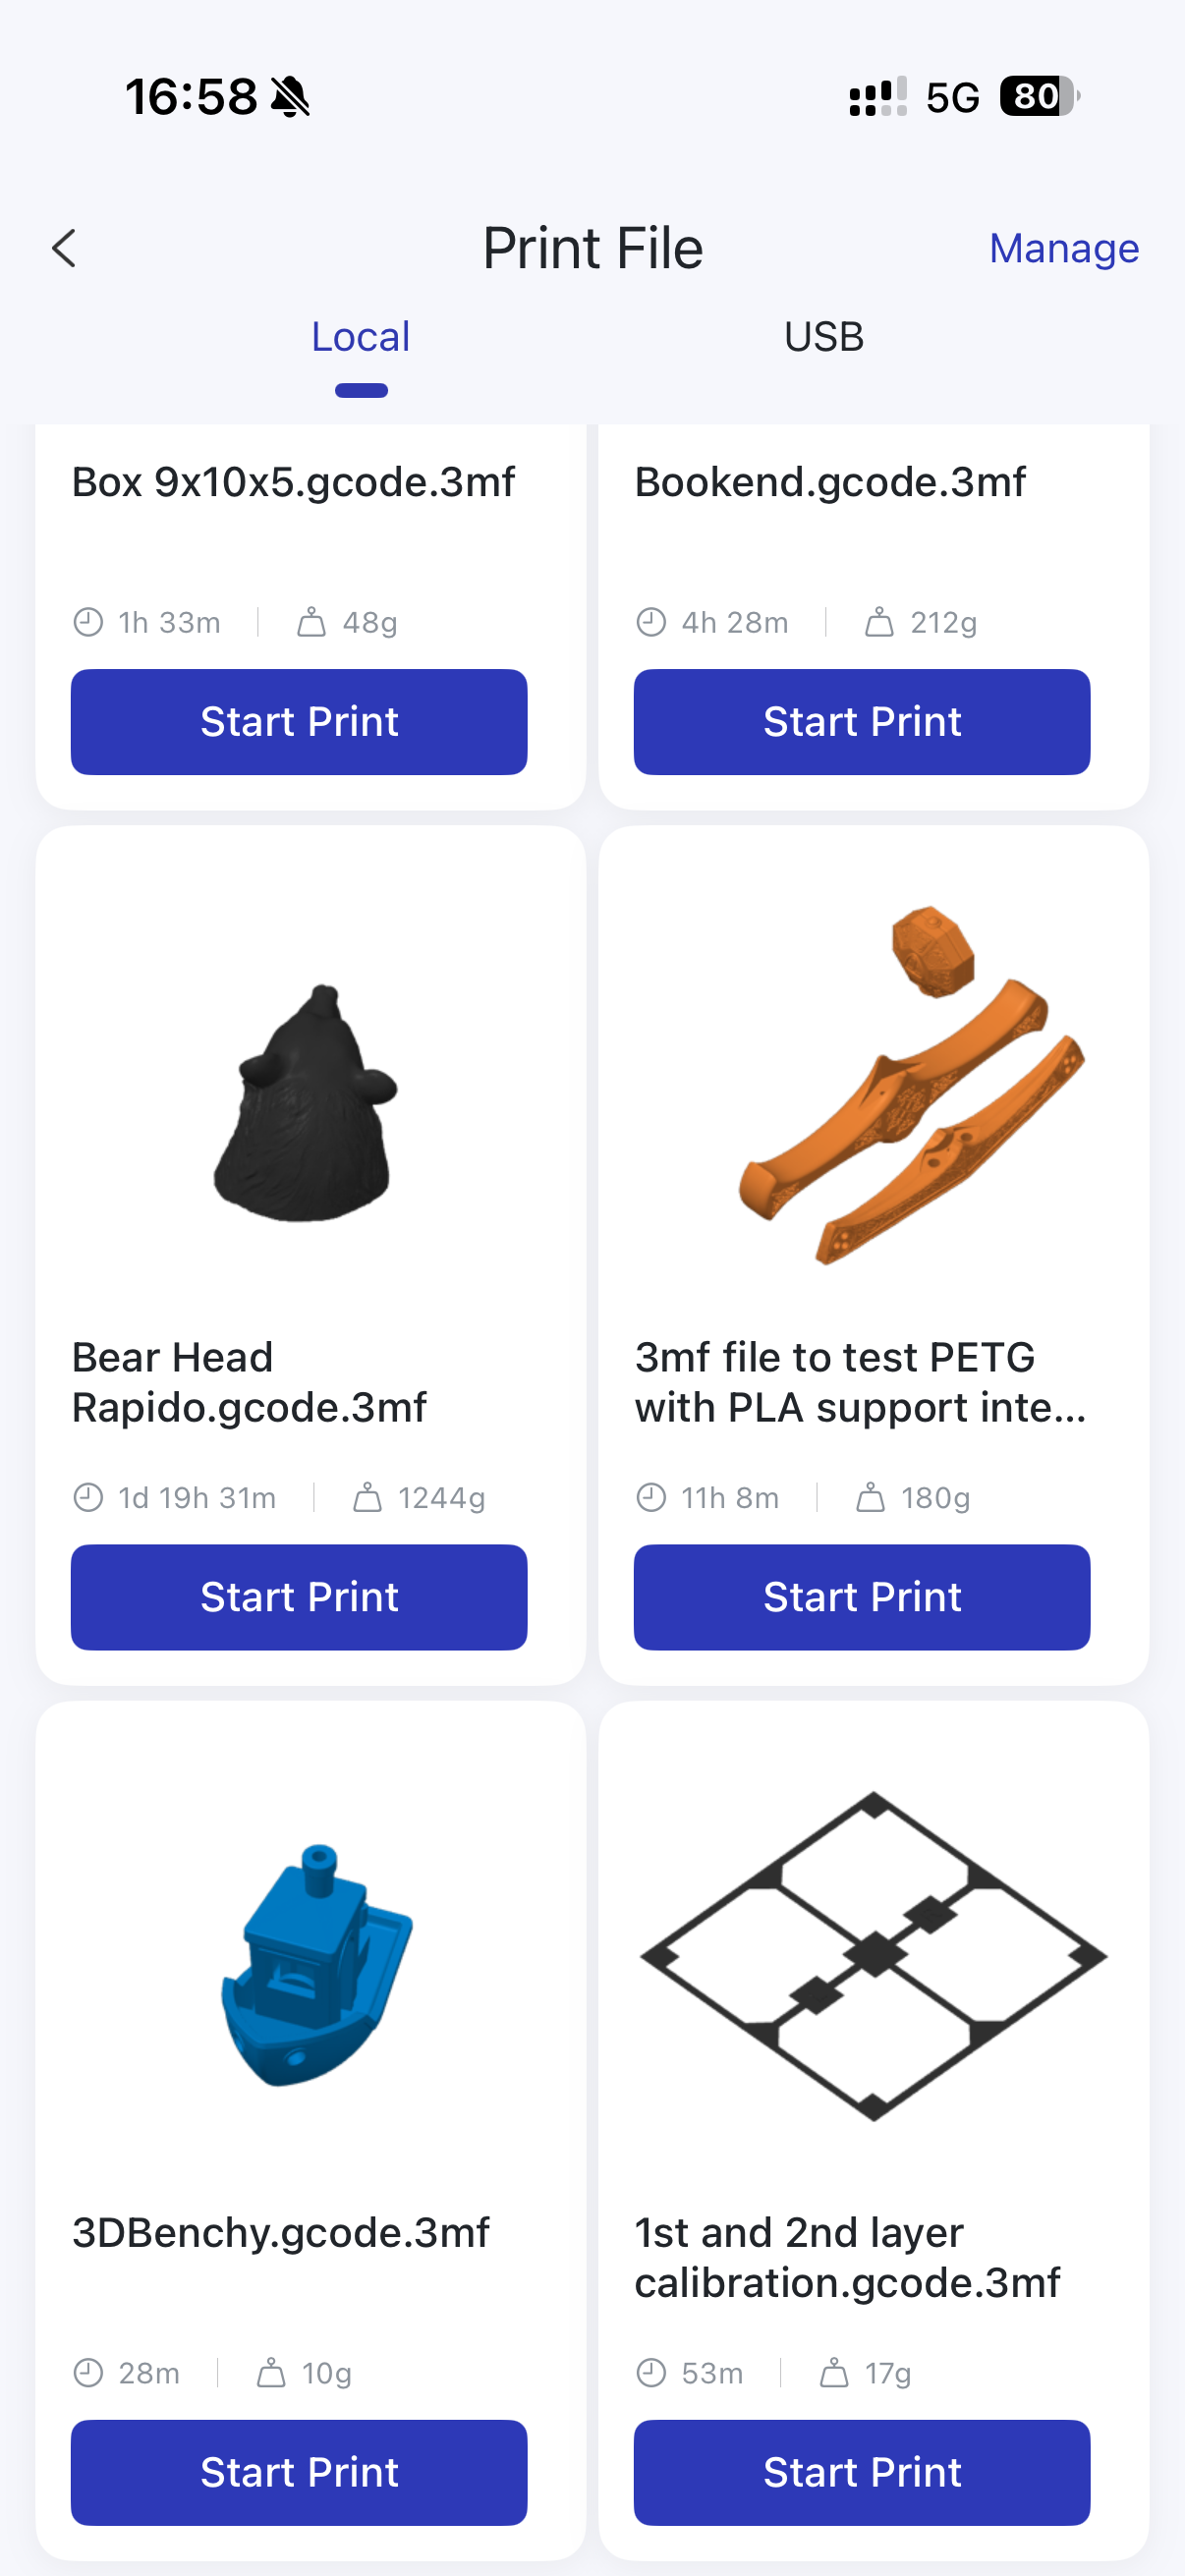
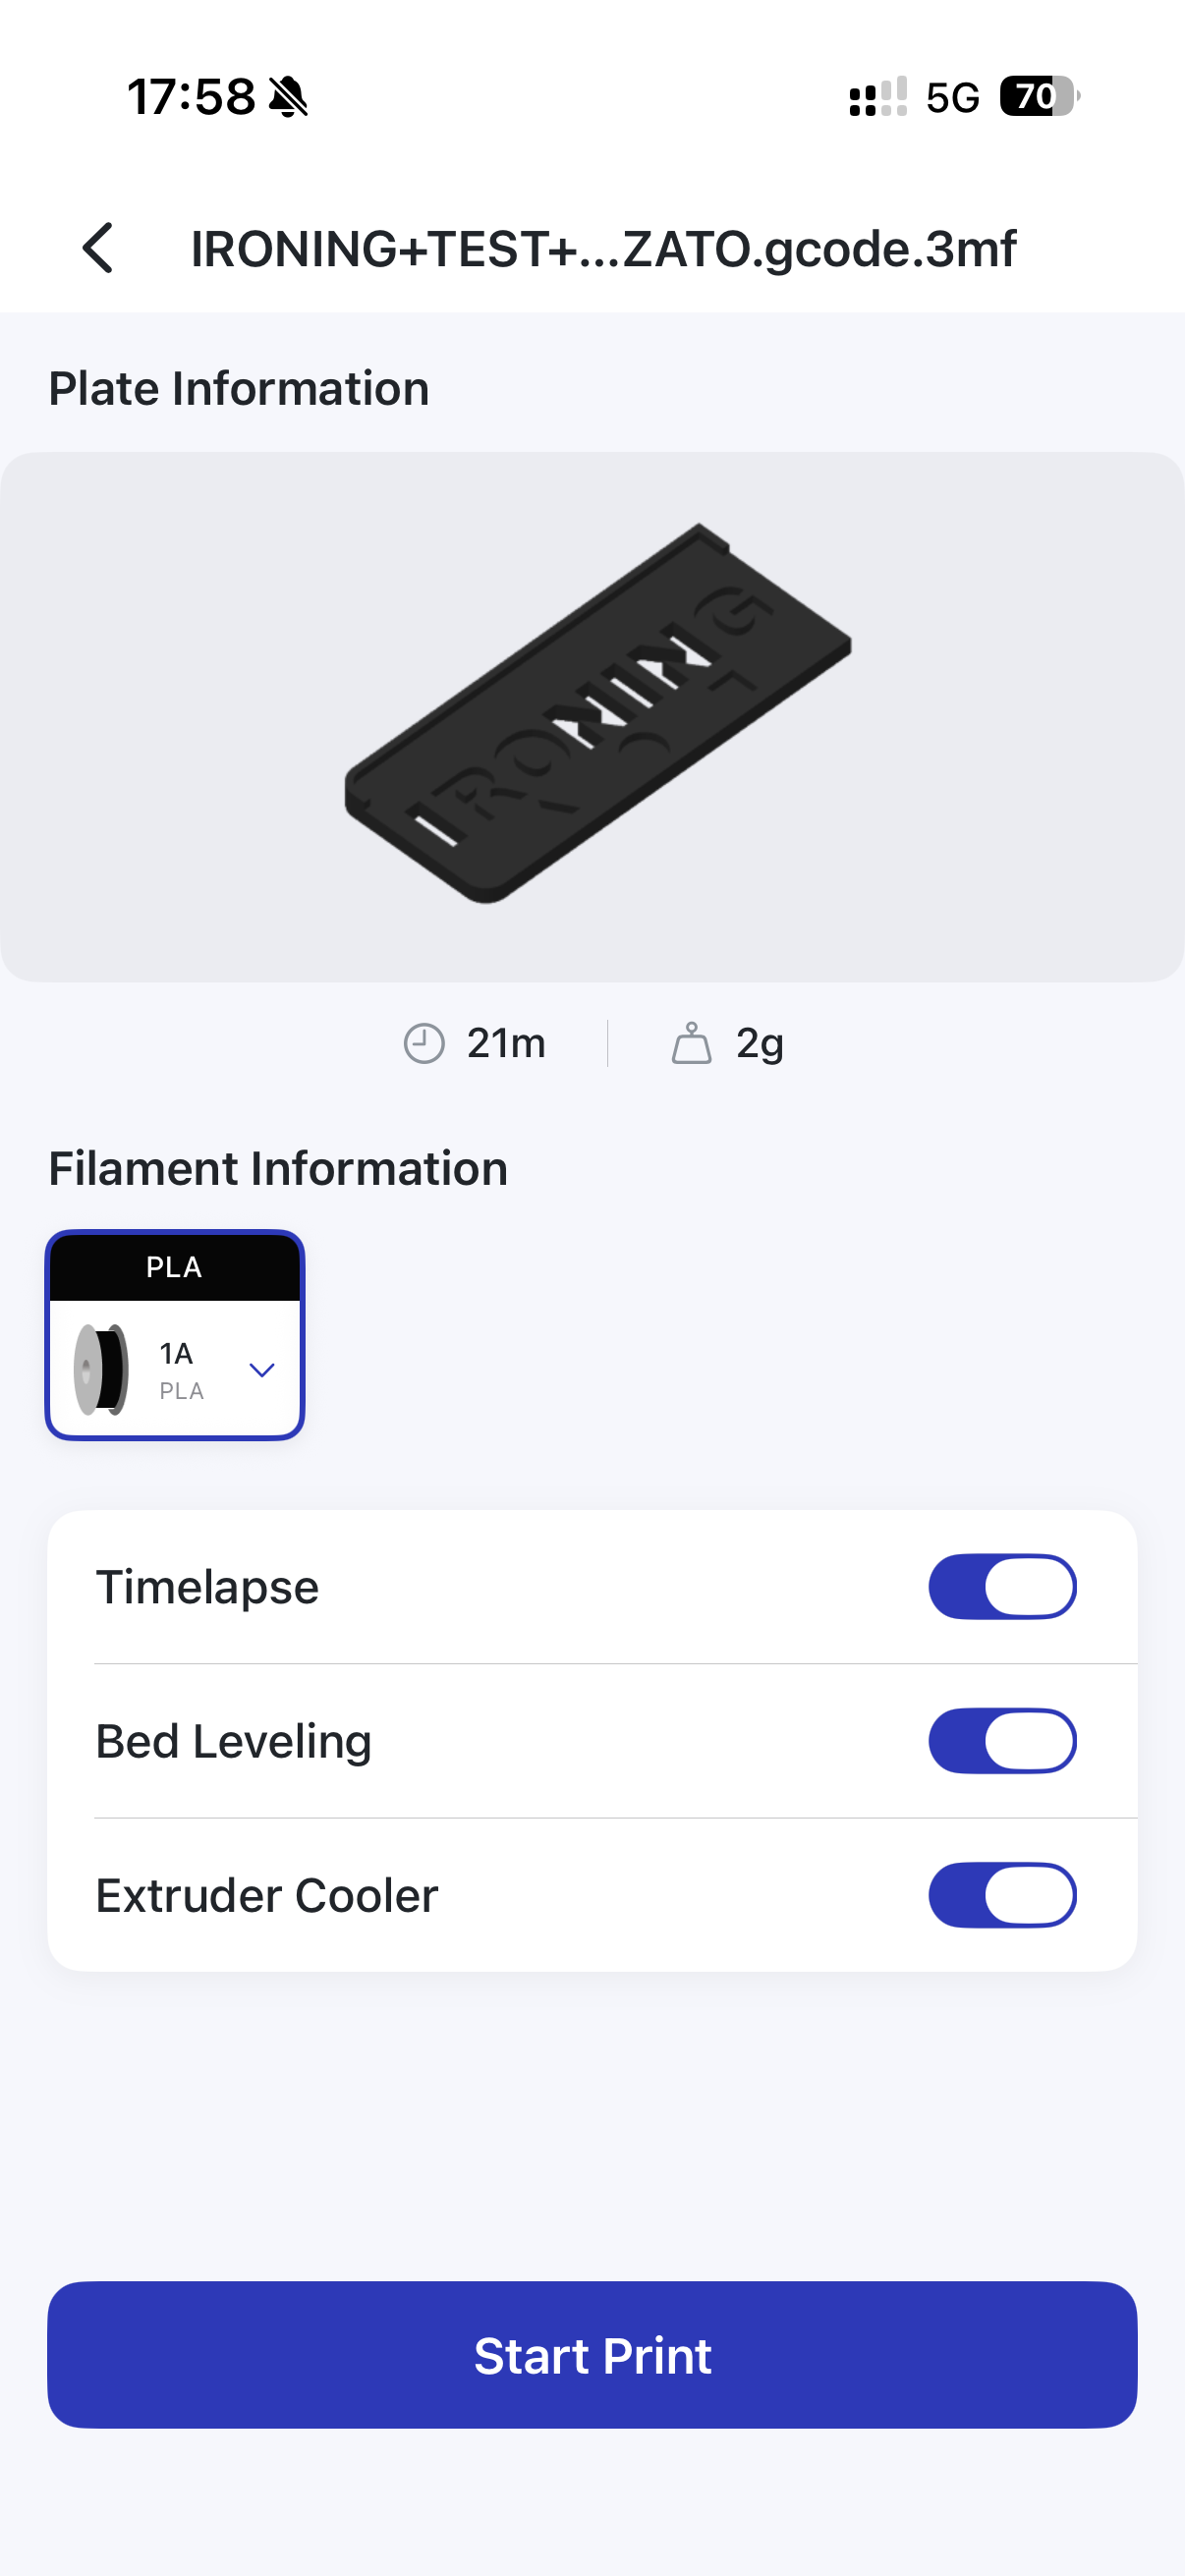
¶ How to start printing from the model page
1.After selecting your preferred model, click "Start Printing" below
2.Select print configuration
3.After confirming that the information is correct, click at the bottom to start printing
4.Start slicing and automatically enter the device page
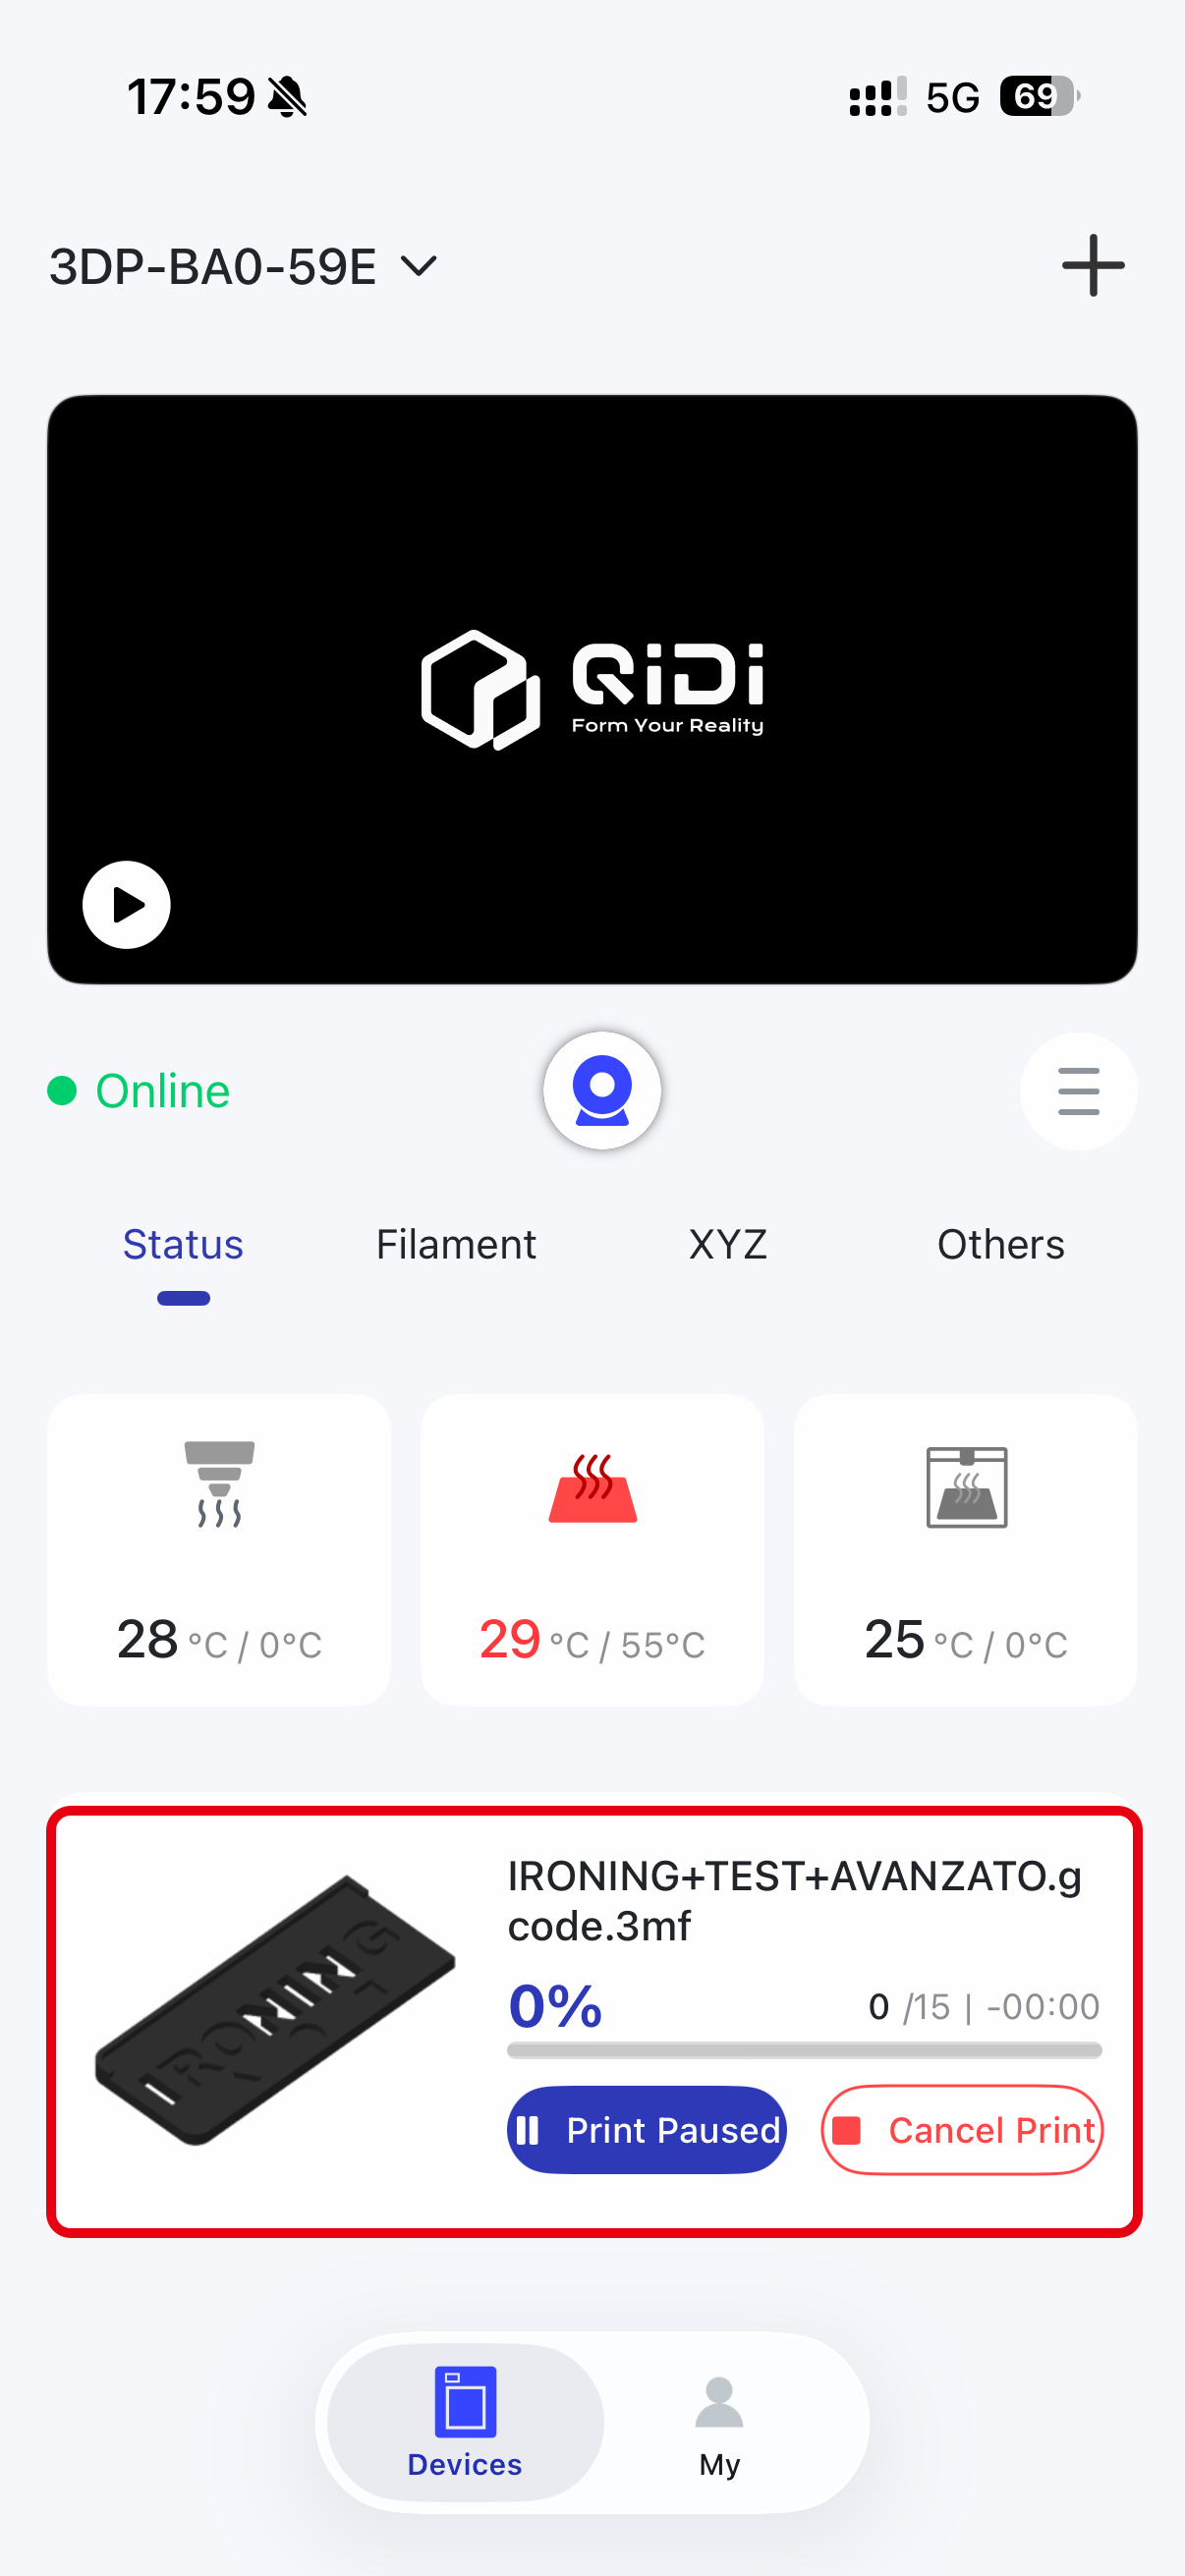
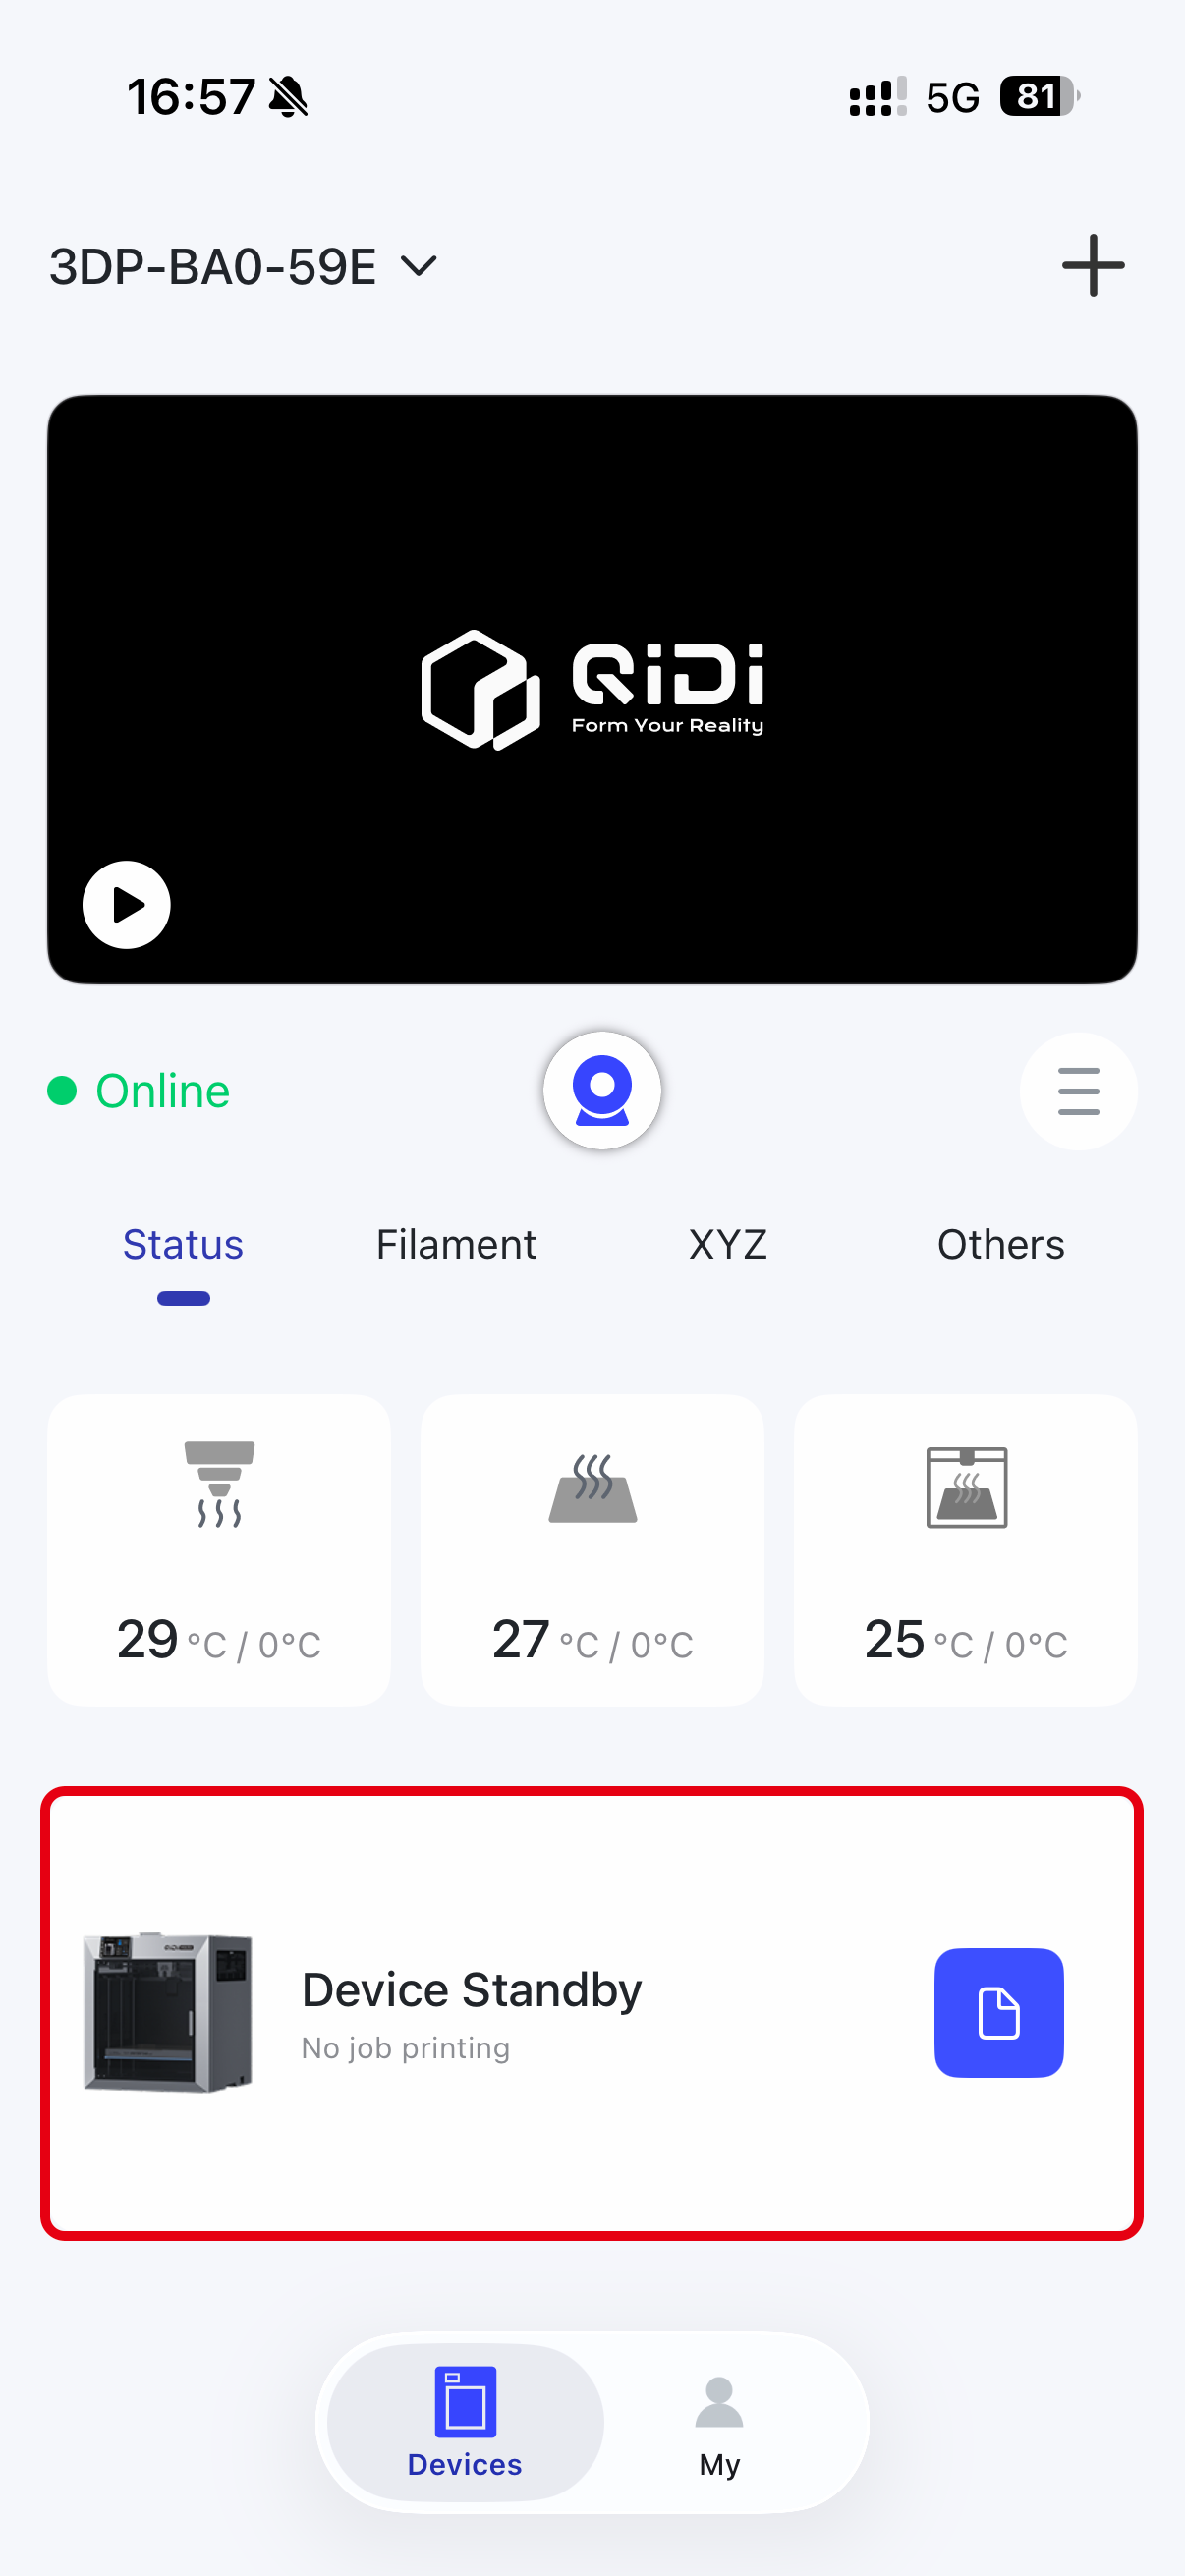
¶ [Device] Interface Functions
After completing the printer binding, the application will automatically return to the device screen. The Device interface contains the top bar, printer monitoring image, item currently being printed (or the last previously printed item), and the printer controls.
¶ Top Bar
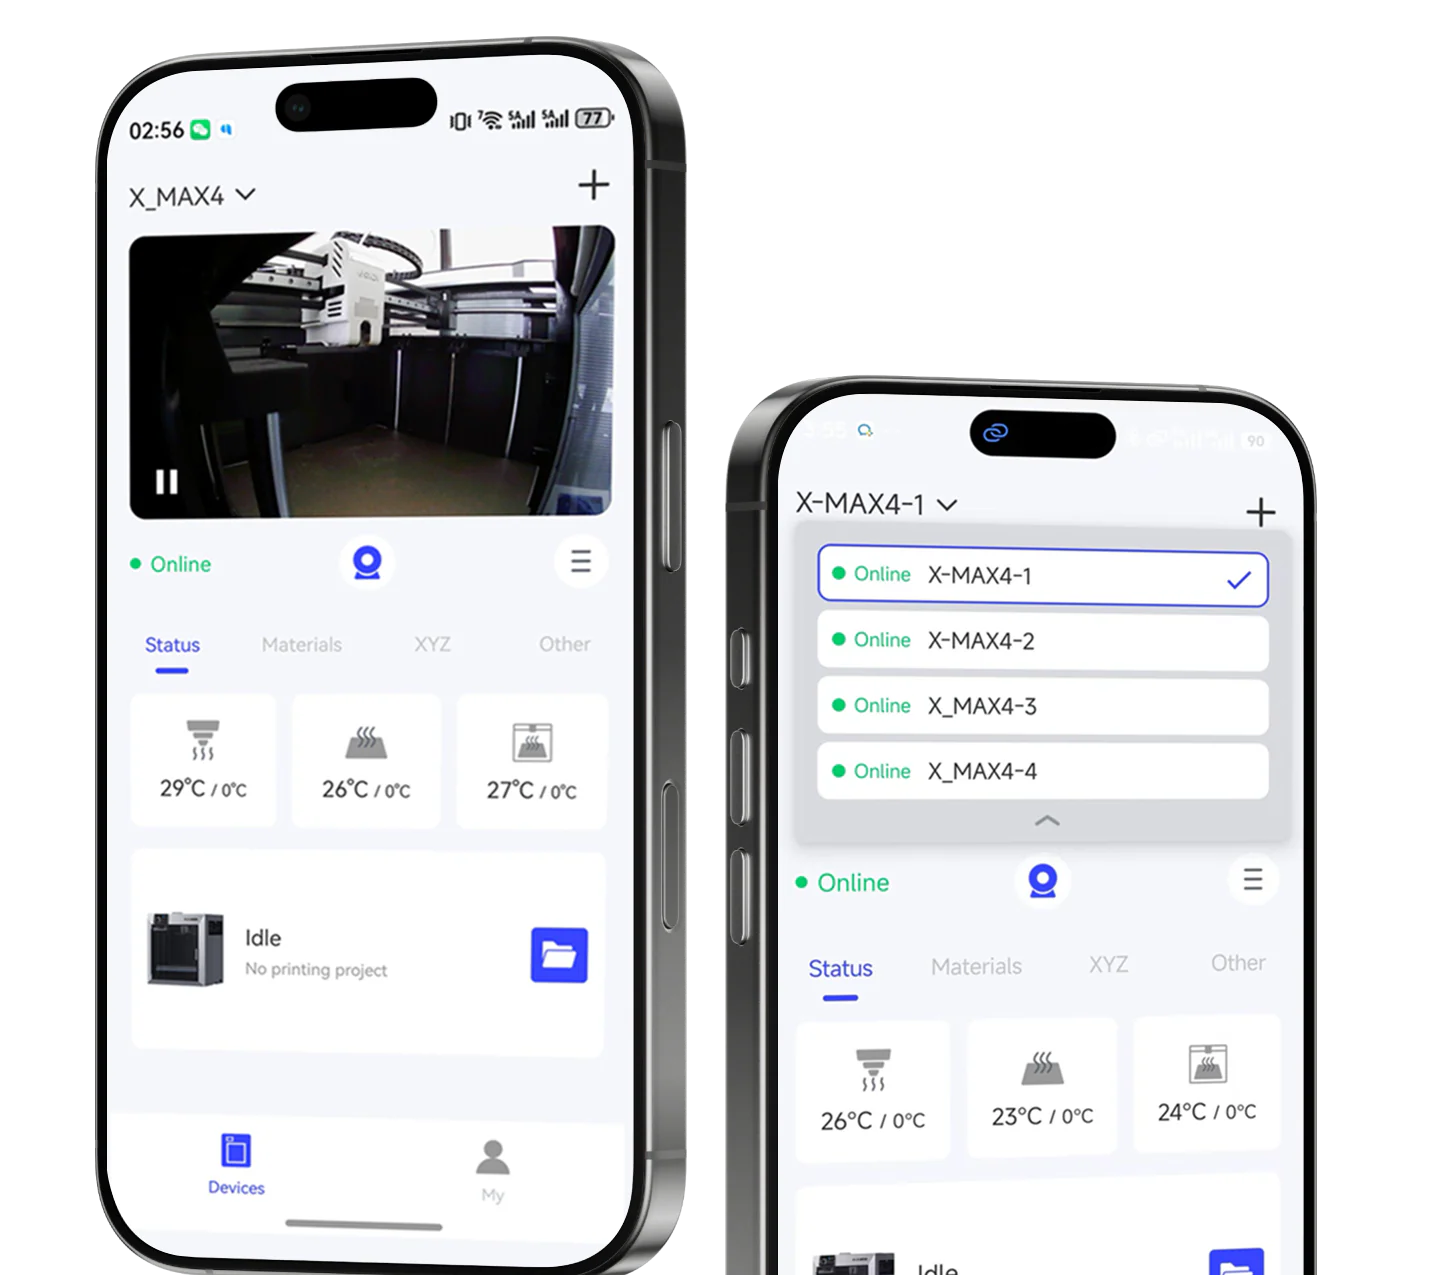
At the top of the interface is the name of the current device, and you can click to switch between different binded devices.


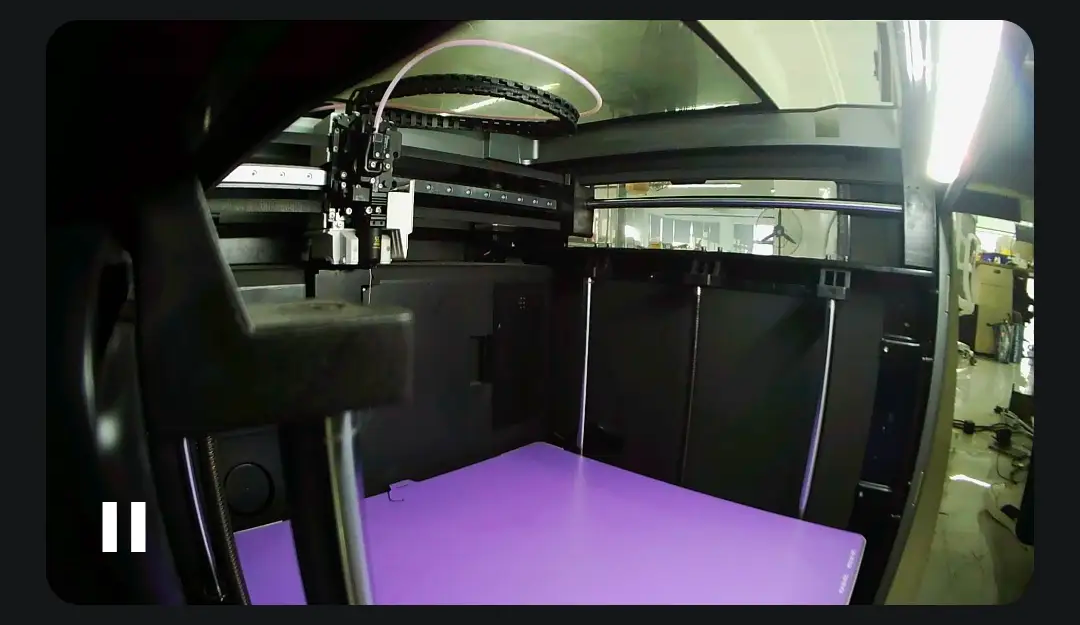
¶ Printer Monitoring Image
You can view the current returned image at any time by clicking the play button in the monitor image returned by the printer. Click the Camera button at the bottom right corner of the screen to take a picture, and the captured picture will be saved to the cell phone album. You can also click the Full Screen button at the bottom right corner to enter full screen mode to view the returned image. In full-screen mode, users can adjust the screen size by two-finger zoom, so that it is easy to observe the printing details.
¶ Print Project
The Print Items module displays only the last item printed by the binded device if no item is currently printing. If the device is printing, the module displays the currently printing item and the print control options. If printing was initiated through the printer, the module only displays the Pause and Stop options
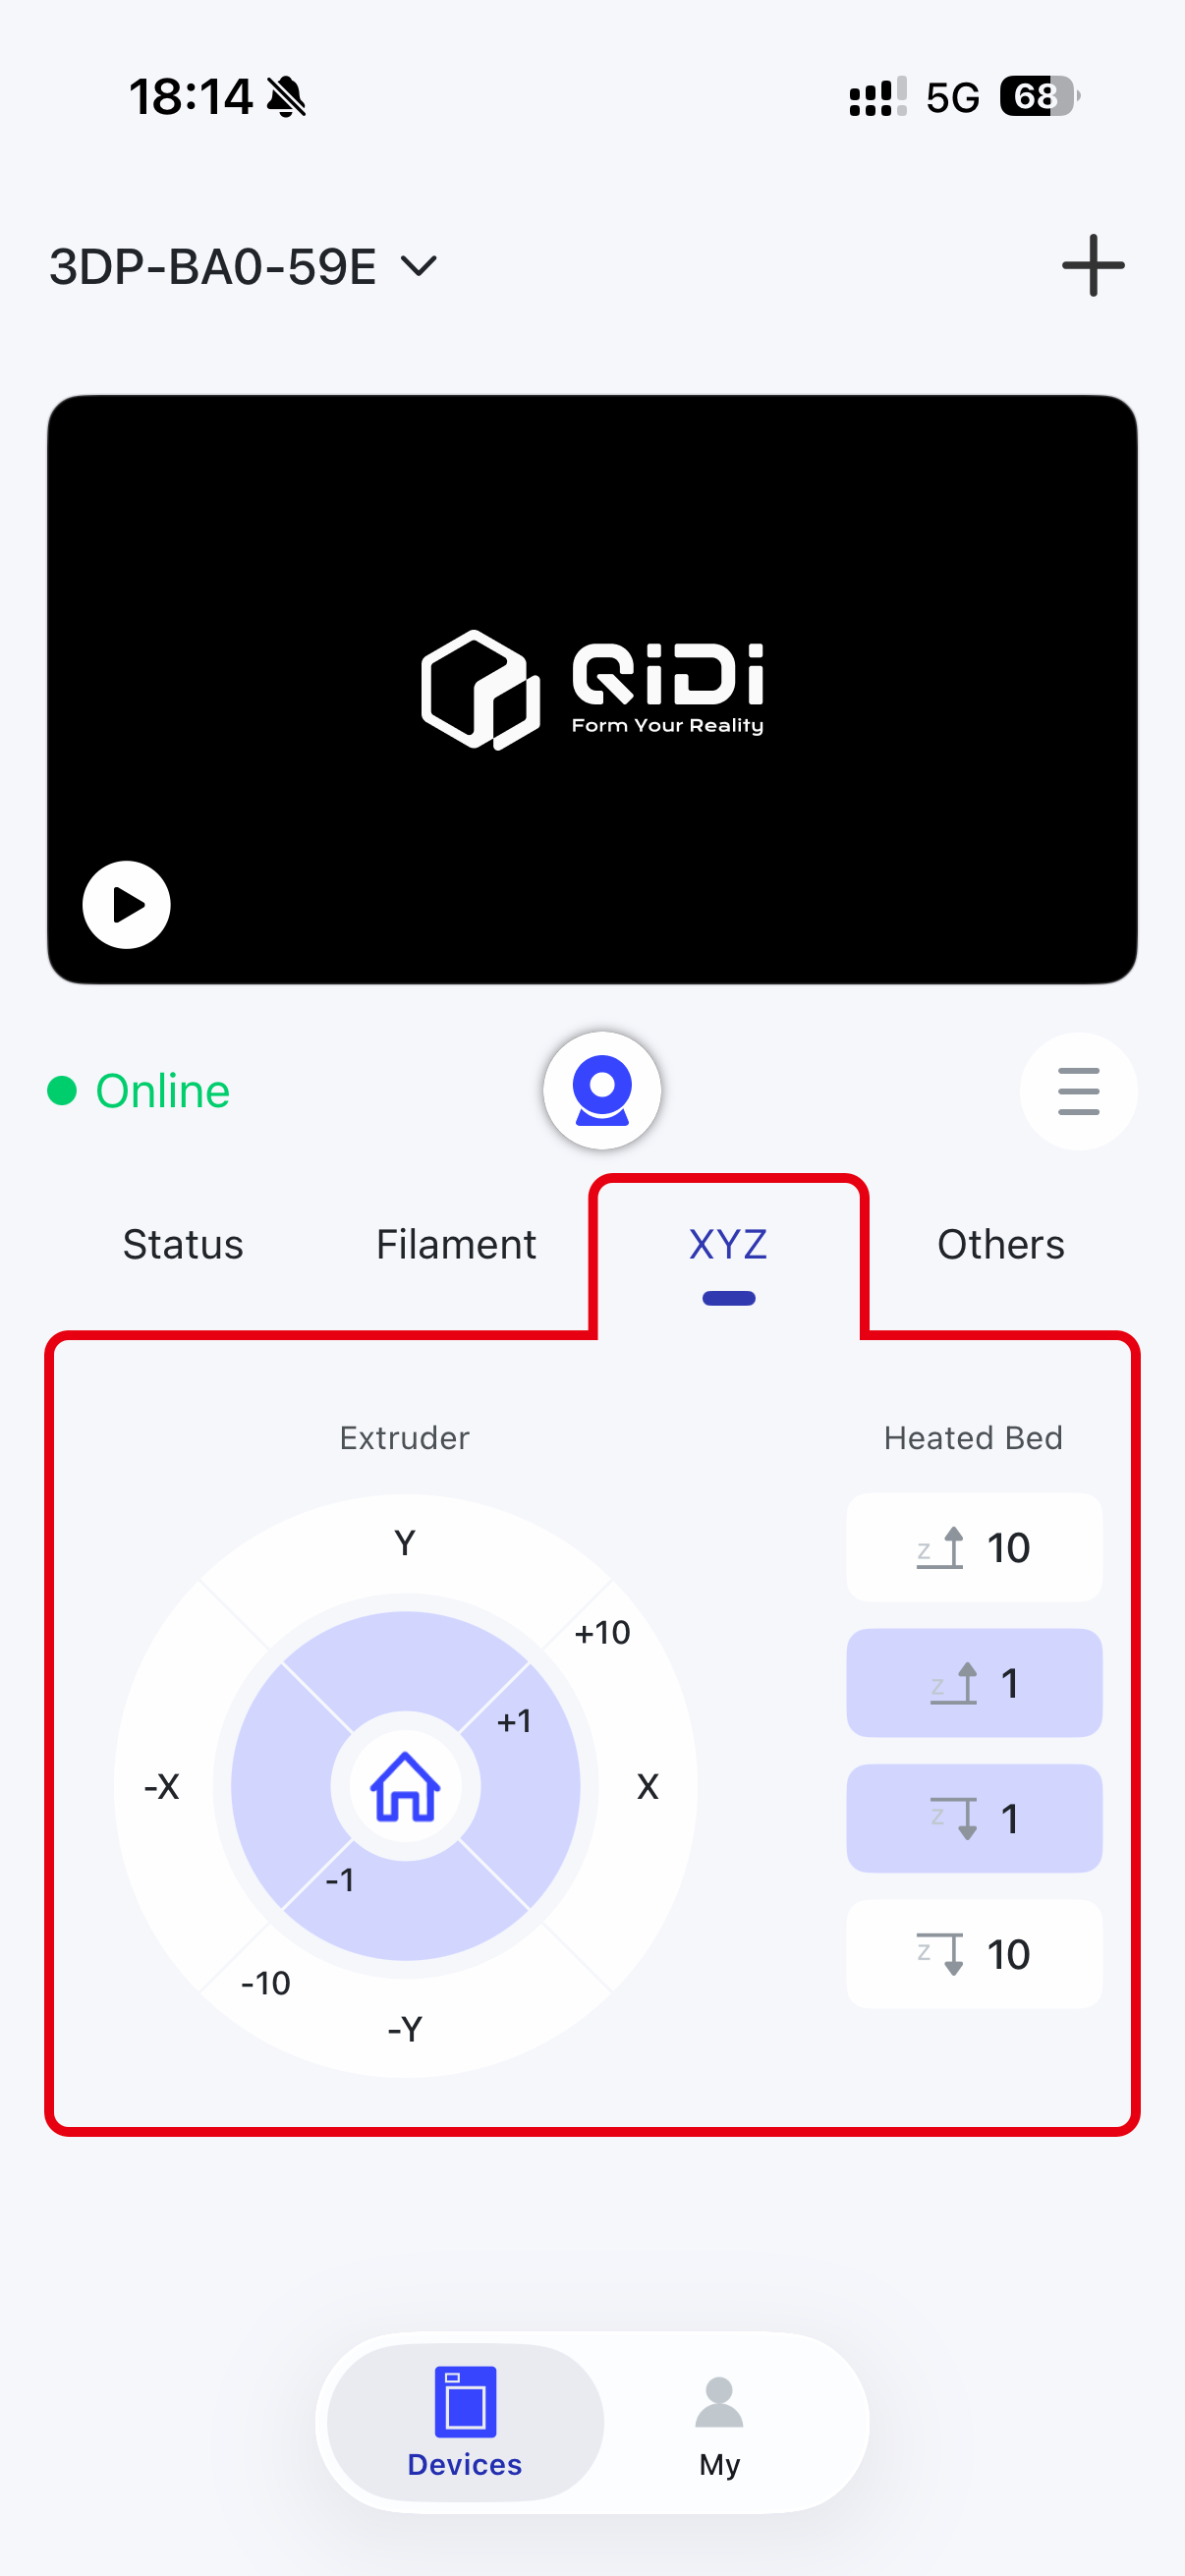
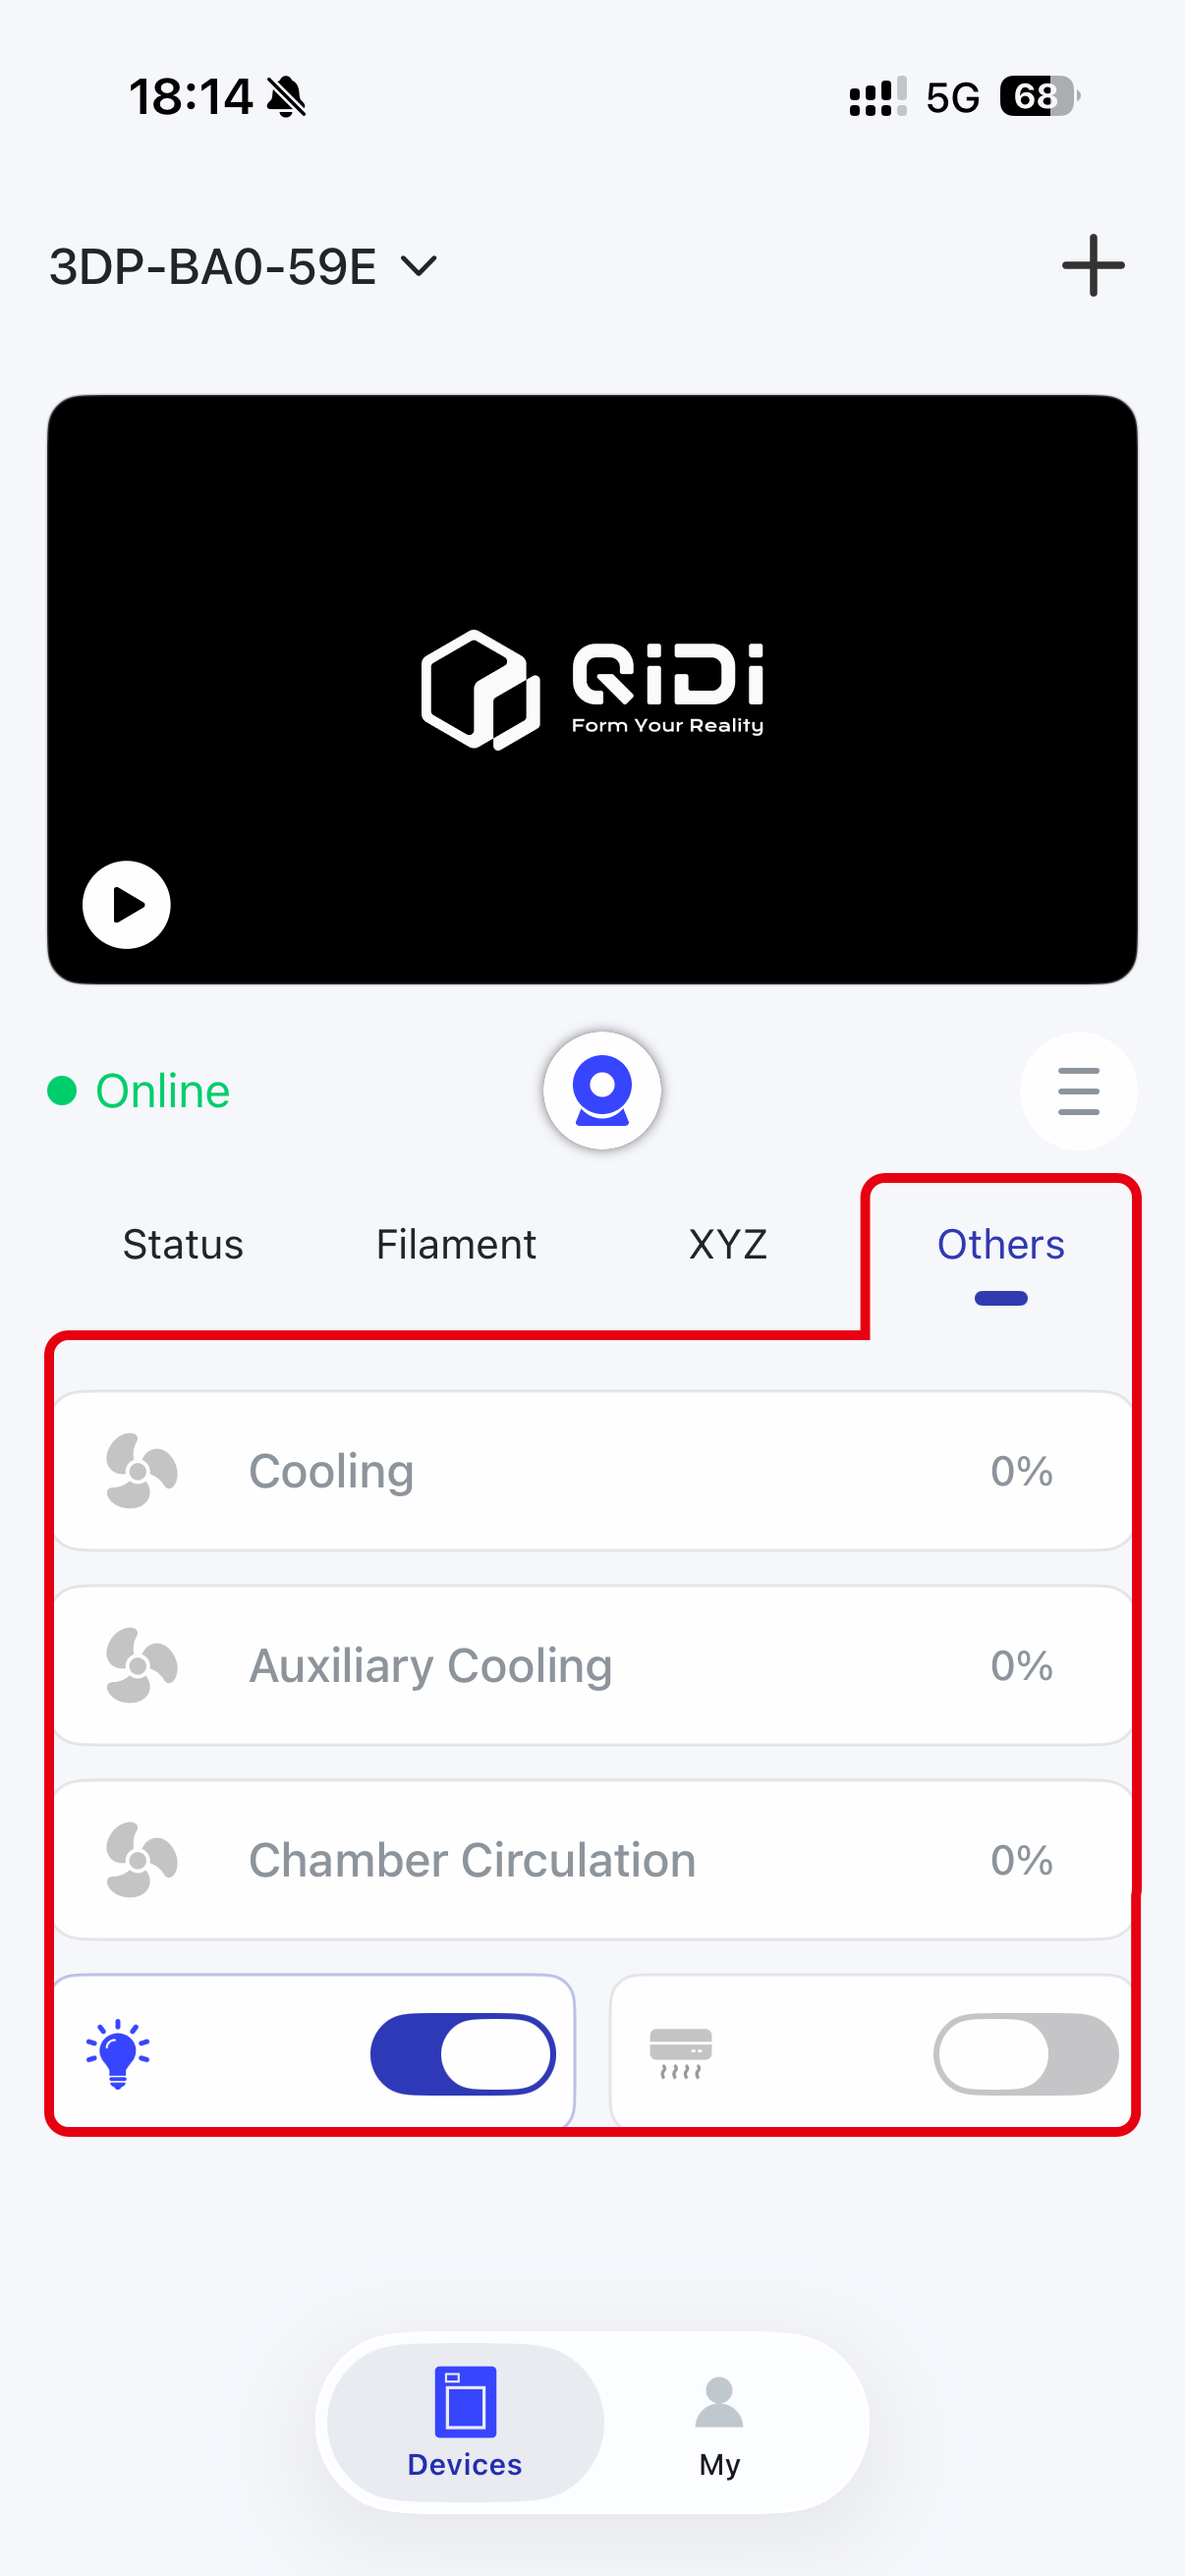
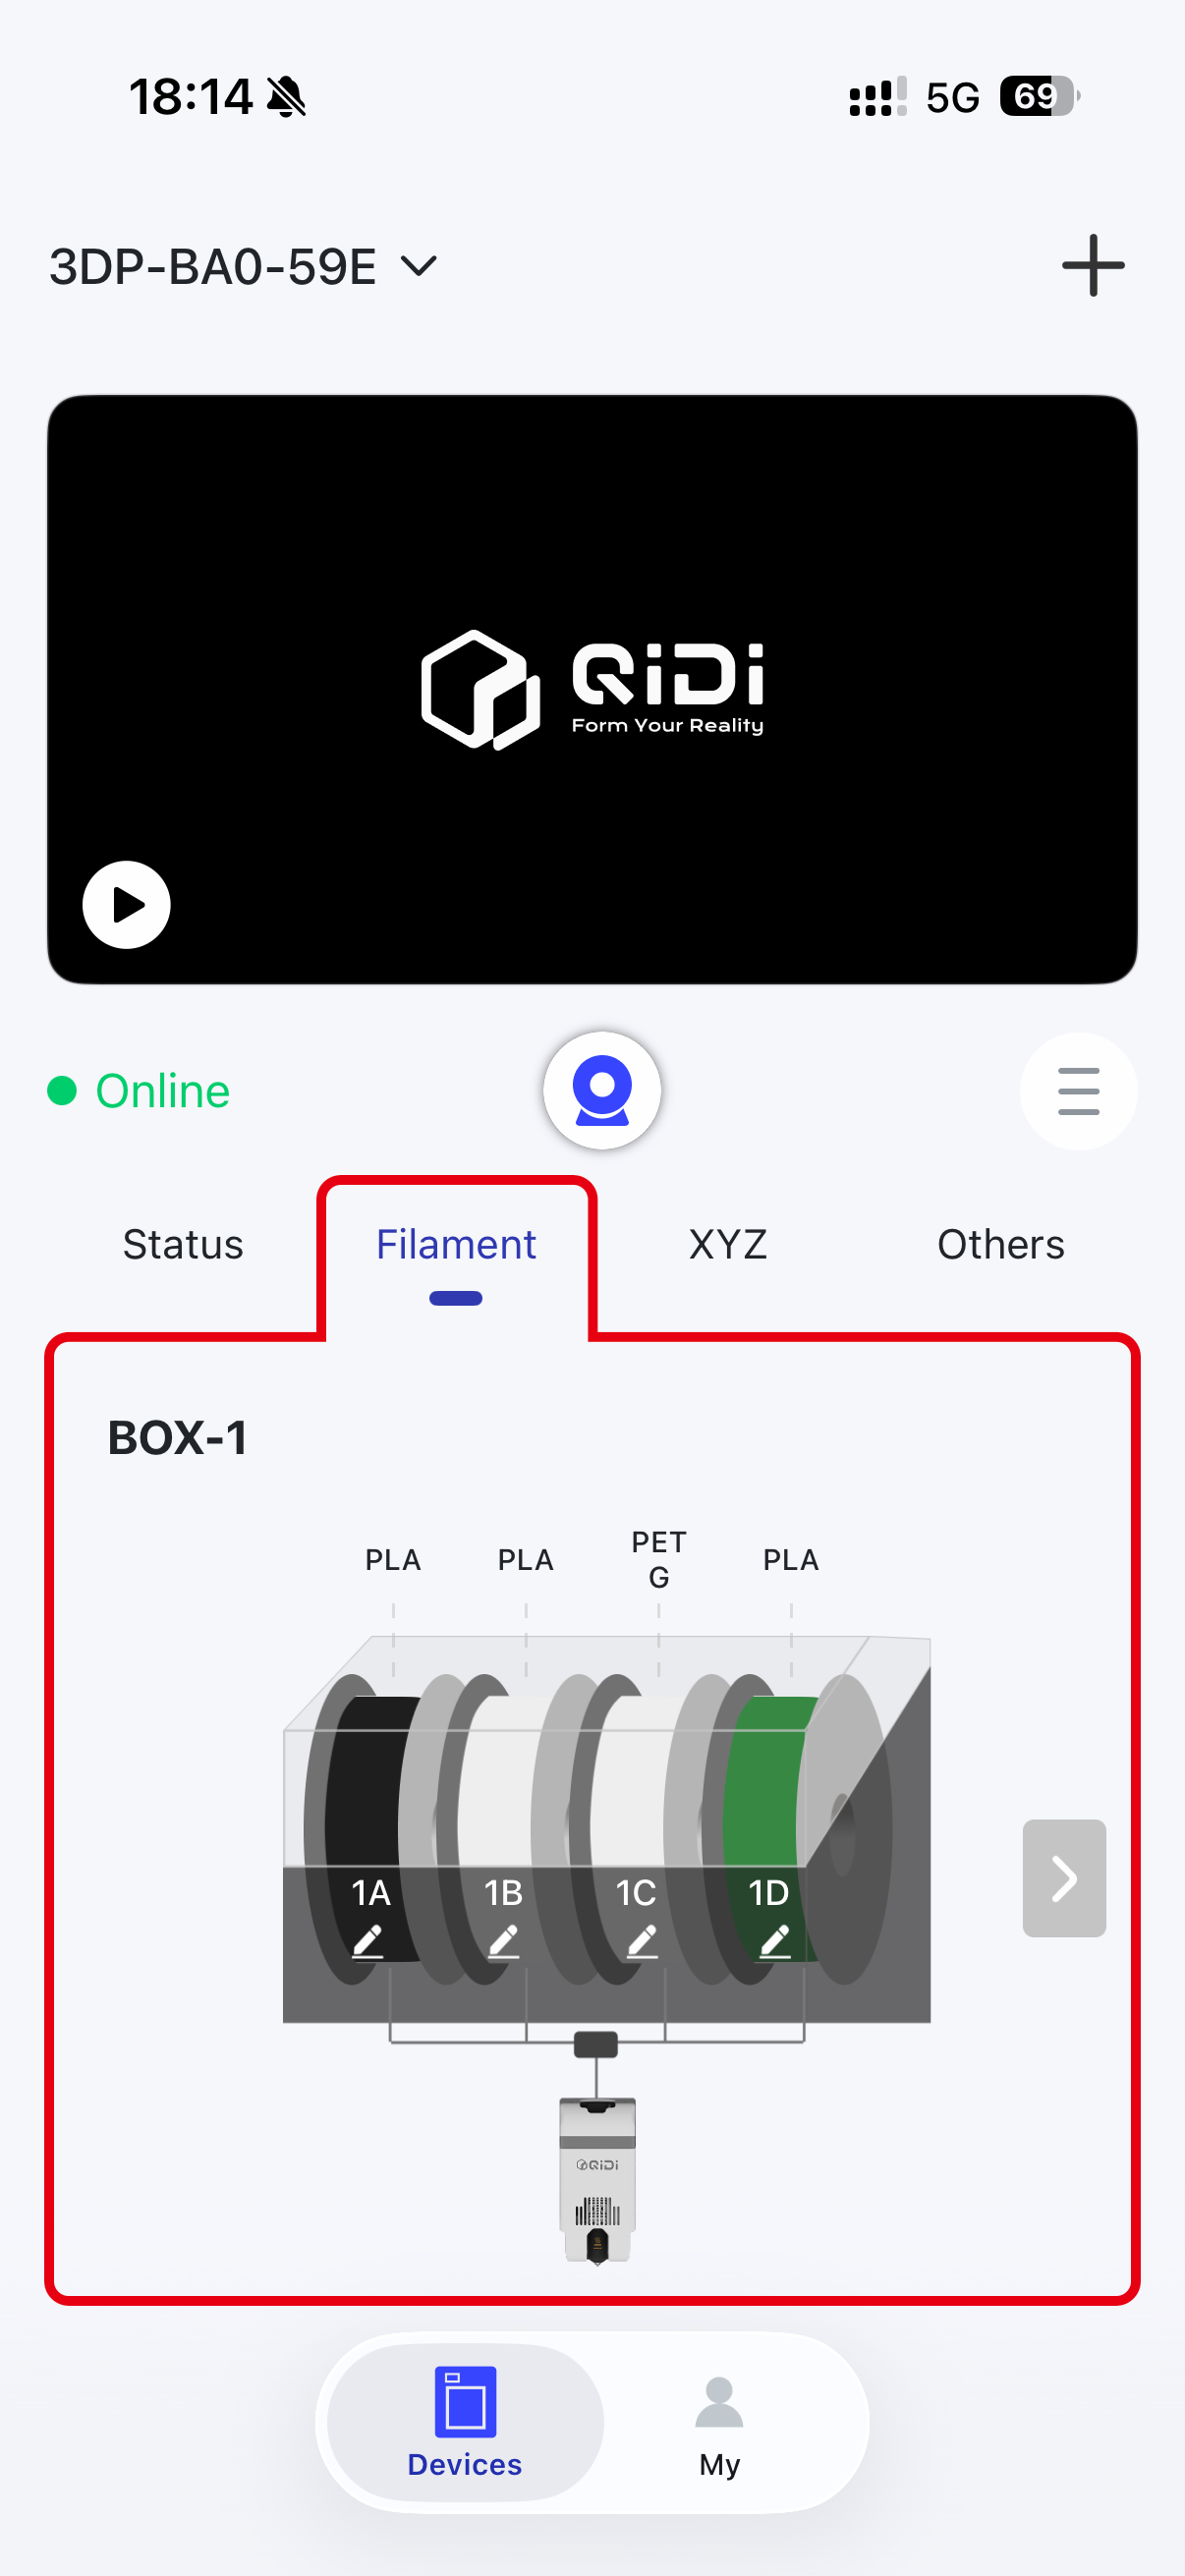
¶ Printer Control
Printer Control contains control options for both the printer and QIDI Box sections.
On the main screen, you can directly control the nozzle temperature, heat bed temperature and speed
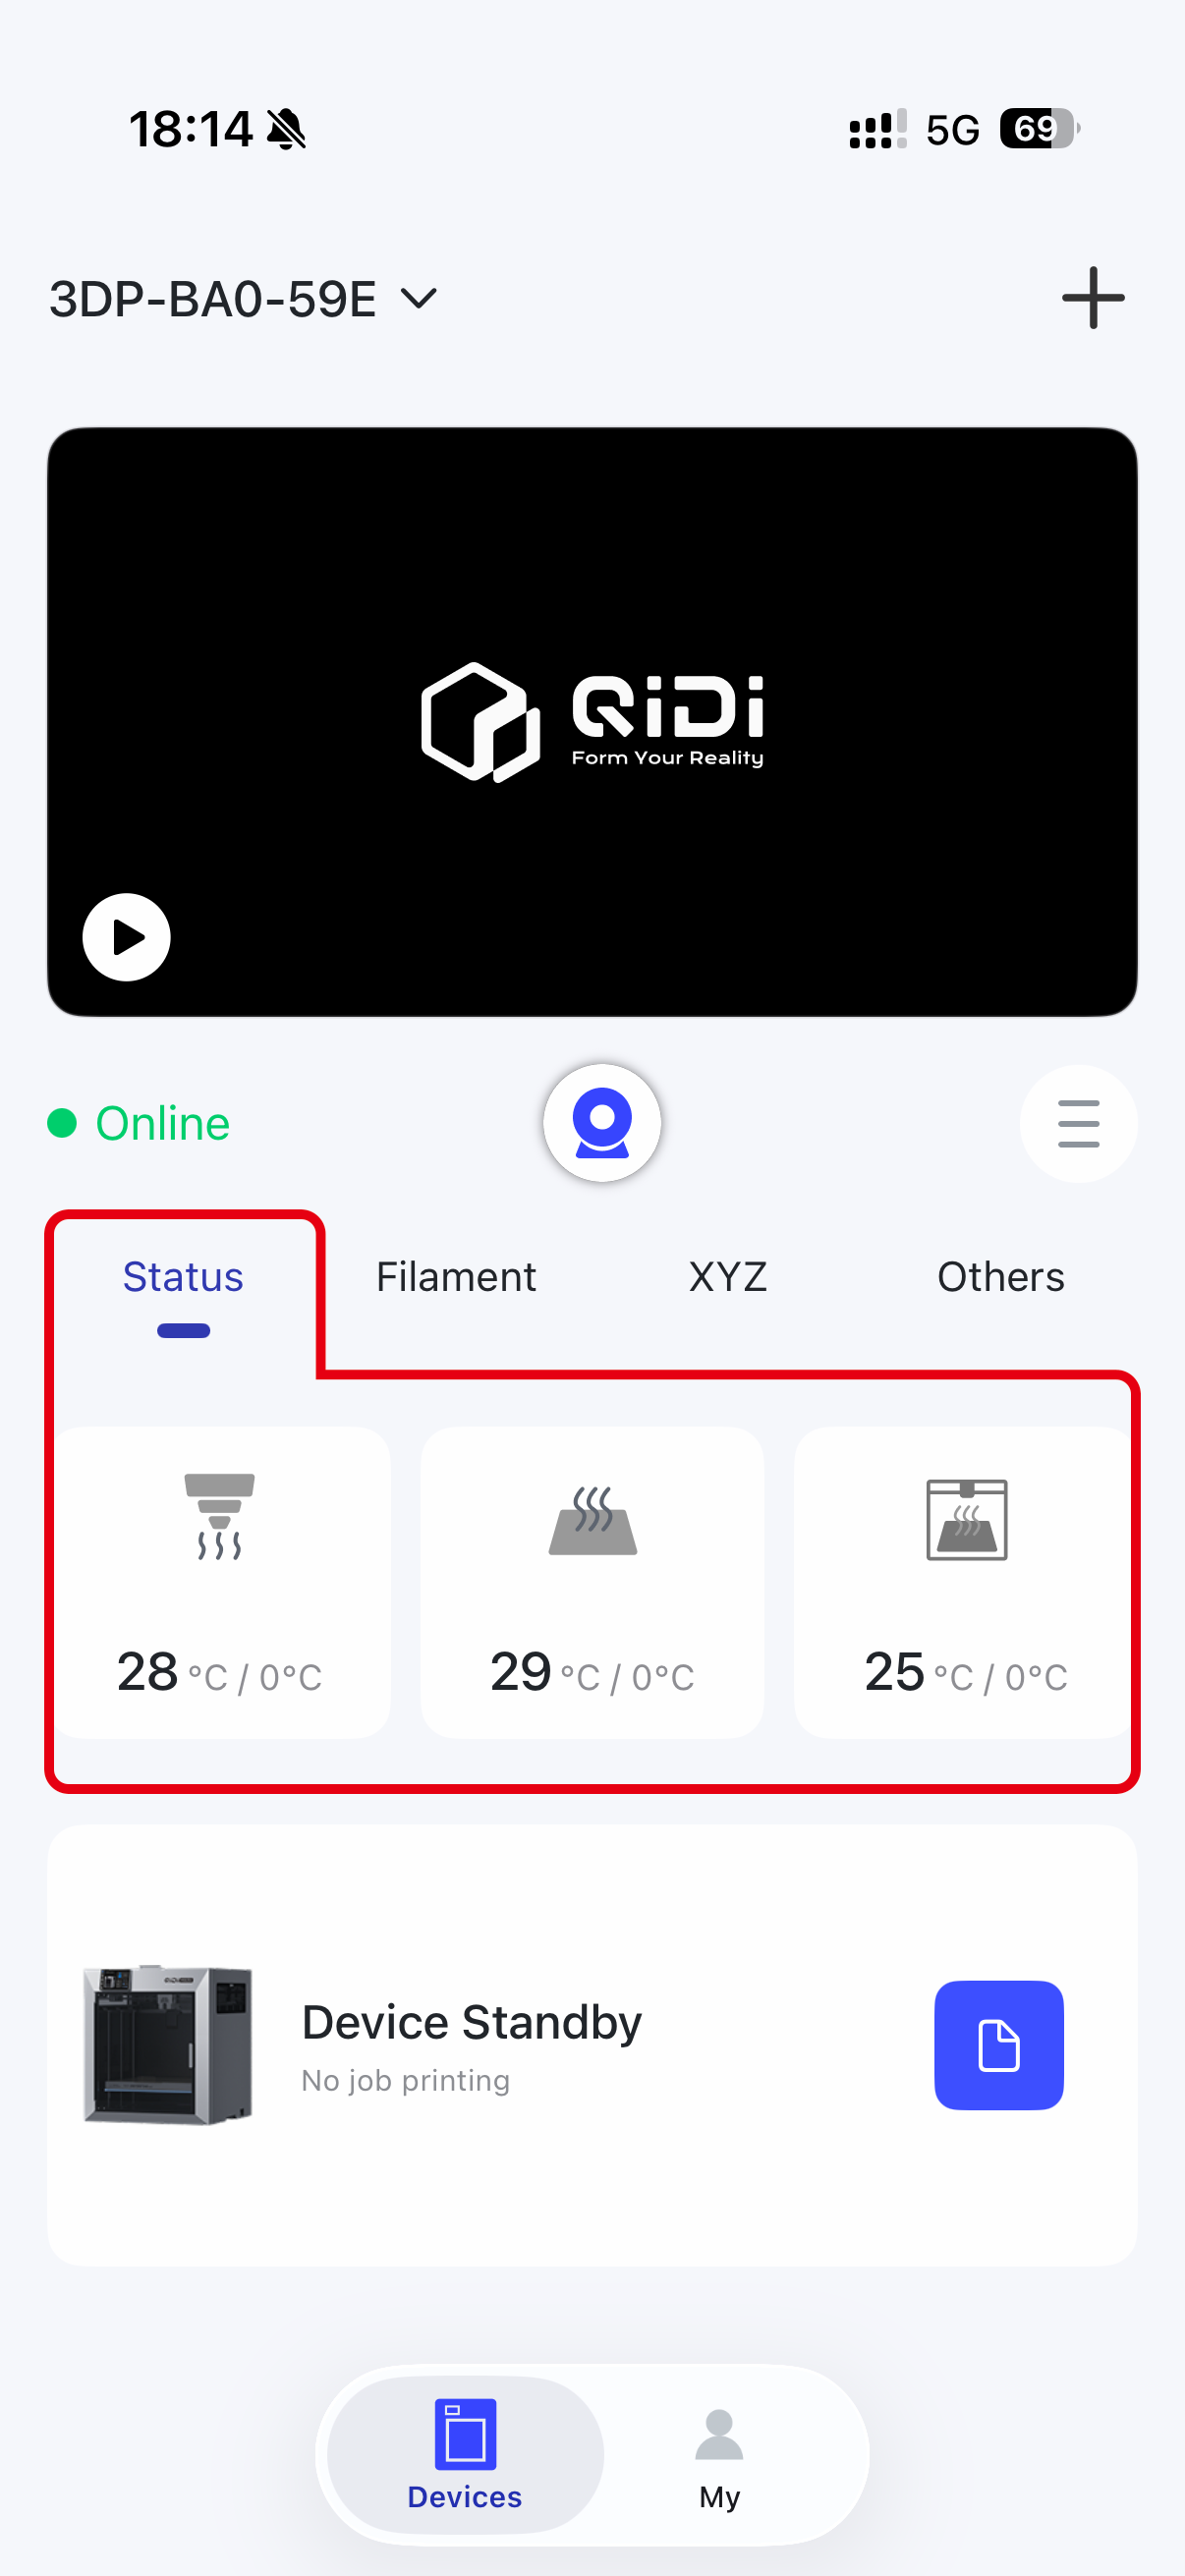
You can move the printer axes in addition to what you can do on the main screen, control some parts (such as the light and cooling fan), and control the QIDI Box to perform load/unload actions.
¶ Introduction to user interface
¶ advanced features
¶ Device settings interface
The device settings interface is a settings interface used to control a specified device. This interface includes the following options:
1.First, select in the central toolbar

2.Device settings interface

3.Print option settings
4.Box settings
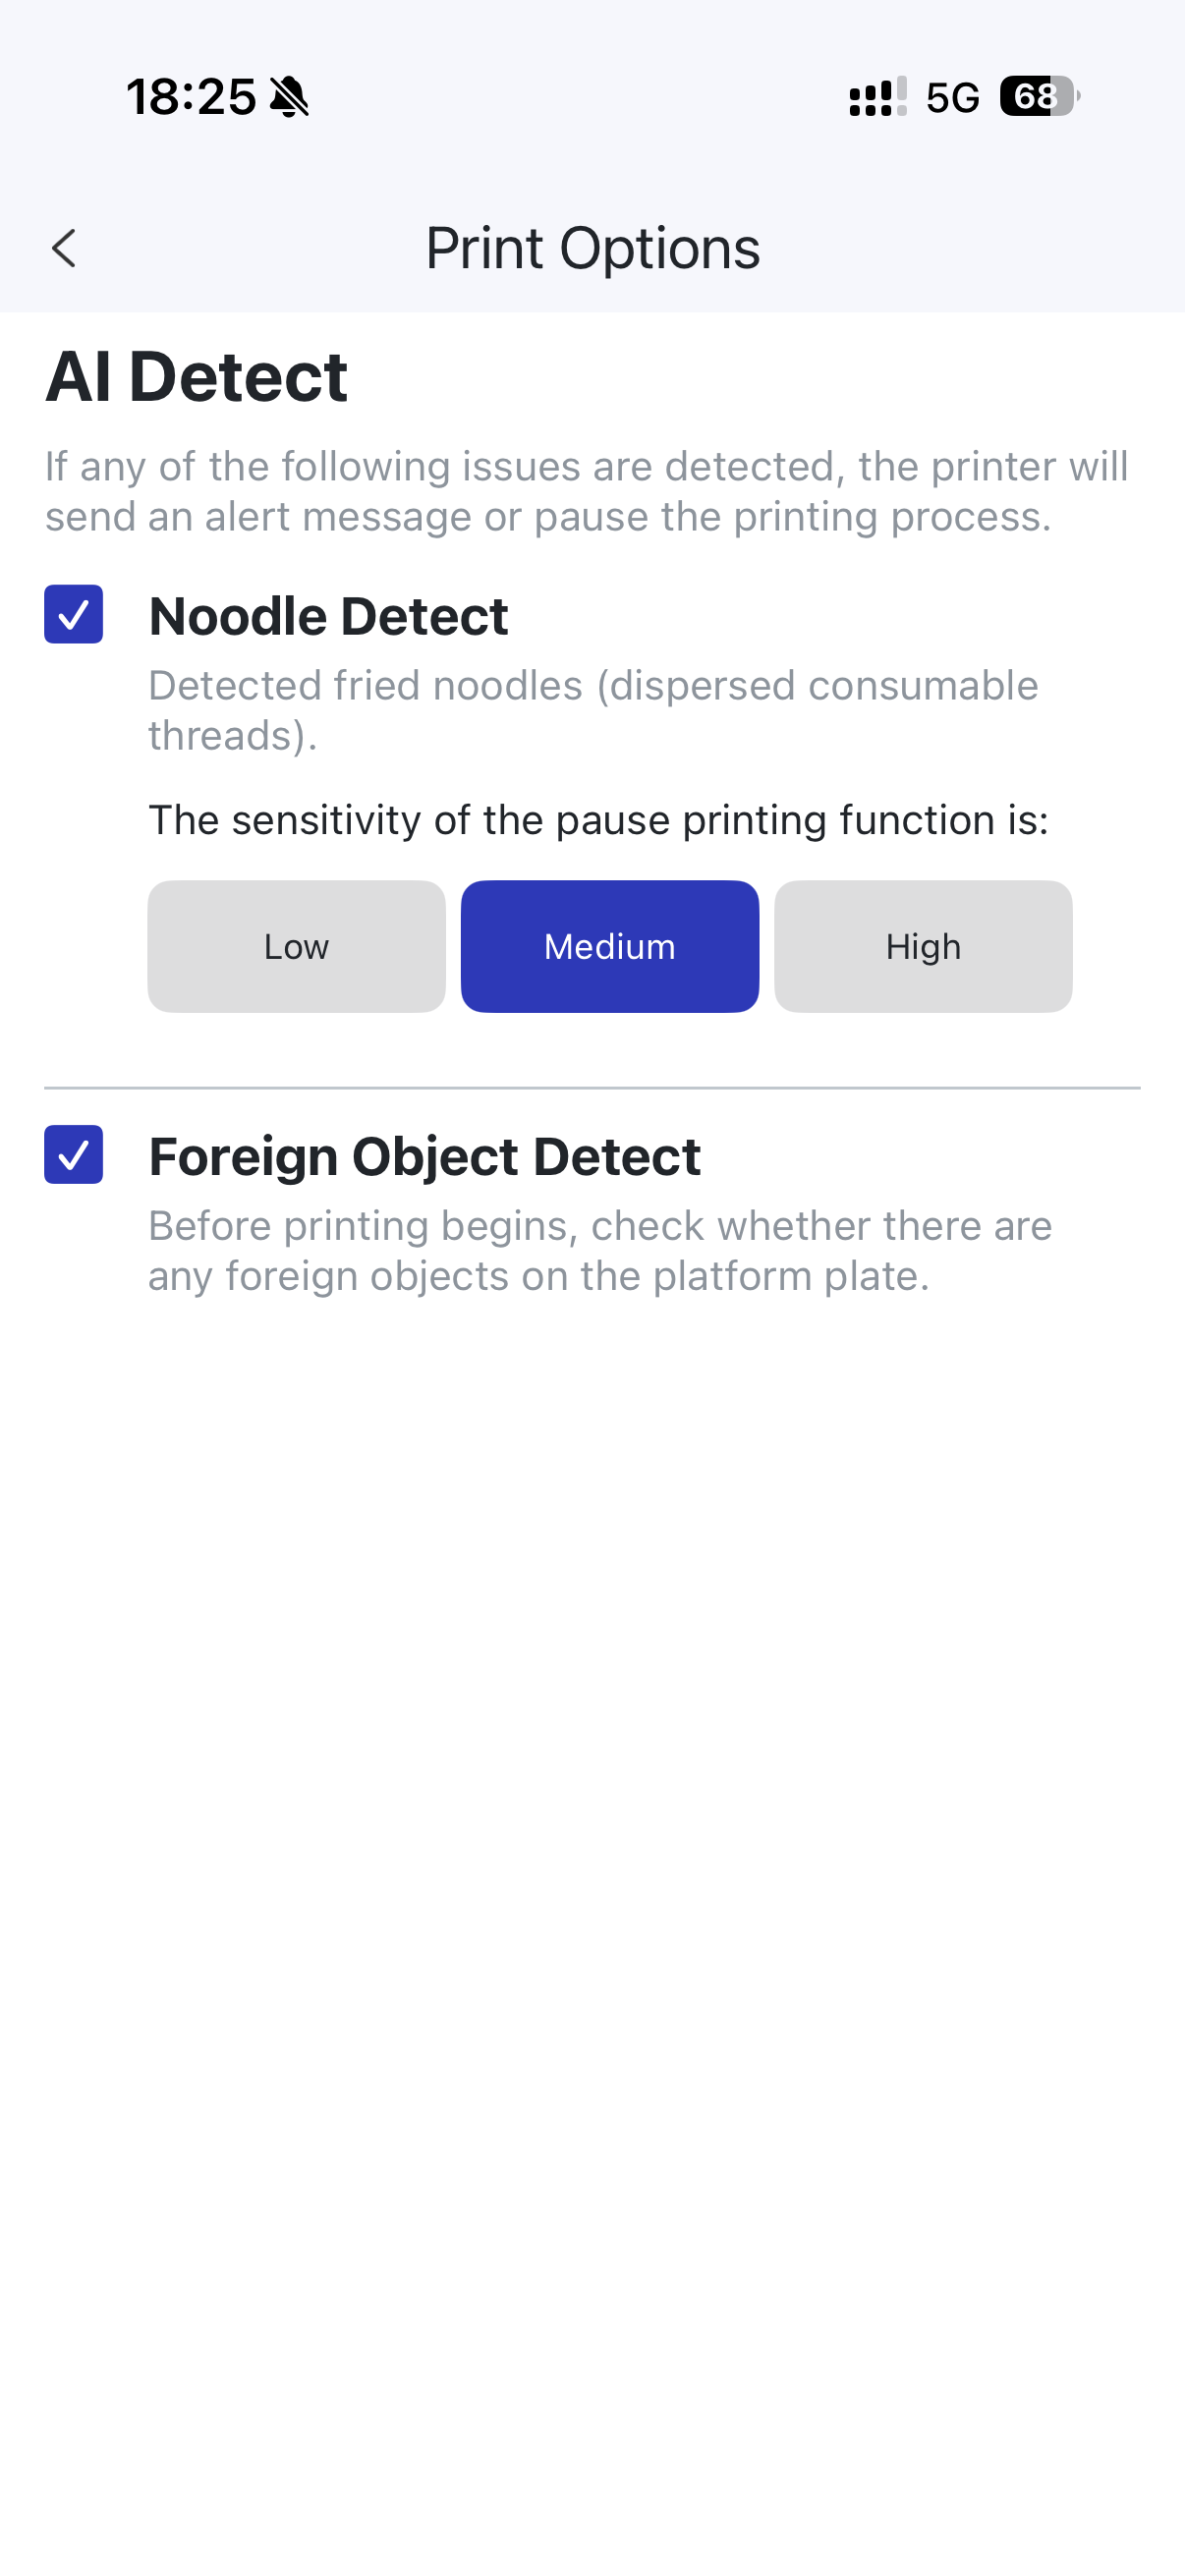
- Print options
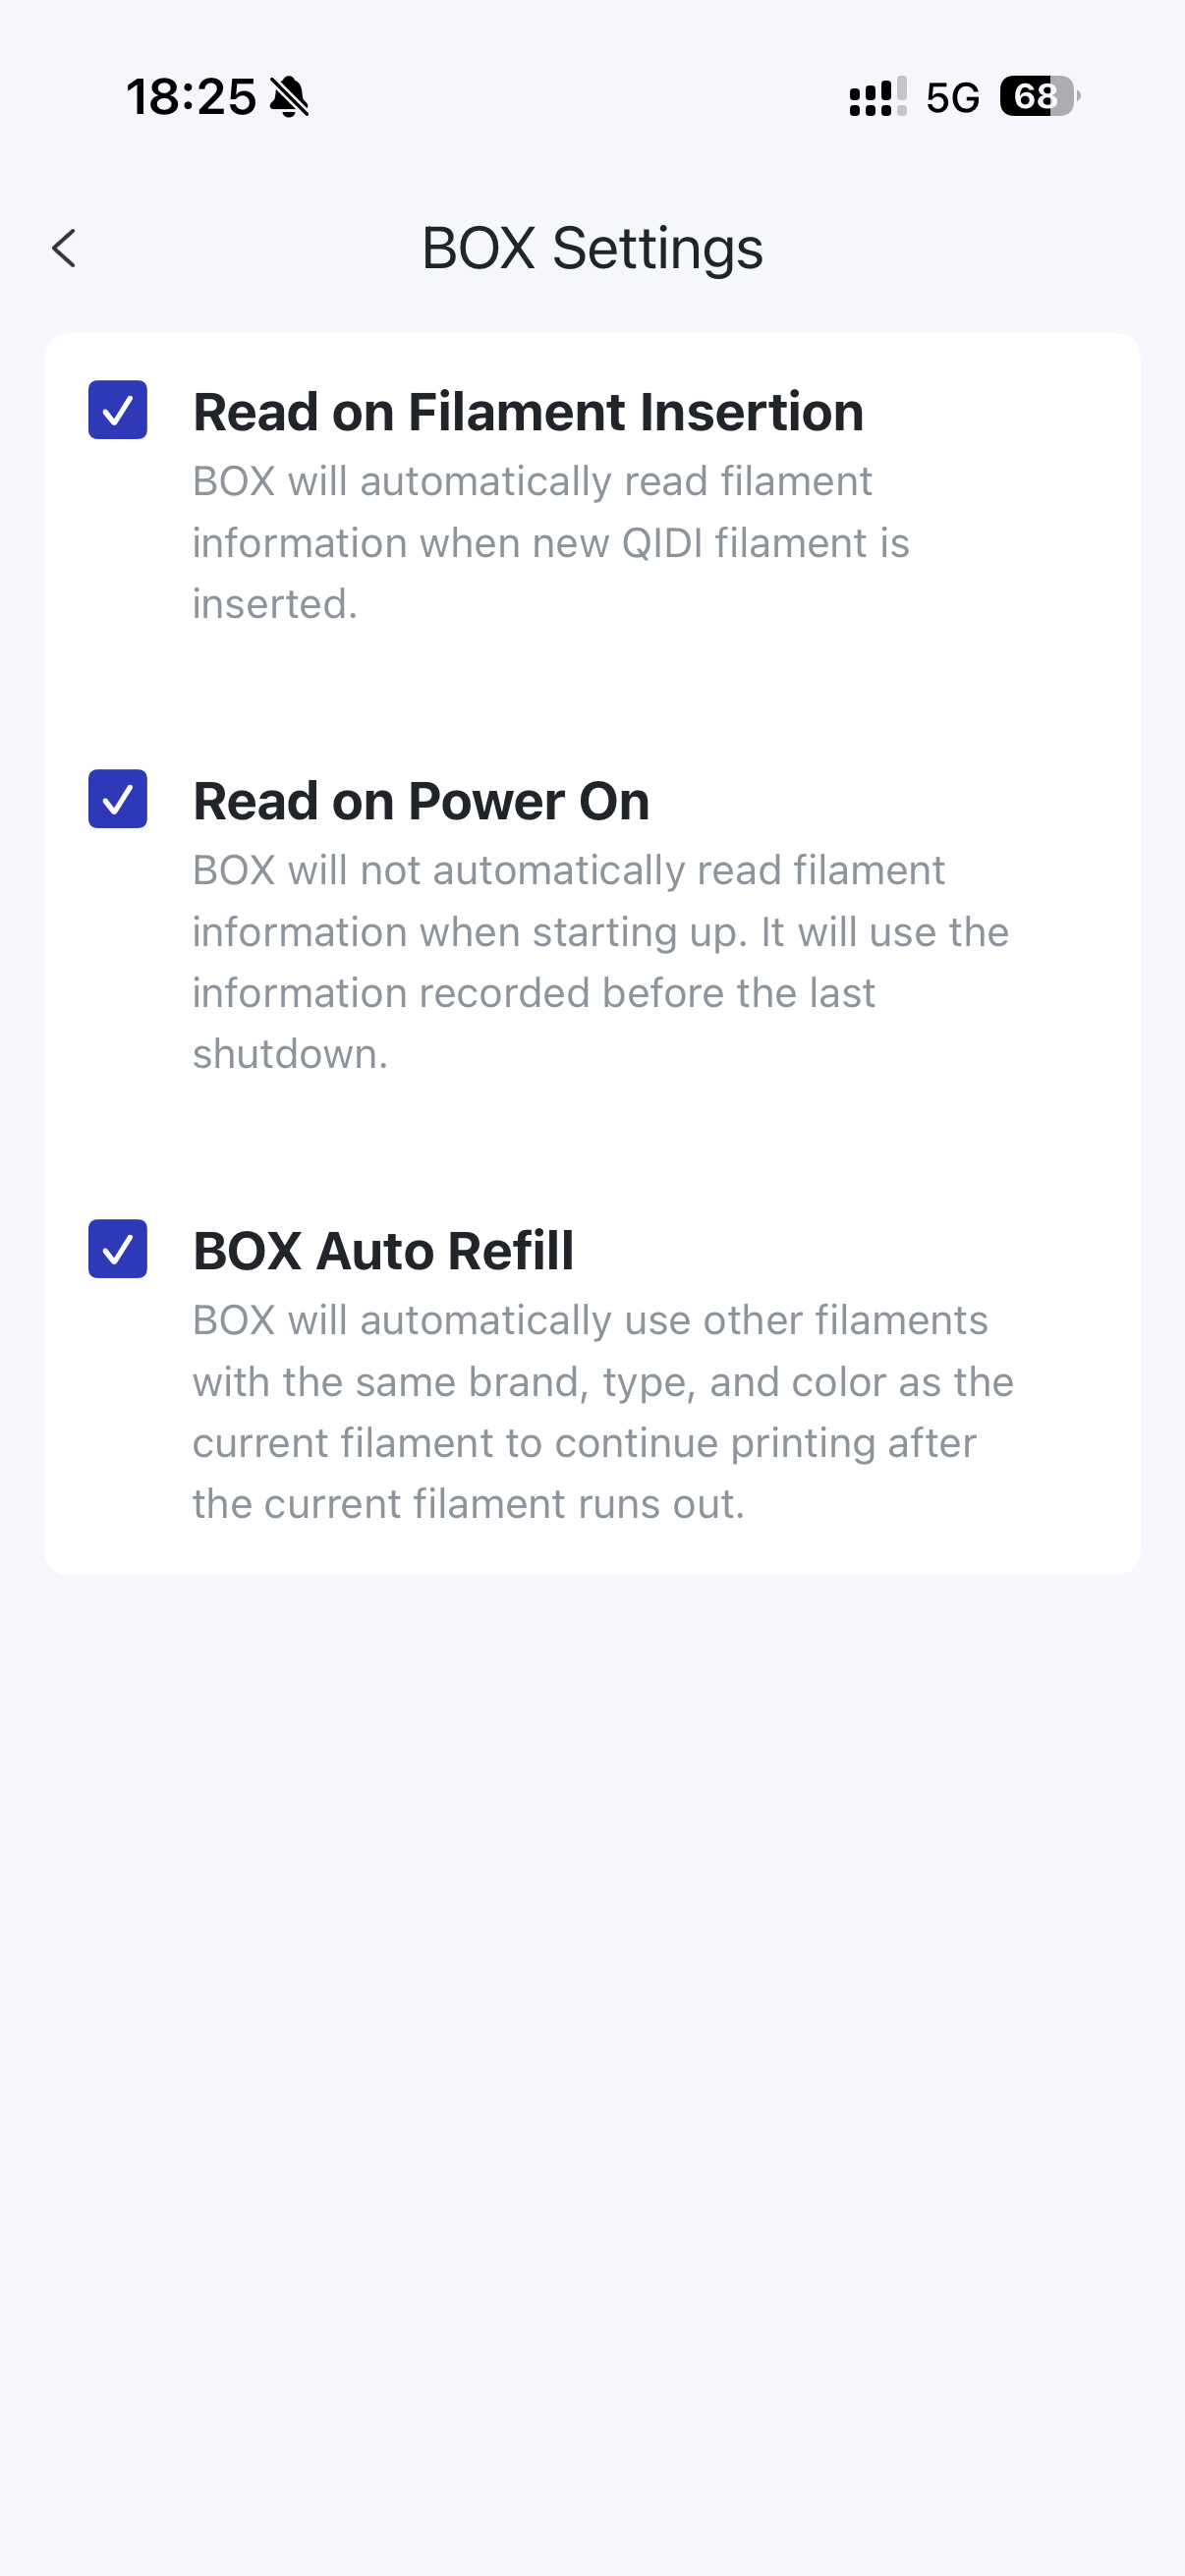
This option is used to adjust printing options. Due to limitations of the mobile application, there are fewer printing options that can be changed within this menu. - Box settings
This option is used to adjust Box-related settings, and you can adjust these settings according to your needs. - Delete device
This option is used to delete a device from the account.