¶ Operation Process for Manual Download, Update, and Synchronization of OrcaSlicer Configuration Content
¶ Purpose To address the inefficiency issue of OrcaSlicer relying on the author to release new versions for updating configuration, and to achieve manual download, update, and synchronization of configuration content (printers, filaments, printing parameters, etc.), allowing everyone to quickly use the latest configuration and improve slicing efficiency.
¶ Pre-note Pre-note: The configuration files of OrcaSlicer are mainly divided into system configuration (pre-installed by default) and user configuration (saved by personal customization), both stored in JSON format. When manually updating, it is important to pay attention to the storage path and replacement logic of the configuration files to avoid accidentally deleting custom configurations. As our company uses QIDI printers, priority should be given to the specific configuration path for QIDI during synchronization to ensure that the configuration is compatible with our company's equipment.
¶ 1. Preliminary Preparation
- Close the OrcaSlicer software: Before updating the configuration, you must completely exit the software to avoid the configuration file being occupied, which may lead to replacement failure or file corruption.
- Backup the original configuration (optional but recommended): To prevent the loss of custom configuration due to update errors, it is recommended to back up the original configuration file first. The specific backup method is described in the "Supplementary: Backup Configuration Method" section below.
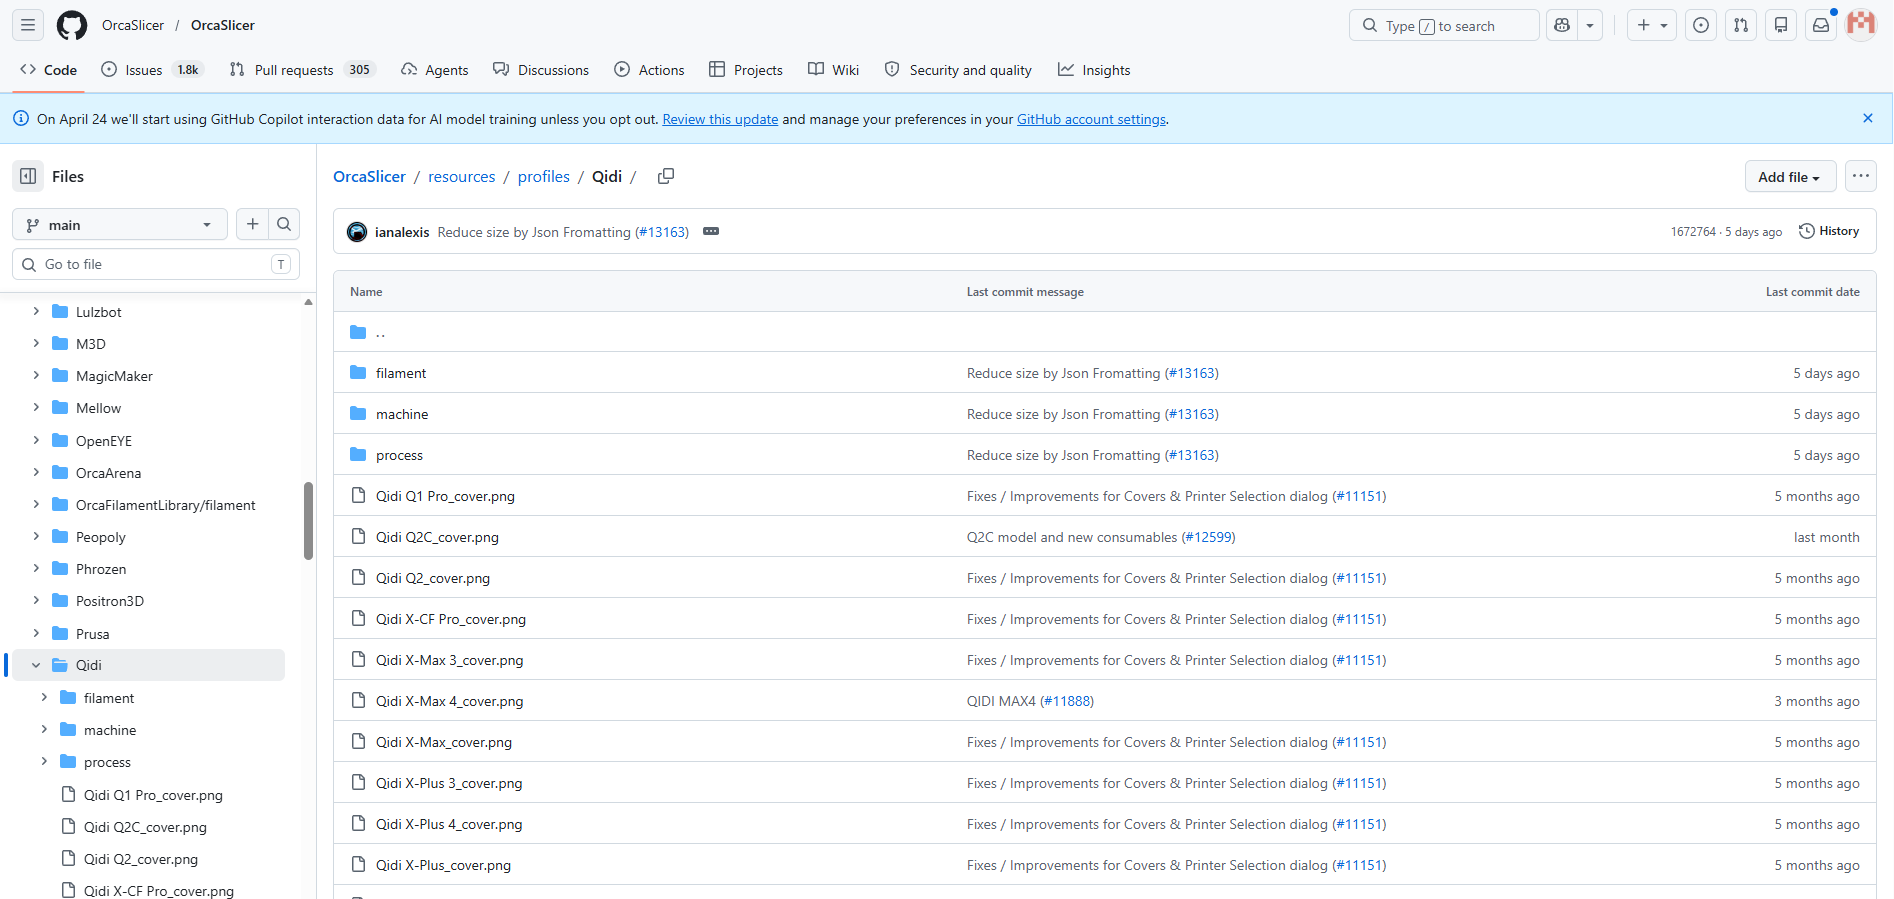
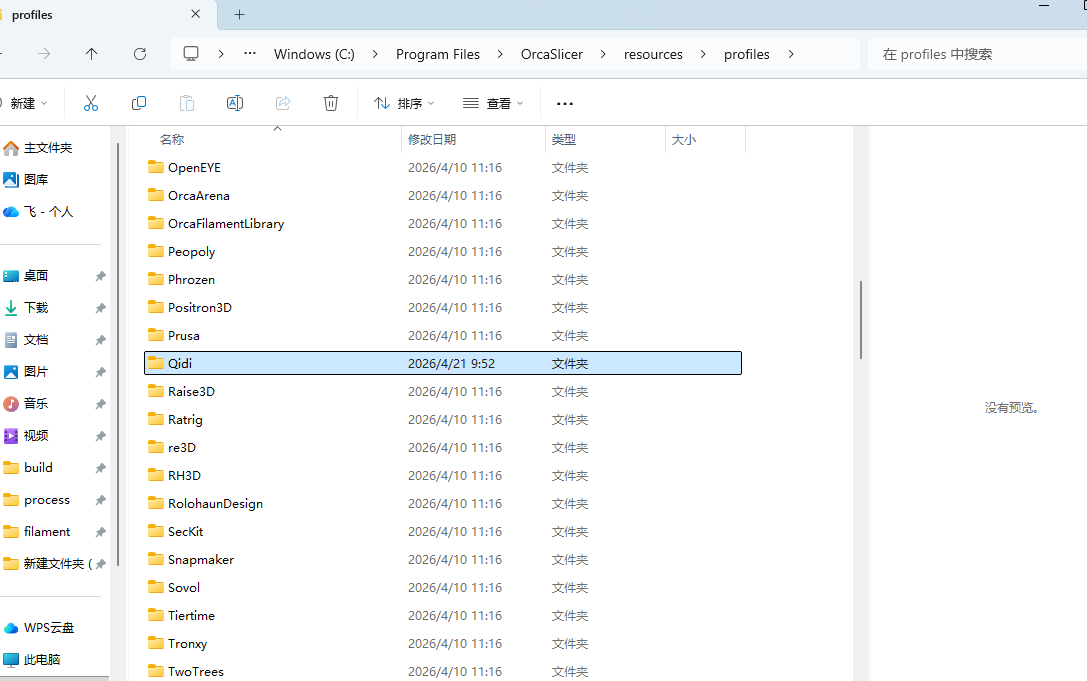
- Source for obtaining the latest configuration files: - Official repository: (https://github.com/OrcaSlicer/OrcaSlicer/tree/main/resources/profiles), where QIDI-specific configurations are centralized in the OrcaSlicer\resources\profiles\Qidi directory, compatible with QIDI series printers from the company.
 4. Confirm the configuration file type: It is necessary to download a JSON format configuration file that matches the requirements. There are mainly three types:
- Printer configuration (machine): This defines basic information such as printer model, size, nozzle parameters, etc. The QIDI-specific configuration can be obtained from the official repository at the path OrcaSlicer\resources\profiles\Qidi.
- Filament configuration: Define the temperature, flow rate, cooling parameters, etc. for filaments such as PLA and PETG.
- Print parameter configuration (process): Define core slicing parameters such as layer height, wall thickness, and infill rate.
¶ 2. Storage location of system temporary configuration files
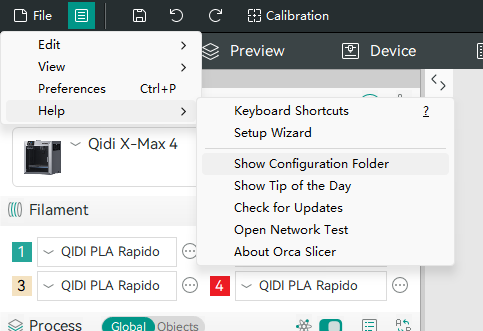
The storage path of the configuration file for OrcaSlicer varies depending on the software version, and accurately locating the path is the core of synchronizing configurations. If the path cannot be found, you can quickly open it through the "Help → Open Configuration Folder" option within the software. At the same time, pay special attention to the QIDI-specific configuration path, as follows:
C:\Users[Your Username]\AppData\Roaming\OrcaSlicer
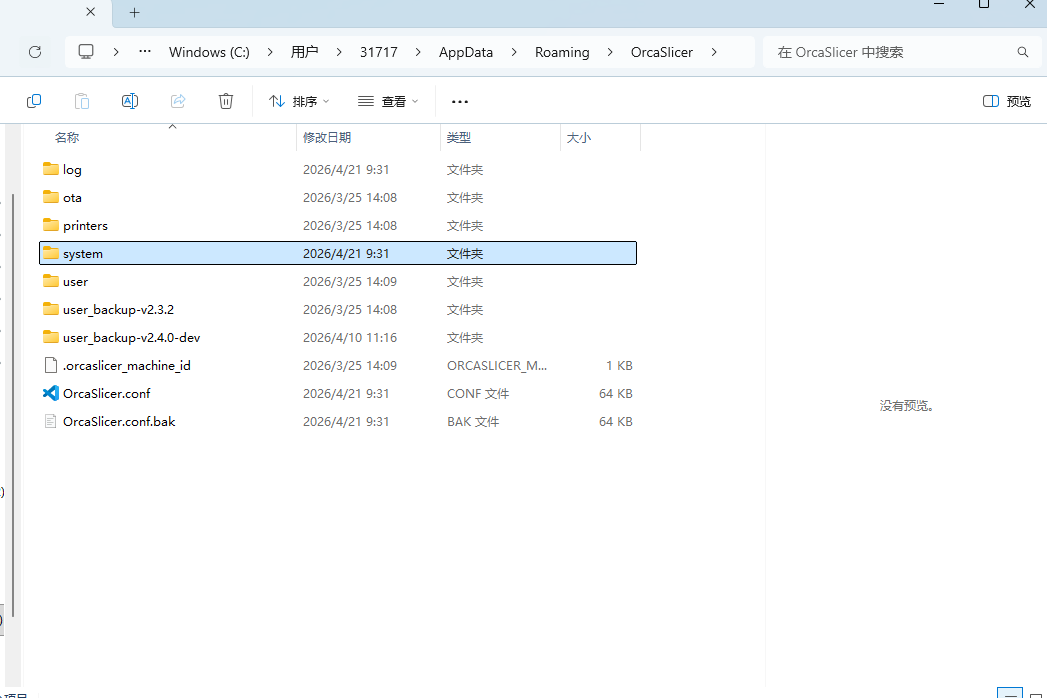 1. AppData is a hidden folder, and you need to enable "Show hidden files";
2. The system folder under the path stores the system default configuration, and the user folder stores the custom configuration (both in JSON format); Supplement: Backup configuration method - Copy the entire "OrcaSlicer" folder under the corresponding path (for QIDI-specific configuration, you can separately copy the "Qidi" folder), and paste it to the desktop, U-disk, or other paths. If the update fails, you can directly replace it with the original path to restore the configuration; For Windows systems, you can quickly locate the configuration folder by entering the corresponding path using the shortcut key Win+R.
¶ 3. Operation steps for synchronizing configuration to OrcaSlicer
Synchronization core: Copy the downloaded latest JSON configuration file to the configuration storage path of the corresponding system. It is divided into "updating existing configuration" and "adding new configuration" according to the scenario. The QIDI equipment of the company should preferentially use the QIDI-specific configuration path.
Scenario 1: Updating existing configurations (replacing old configurations)
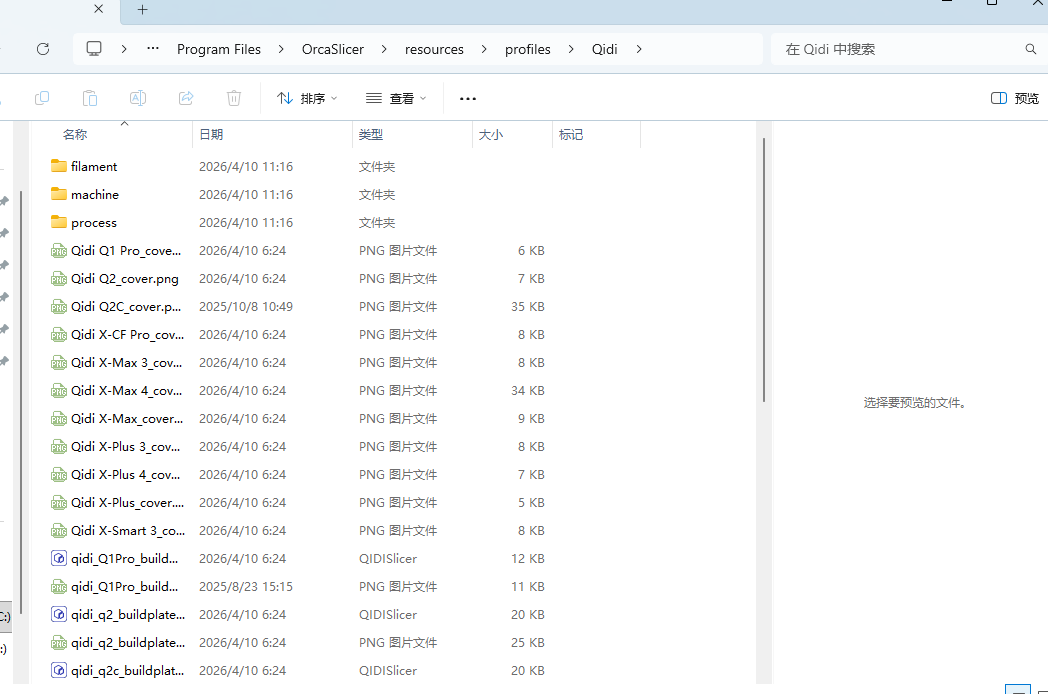
- Open the "OrcaSlicer configuration storage path" located in the previous text (for QIDI devices, prefer the QIDI-specific path: OrcaSlicer installation directory \resources\profiles\Qidi), and enter the corresponding subfolder (e.g., enter the machine folder to update printer configurations, or enter the filament folder to update filament configurations).
2. Locate the old configuration file that needs to be updated (corresponding to the downloaded new configuration file, distinguishable by the file name).
3. Copy the downloaded new JSON configuration file and paste it into this folder. When prompted to "Replace File", click "Replace" (you can safely replace the old configuration if you have backed it up; if not, it is recommended to back up the old file first).
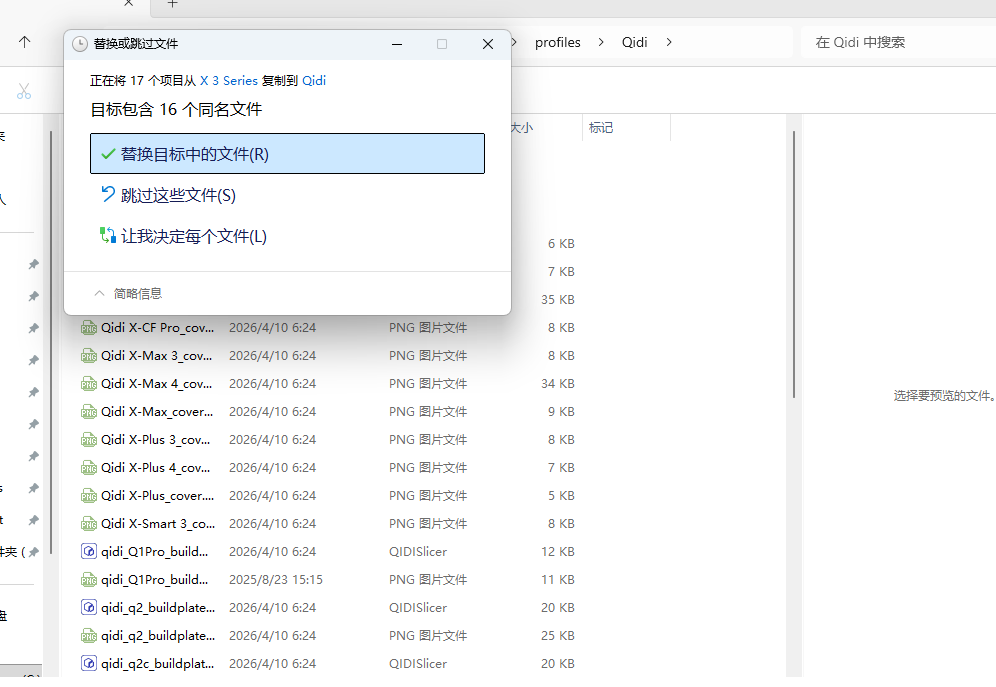
You can also directly copy and replace the entire Qidi folder and Qidi.json
Scenario 2: Adding new configurations (without replacing old configurations, adding new printers/consumables/parameters)
4. Open the file to install the configuration storage path (QIDI devices prefer to use a dedicated path: OrcaSlicer installation directory \resources\profiles\Qidi), and enter the corresponding subfolder (such as the machine folder for adding new printer configurations).
5. Simply paste the downloaded new JSON configuration file into this folder without replacing any existing files.
Special operation: Clear configuration cache (use when configuration is not taking effect).
If, after synchronizing the configuration, opening OrcaSlicer still does not display the updated configuration, it is highly likely caused by software caching. Follow these steps to clear the cache:
- Close the OrcaSlicer software (ensure it is completely exited).
- Open the configuration storage path (no need to operate files under the QIDI-specific path), delete the "system" folder (this folder is a software cache, and deleting it will automatically regenerate the software without affecting custom configurations and QIDI-specific configurations). The folder location can be found in the previous text.
- Reopen the OrcaSlicer software, and the system will automatically load the newly synchronized configuration file.
¶ 4. Verify whether the configuration is effective. 1. Open the OrcaSlicer software, enter the corresponding configuration interface, and verify one by one whether the configuration is effective:
- Verify printer configuration: Click "Printers" → "Manage Printers" to check if the configuration of QIDI series printers has been updated, or if the configuration of newly added QIDI models is displayed normally.
- Verify consumable configuration: Click "Consumables" → "Manage Consumables" to check if the consumable parameters (such as printing temperature, cooling speed) are consistent with the downloaded new configuration.
- Verify print parameter configuration: Create a new slicing task, select the corresponding print parameters, and check if the parameter details (such as layer height, infill percentage) have been updated.
- (Optional) Test Slice: Load a simple model, slice it using the updated configuration, check whether the slice preview is normal, whether the parameters meet expectations, and ensure that the configuration is free of abnormalities.
- If the configuration still does not take effect, you can repeat the "Synchronization steps" and "Clear cache steps", or check whether the downloaded JSON file is complete and the path is correct.
- Configuration File Compatibility: The downloaded configuration file should be broadly compatible with the OrcaSlicer software version (e.g., versions V2.3 and above are generally compatible). Significant version differences may result in unrecognized configurations.
- Custom configuration protection: If you have customized configurations optimized for personal use, please do not replace the custom files in the "user" folder during updates. You can choose the "add new configuration" mode to avoid losing personal settings.
- File permissions: If Windows prompts "Cannot replace the file", you need to close the OrcaSlicer software, or right-click on the file and select "Properties", then cancel the "Read-only" permission before attempting to replace it. If the issue persists, you can try running the file manager as an administrator and then proceed with the operation.
- QIDI exclusive configuration: When synchronizing, priority is given to configuration files under the QIDI exclusive path to ensure that the configuration is compatible with the company's QIDI printers, eliminating the need for additional screening of general configurations.