In order to make it easier for users to interact with the printer, QIDISlicer added a "Device" page. Users can add a physical printer to the software through the "Device" page, and send the GCode code to the printer over the network for model printing.
¶ Device Page
The Device page consists of a list of devices on the left and a Fliudd page on the right.
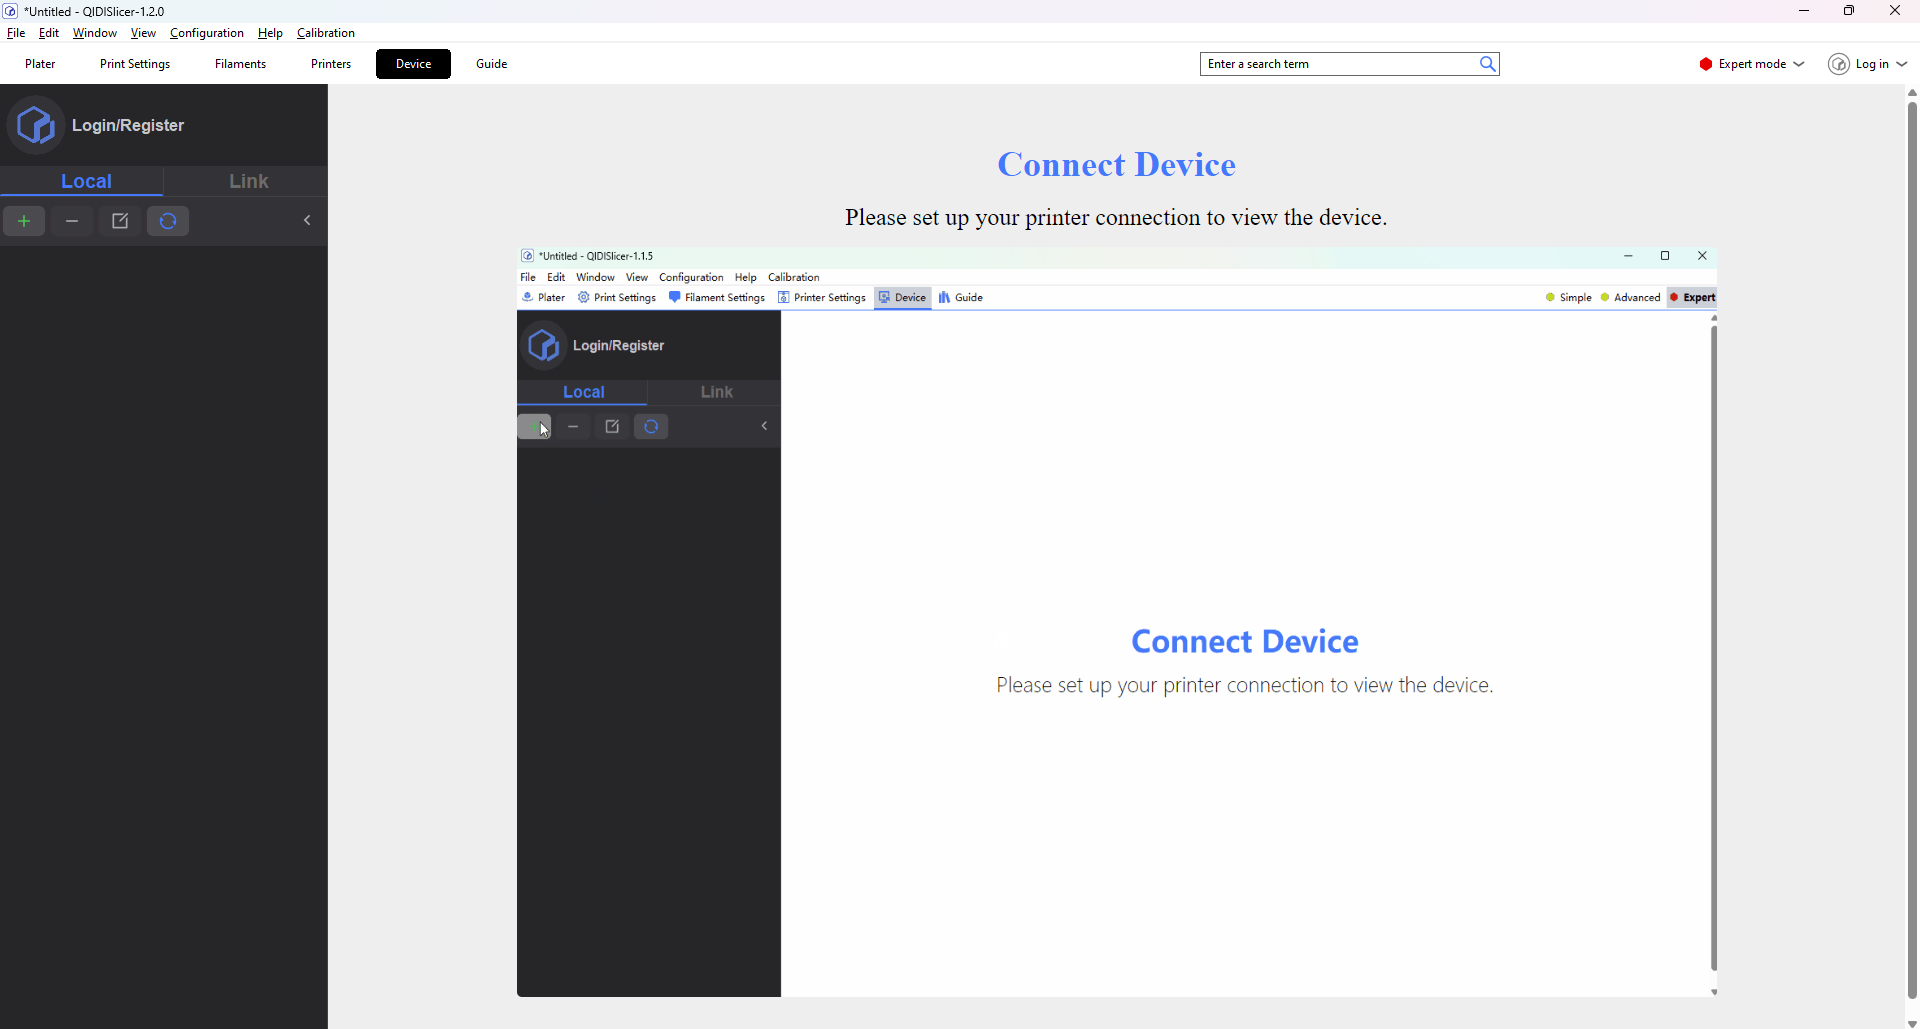
¶ Device list
The device list consists of the following modules:
- Login module
- Local/Link Switch button
- Add, delete, edit, refresh button
- Device list
¶ Login module
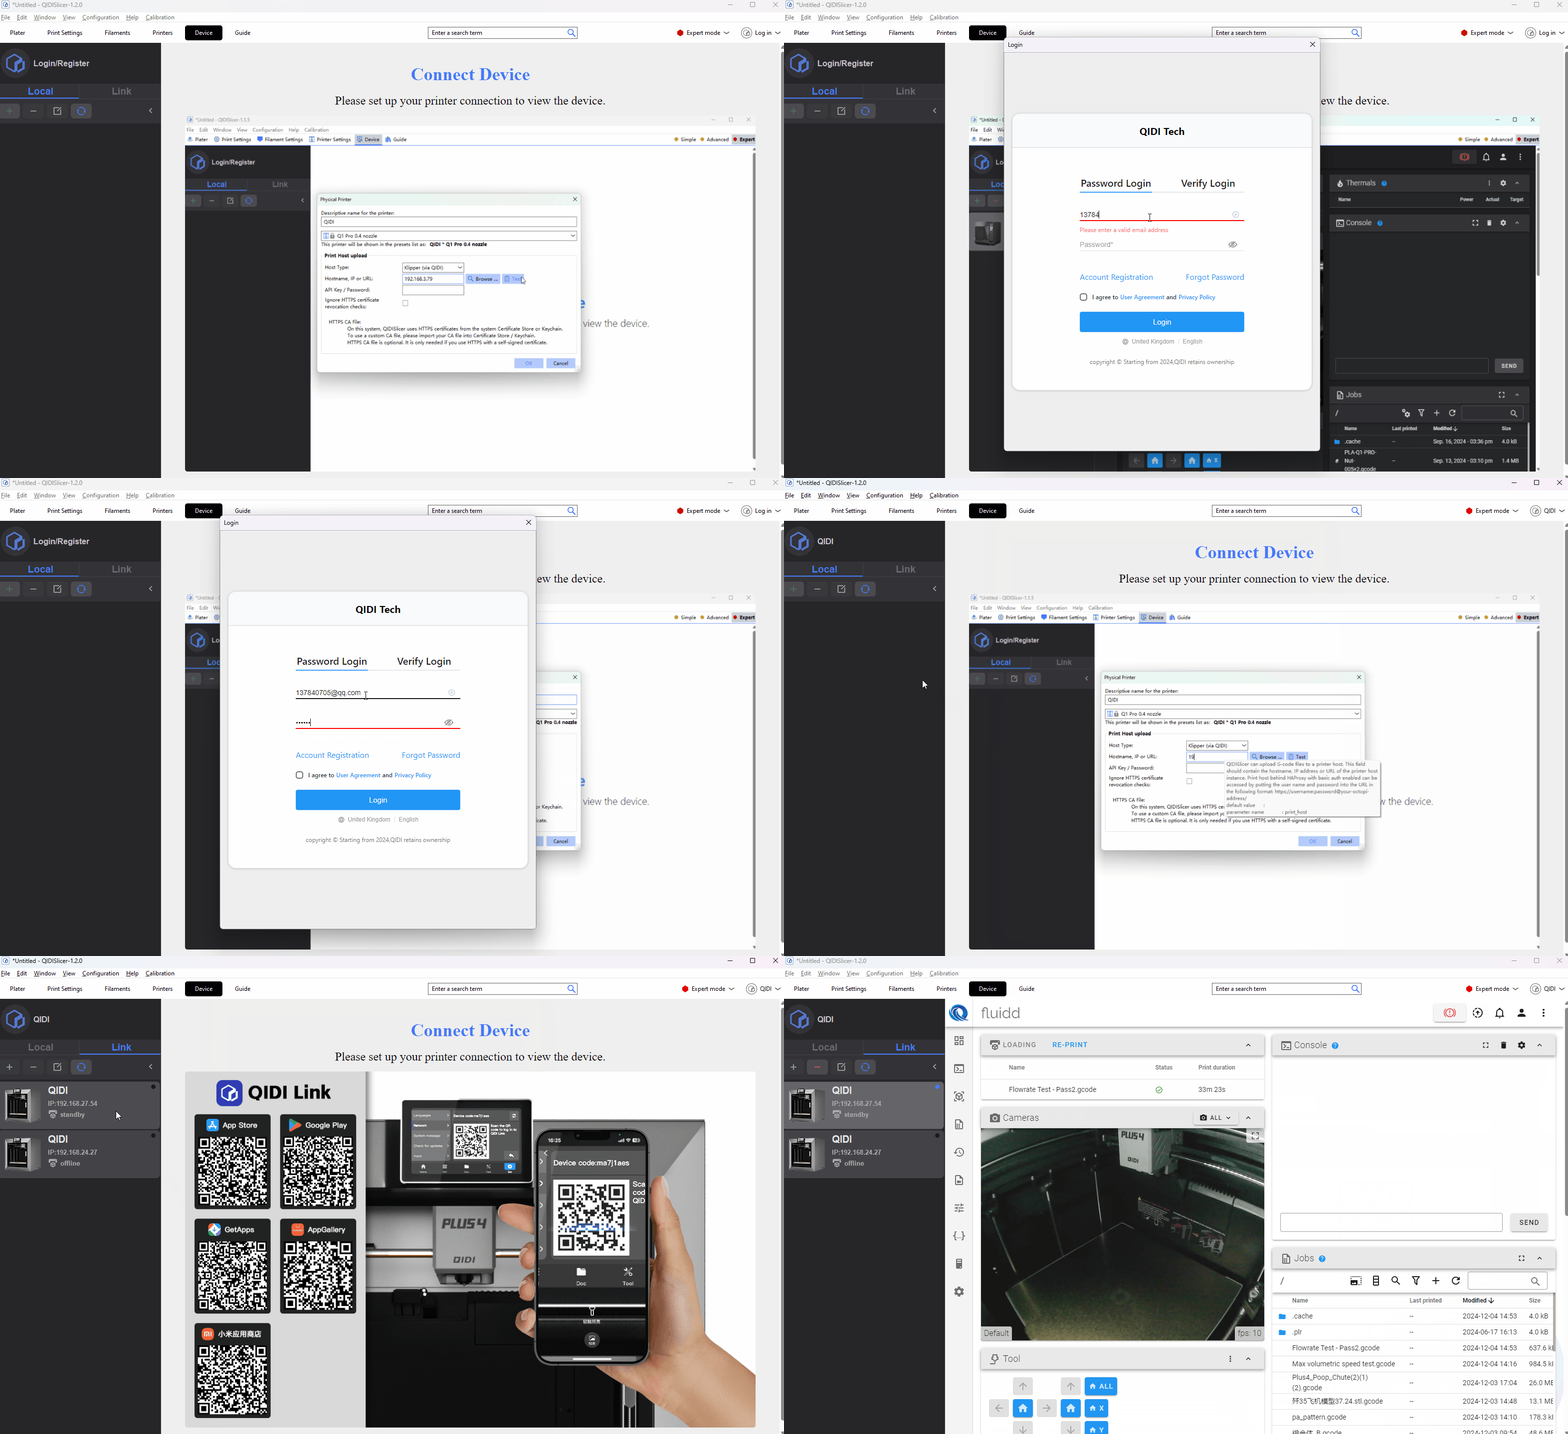
You can open the user Login pop-up window by clicking "Login/Register" and log in to your QIDI Acount. After successful login, the login module will display your user name and avatar, and the devices you bind to the QIDI Link will be synchronized to the "Link" device list.
¶ Local/Link Switch button
This button allows you to switch between the view of the local and Link device lists.
¶ Local device list
¶ Add button
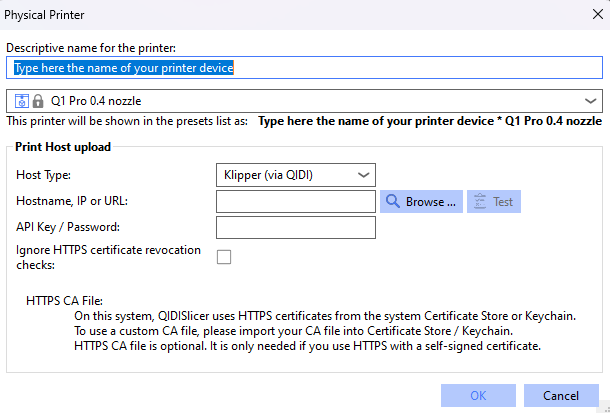
The new button can only be clicked when you switch to the Local device list. Click and a new pop-up window appears.
-
First, you need to physically print and connect to the same LAN as your computer
-
View the printer's Settings -> General Settings -> Network to see the printer's IP address
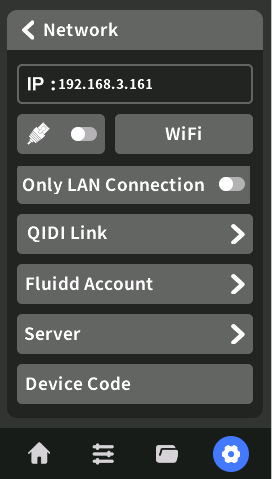
(The interface of different models is different, and the path to obtain IP address is similar) -
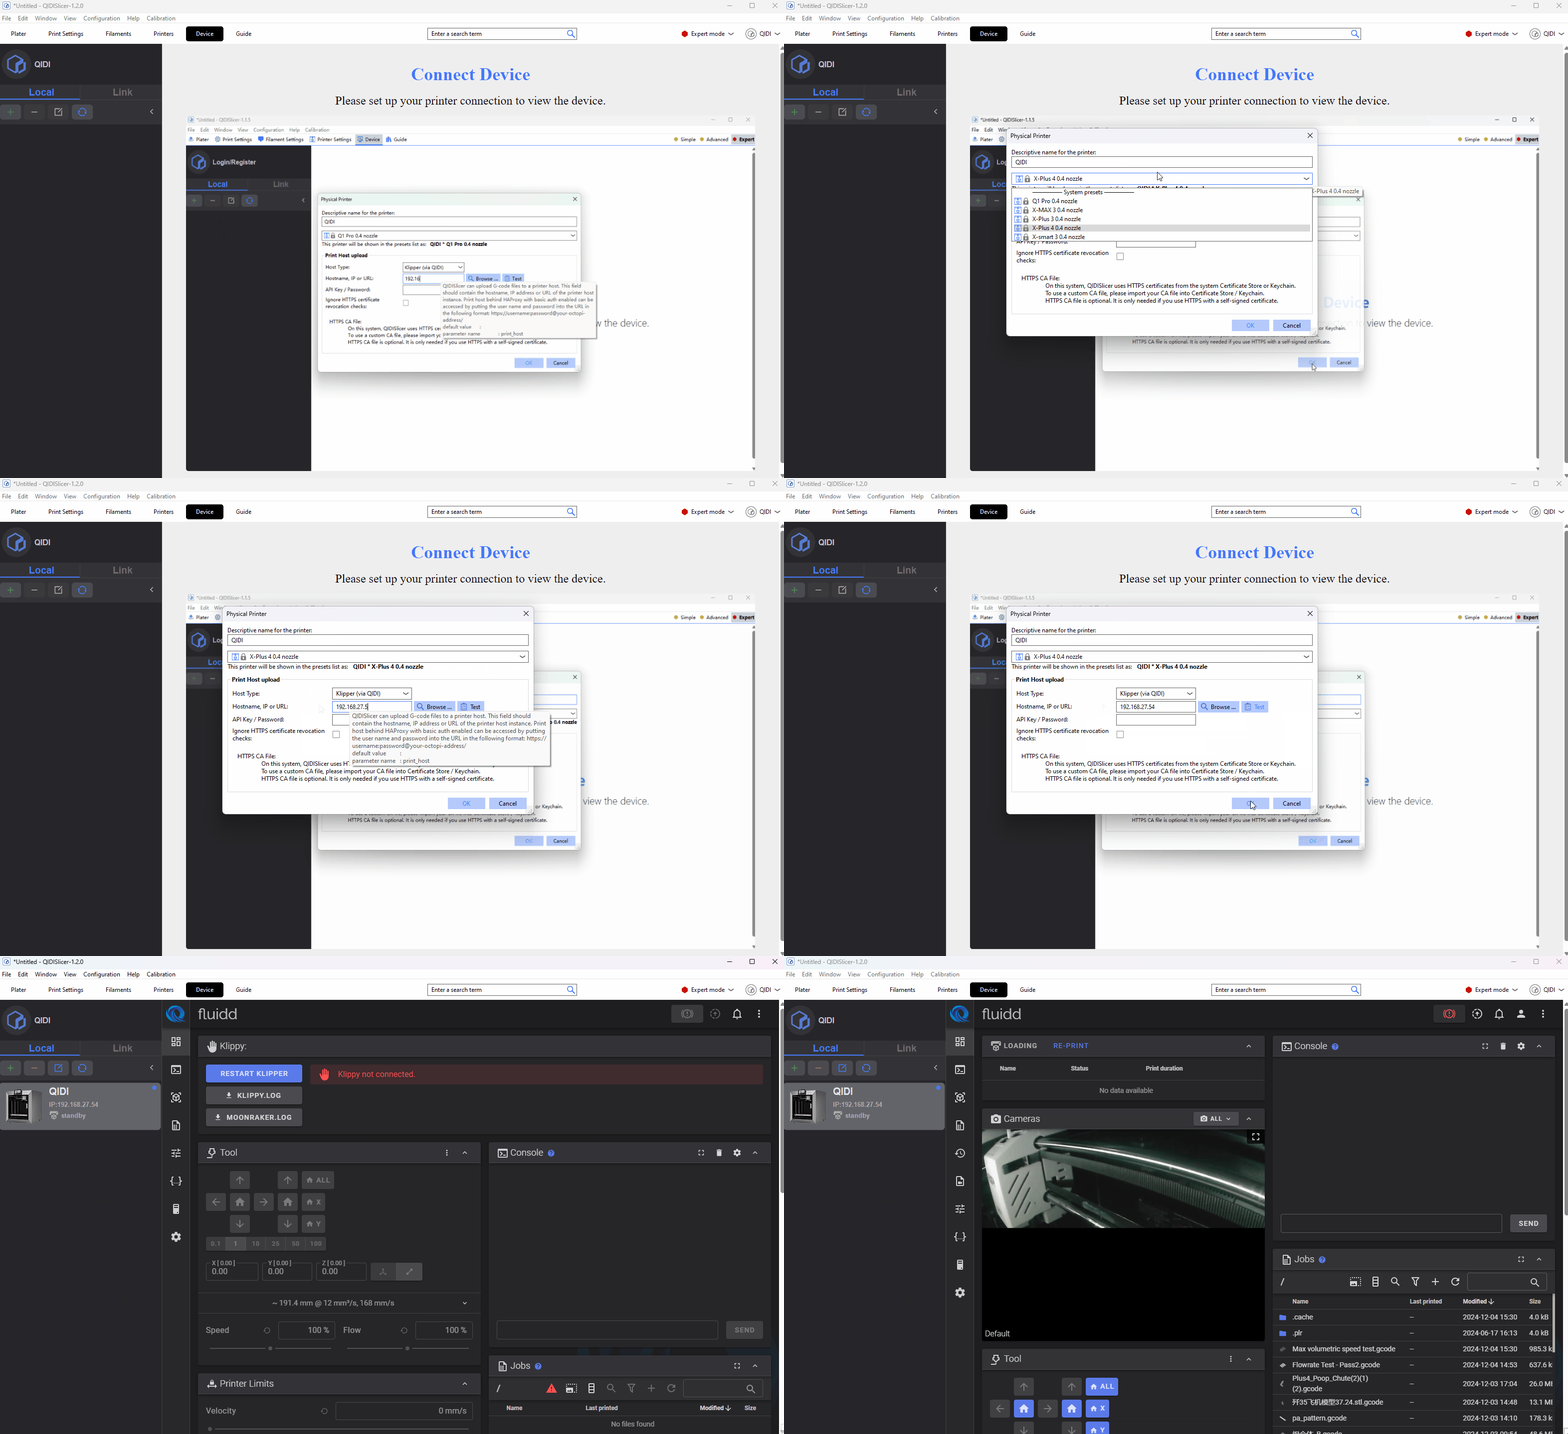
Under the "Local" list, click the Add button. In the new pop-up window, enter the device name, select the device default, and enter the IP address of the device.
-
Click the "OK" button, and the software automatically connects the Fluidd page of the corresponding IP printer.
¶ Attention
¶ Device name restriction
- The value cannot be empty.
- Do not allow special characters "<>[]:/|? A \ *".
- Cannot start or end with a space.
- The name cannot be the same as that of an existing device.
¶ Preset selection
You can add or remove preset options in the configuration wizard.
¶ IP/URL
- The value cannot be empty.
- No repetition allowed.
¶ Edit button
The edit button allows you to maintain the information of a device. The modification restriction is the same as adding pop-ups.
¶ Delete button
Delete an added device.
¶ Refresh button
Retrieves the current status of the device.
¶ List of online devices
Currently, online devices can only be connected through the QIDI Link APP.
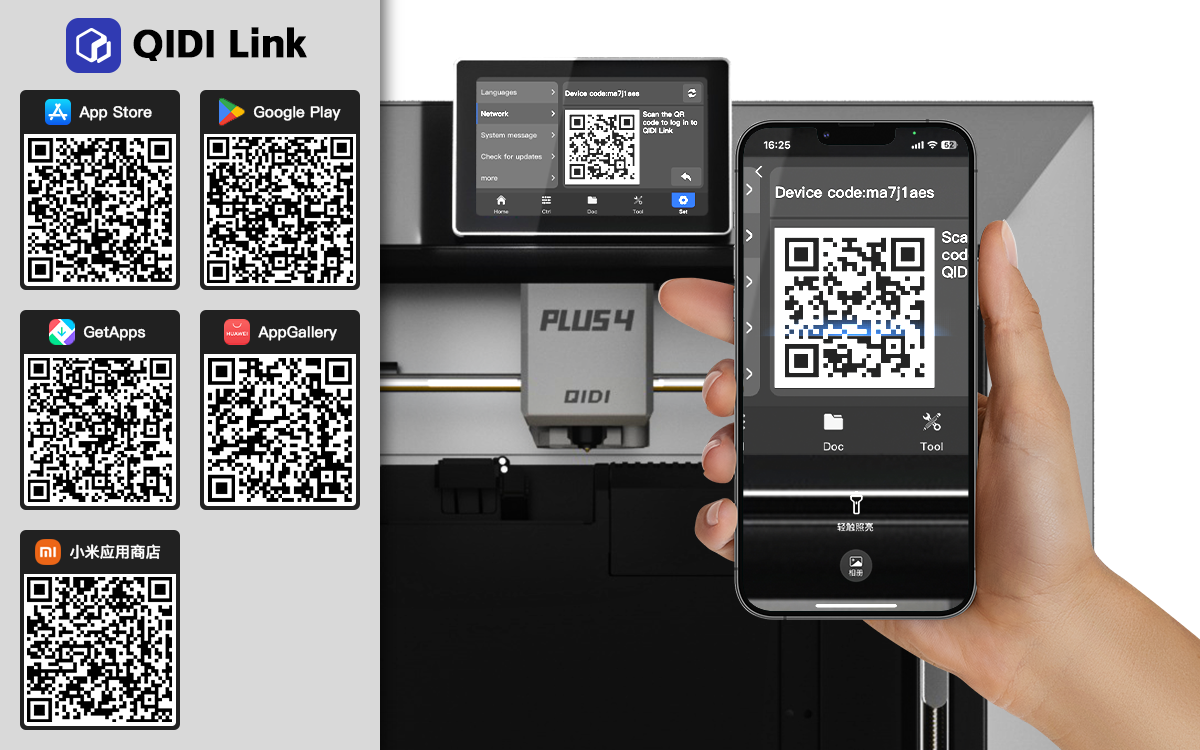
- Download the QIDI Link APP from major app stores
- Register and log in to an account
- Scan the printer's Settings -> General Settings -> QR code displayed on the QIDI Link page. (Note: The printer must be networked first).
- If you log in to the QIDI Account in QIDISlicer, online devices will be synchronized to the Link device list.