¶ Introdution
In certain scenarios, you may wish to adjust settings solely for a particular section of your model. For instance, you might desire a denser infill or additional perimeters for enhanced rigidity in a specific part of your model. However, applying these settings globally would result in material wastage and increased print duration.
There are several methods to specify which model section should be influenced by custom settings. You can utilize a height range modifier, a simple modifier mesh primitive (such as a cube), or a customized modifier mesh.
¶ Height range modifier
To use the height range modifier, right-click on your model and select Height Range Modifier from the context menu.
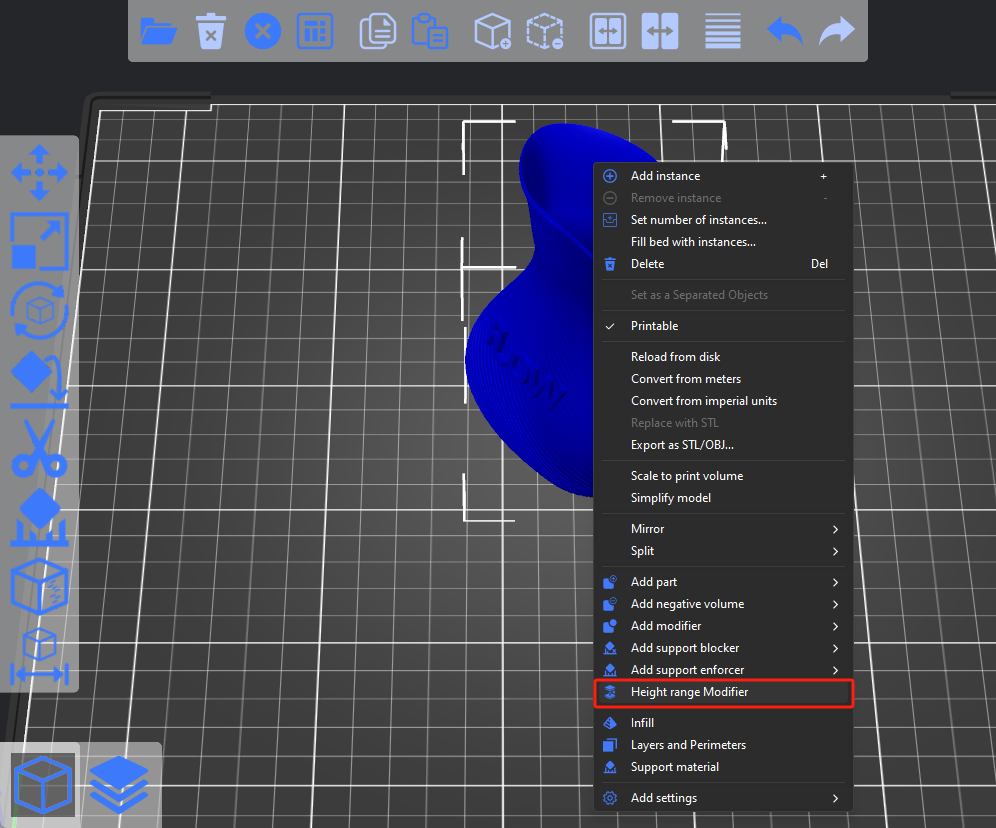
A new window titled "Height Ranges" will appear in the right panel. Here, you can establish intervals within which different settings can be applied. Each interval you set will be listed in the Object list on the right panel.
Clicking on the gear icon adjacent to an interval allows you to configure:
-
Advanced mode: custom infill, layers, and perimeters or support material
-
Expert mode: custom infill, layers and perimeters, support material, extrusion width, speed, and several other settings
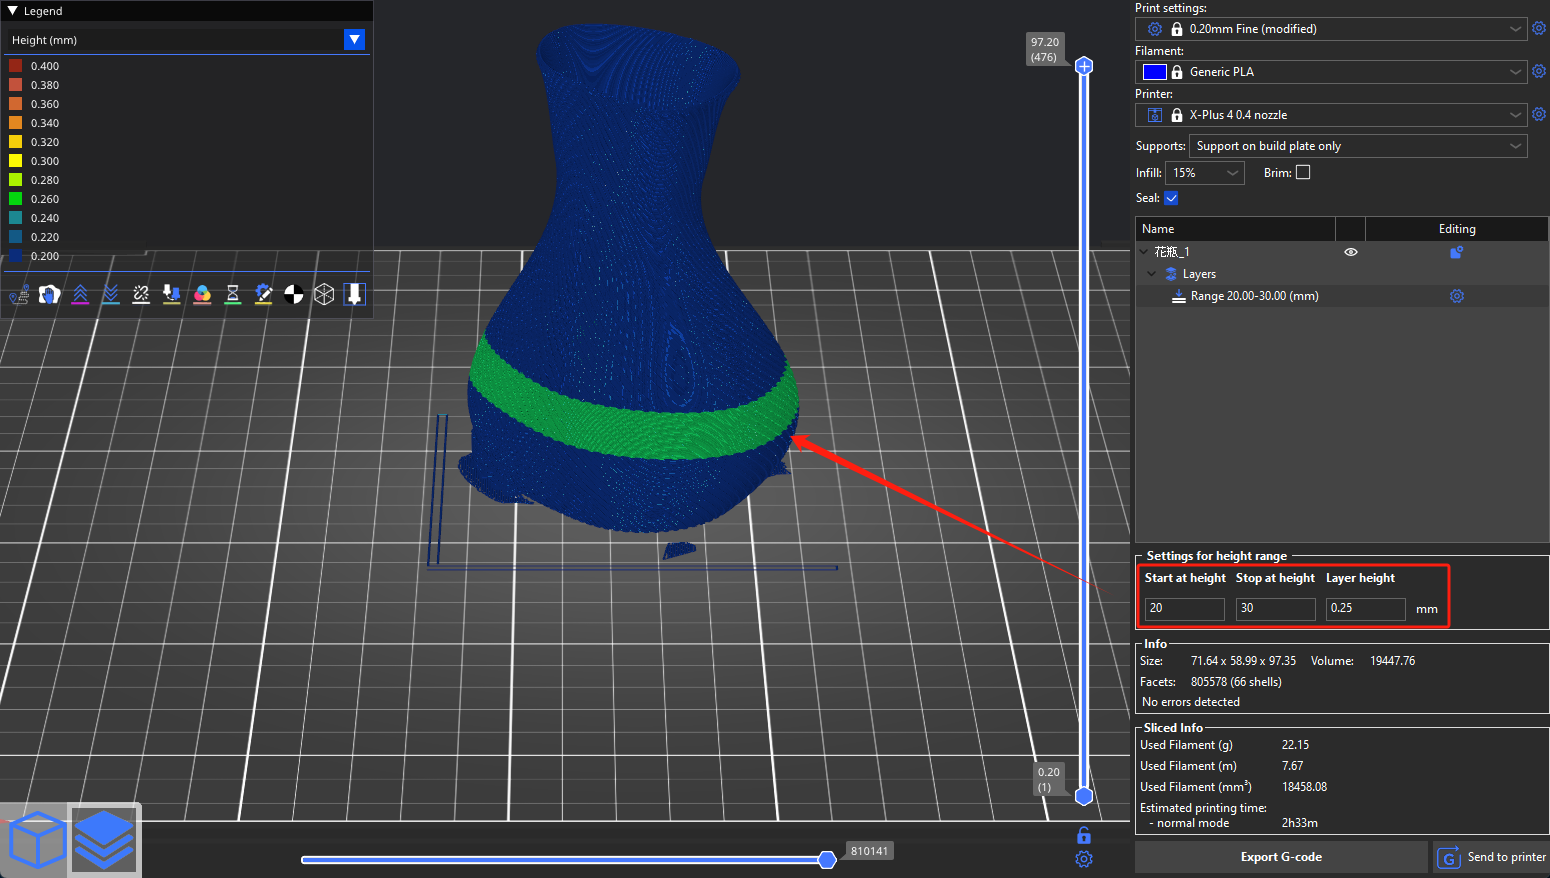
The interval setting also includes a Layer Height input. By default, the global layer setting is applied, but you can opt to slice the model at a different layer height, affecting only the specified interval. Note that if you set a different layer height for the entire model, it will override this value for the height interval.
¶ Modifier meshes
Modifier meshes apply custom settings to the overlapping area between the modifier mesh and the model.
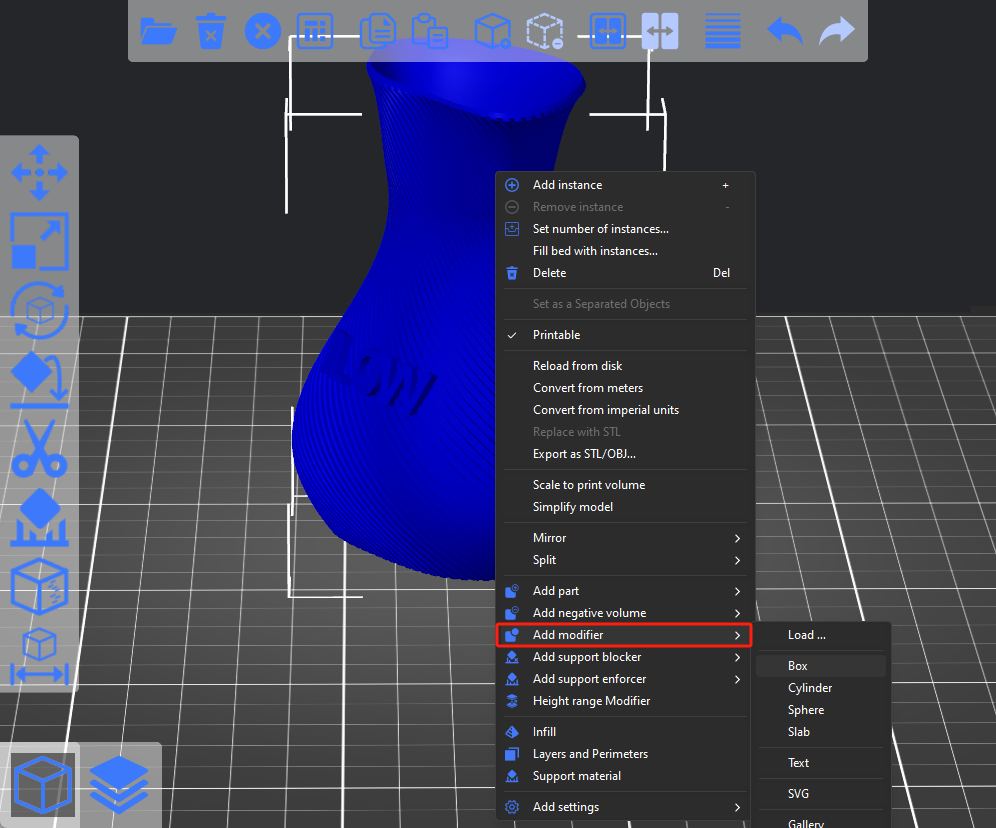
To add a modifier, right-click on your model and select Add Modifier - Select Modifier Type. Alternatively, you can right-click on the gear icon in the Object list panel.
¶ Modifier mesh shape
Four primitives are available for selection: Cube, Cylinder, Sphere, and Slab.
In Expert Mode, you can also use a custom shape as a modifier mesh by selecting Load... in the mesh selection. This mesh is typically created beforehand in a 3D modeling program.
¶ Changing settings for the modifier mesh
To adjust settings for the modifier mesh, either right-click on it in the 3D view or click on the gear icon in the Object list panel to select:
- Advanced mode: custom infill, layers, and perimeters or support material
- Expert mode: custom infill, layers and perimeters, support material, extrusion width, speed, and several other settings
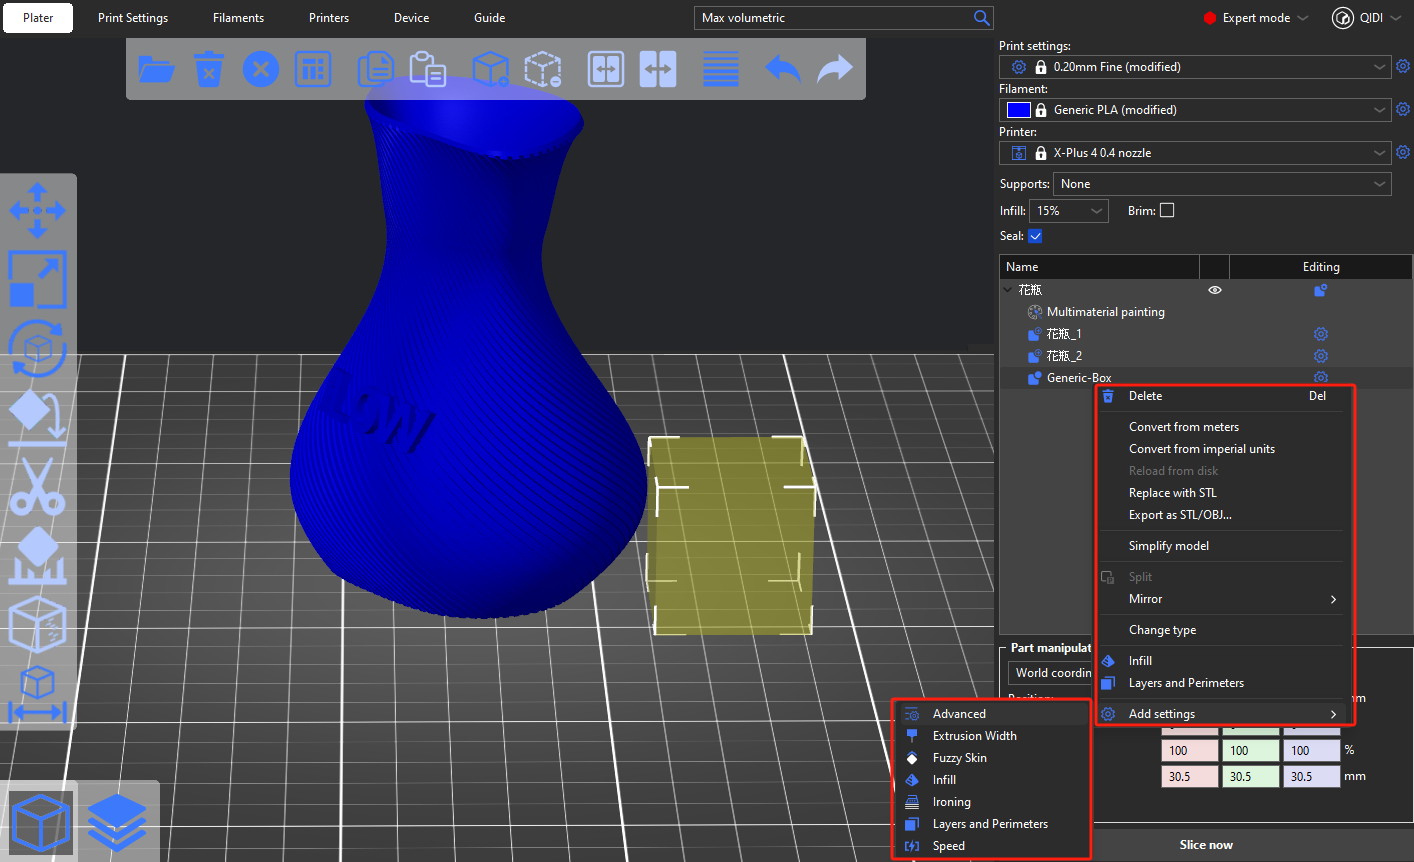
Certain settings are exclusive to Advanced and Expert Modes. If you scale the model, both the model and modifier mesh will scale accordingly, while the modifier mesh will retain its size and position relative to the model.
¶ Place modifier on bed
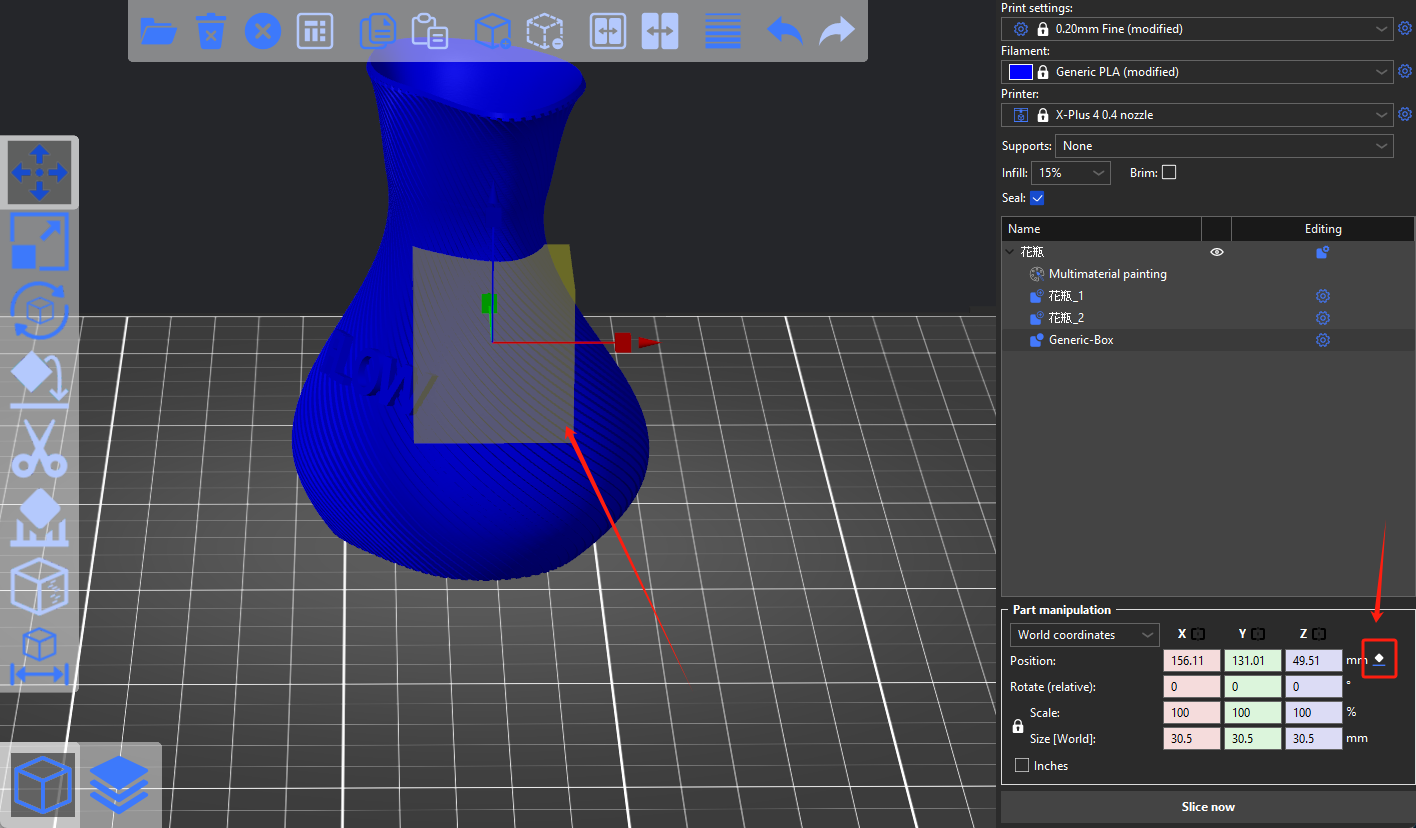
If you've moved a modifier above the print bed, you can use the button in the Part Manipulation panel to reposition it.
