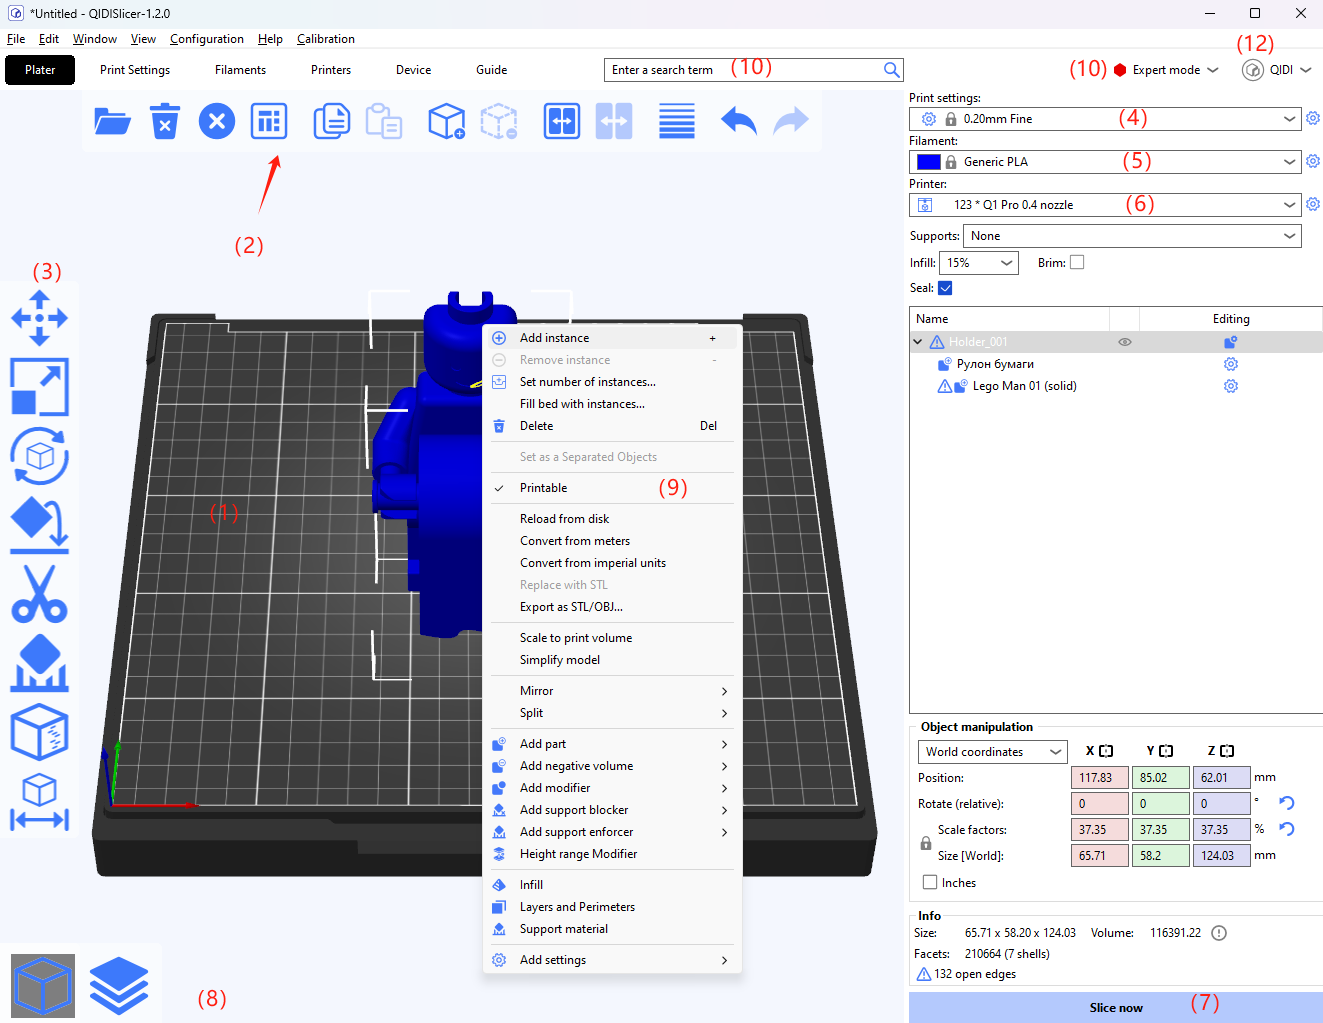
The main interface of QIDISlicer is very brief and mainly consists of the following contents.

-
The majority and core part is the operating area of the 3D model, which allows the user to adjust the 3D model, including the printing plate (1) on which the model is placed. You can use the mouse wheel to enlarge or reduce the visual size of the print.
-
The top toolbar (2) provides some convenient tools for users to edit the model, such as: add, delete, copy, etc
-
The left toolbar (3) contains tools for working with 3D models, such as scaling or rotating.
-
The right panel is mainly the default configuration for printing: printer (4), consumables (5), printer configuration (6), and options such as whether to generate supports and edges.
-
At the bottom of the right is the "Slice Now" button (7), which is used to slice the model to generate GCode. After slicing is complete, the buttons are updated to "Export G-code" and "Send to printer".
-
The bottom left (8) is the toggle button between the 3D editor and the preview of the slice results.
-
Selecting the model by clicking the right mouse button will bring up a menu bar (9) with a variety of full-featured tools for you to choose from.
-
At the top is the top toolbar, including: File, Edit, Window, View, Configuration, Help, Calibration.
-
Search box (10), you can enter the print parameters you want to query in the search box, search success will automatically jump.
-
There is also a mode switch button (11), which allows you to switch between different modes: Beginner, Normal, Expert.
-
The User Login button (12) allows you to open the login page and log in or out of your QIDI Account.