¶ Introduction Of QIDISlicer
QIDISlicer is based on PrusaSlicer by Prusa Research, which is from Slicer by Alessandro Ranellucci and the RepRap community. Thanks to PrusaSlicer and other software developers for their contributions to the 3D printing community.
Learn more about features and tips:Outline
¶ Installation
Follow the instruction below and get installation finnished .
¶ Basic WorkFlow
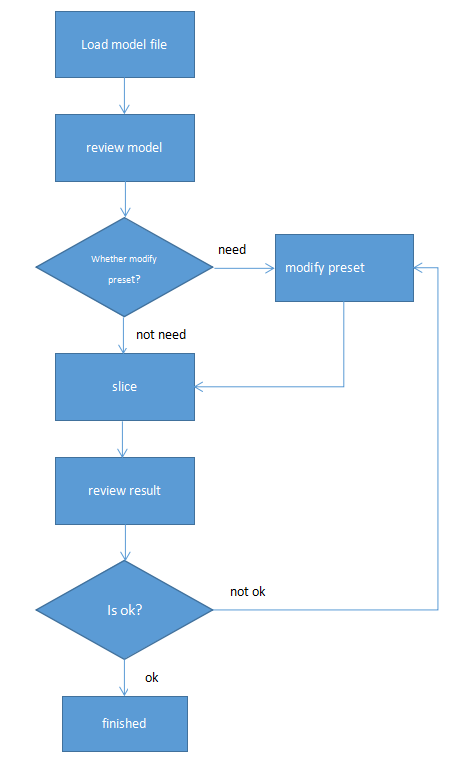
Above,we can find a most basic workflow of 3dprinting.
For most model, preset is fine, as a fresh man don't need pay too much attention here, just remember, if you get some problems with your result work, you can try to review this article below, then maybe you would get idea of how to modiy your preset.
¶ Mode Filter

To have both simplicity and integrity, QIDISlicer provide mode filter function. They have three mode:simple, advanced, expert,simple mode shows least parameter but simplist, expert mode show most number of parameter, but may burdensome. advanced mode is between the two.
Make a brief example of infill subpage below.

Simple Mode
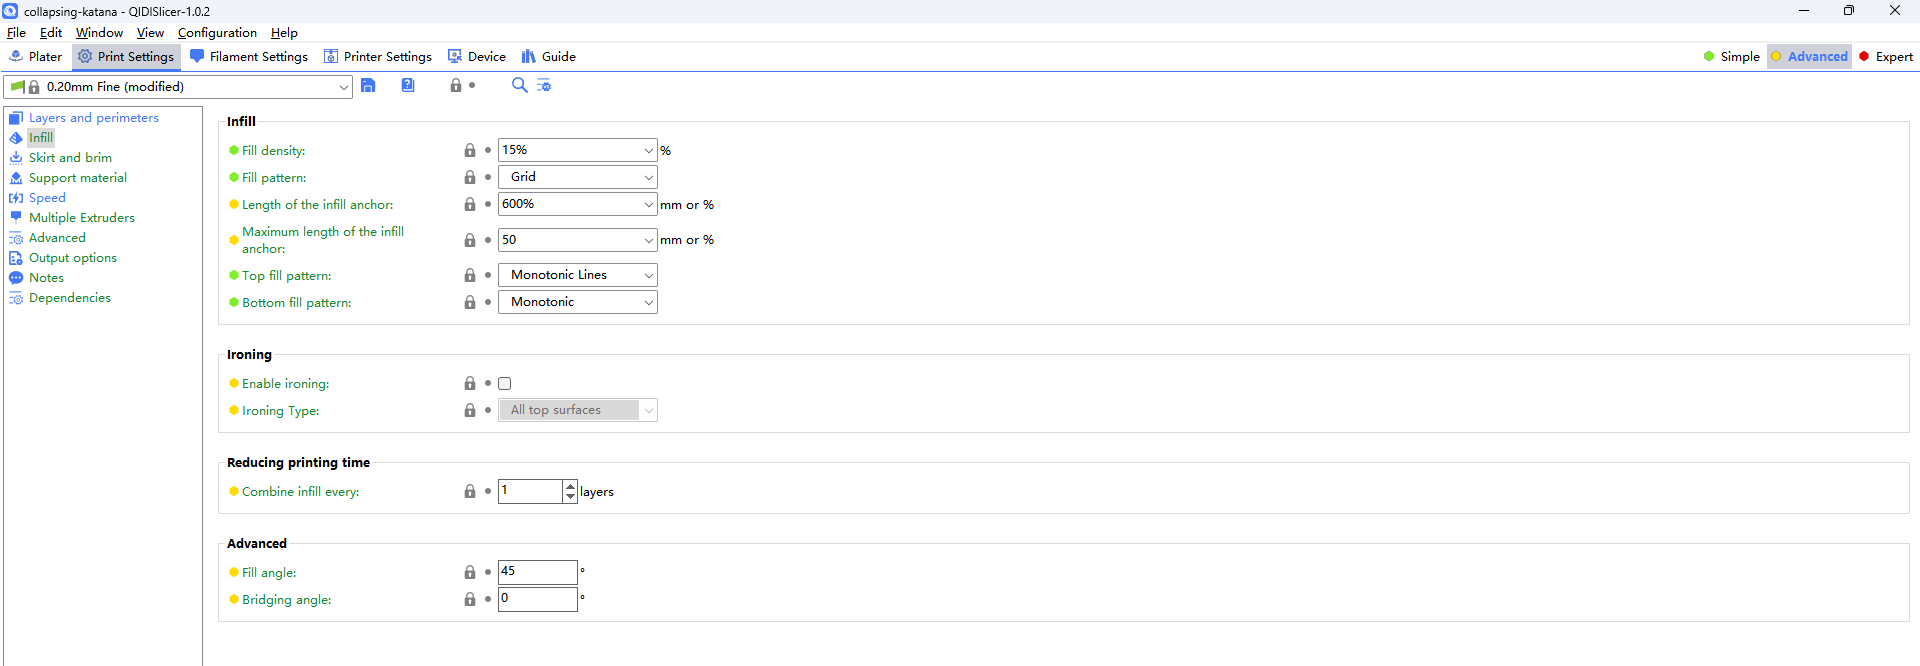
Advanced Mode
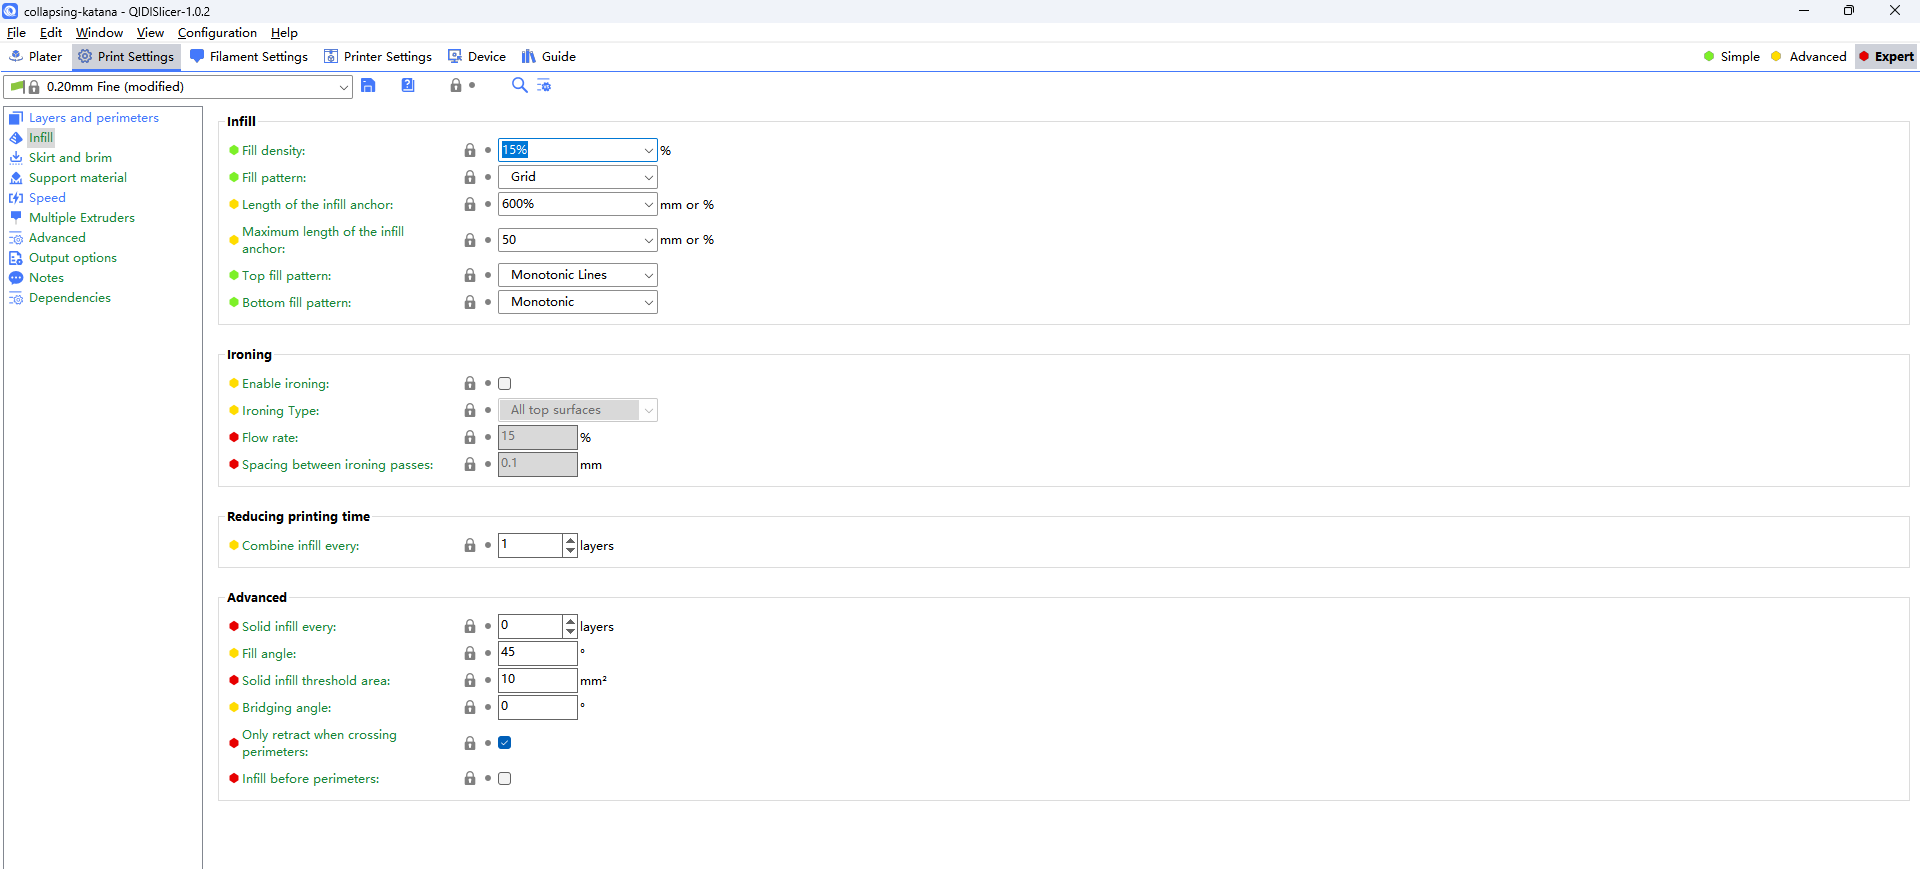
Expert Mode
¶ Main Structure
For QIDISlicer,there are four main pages to fine tune the project and make better slicing.

¶ Plater Page
Plater page is mainly used to import our model and then modify and review them.(simple mode)
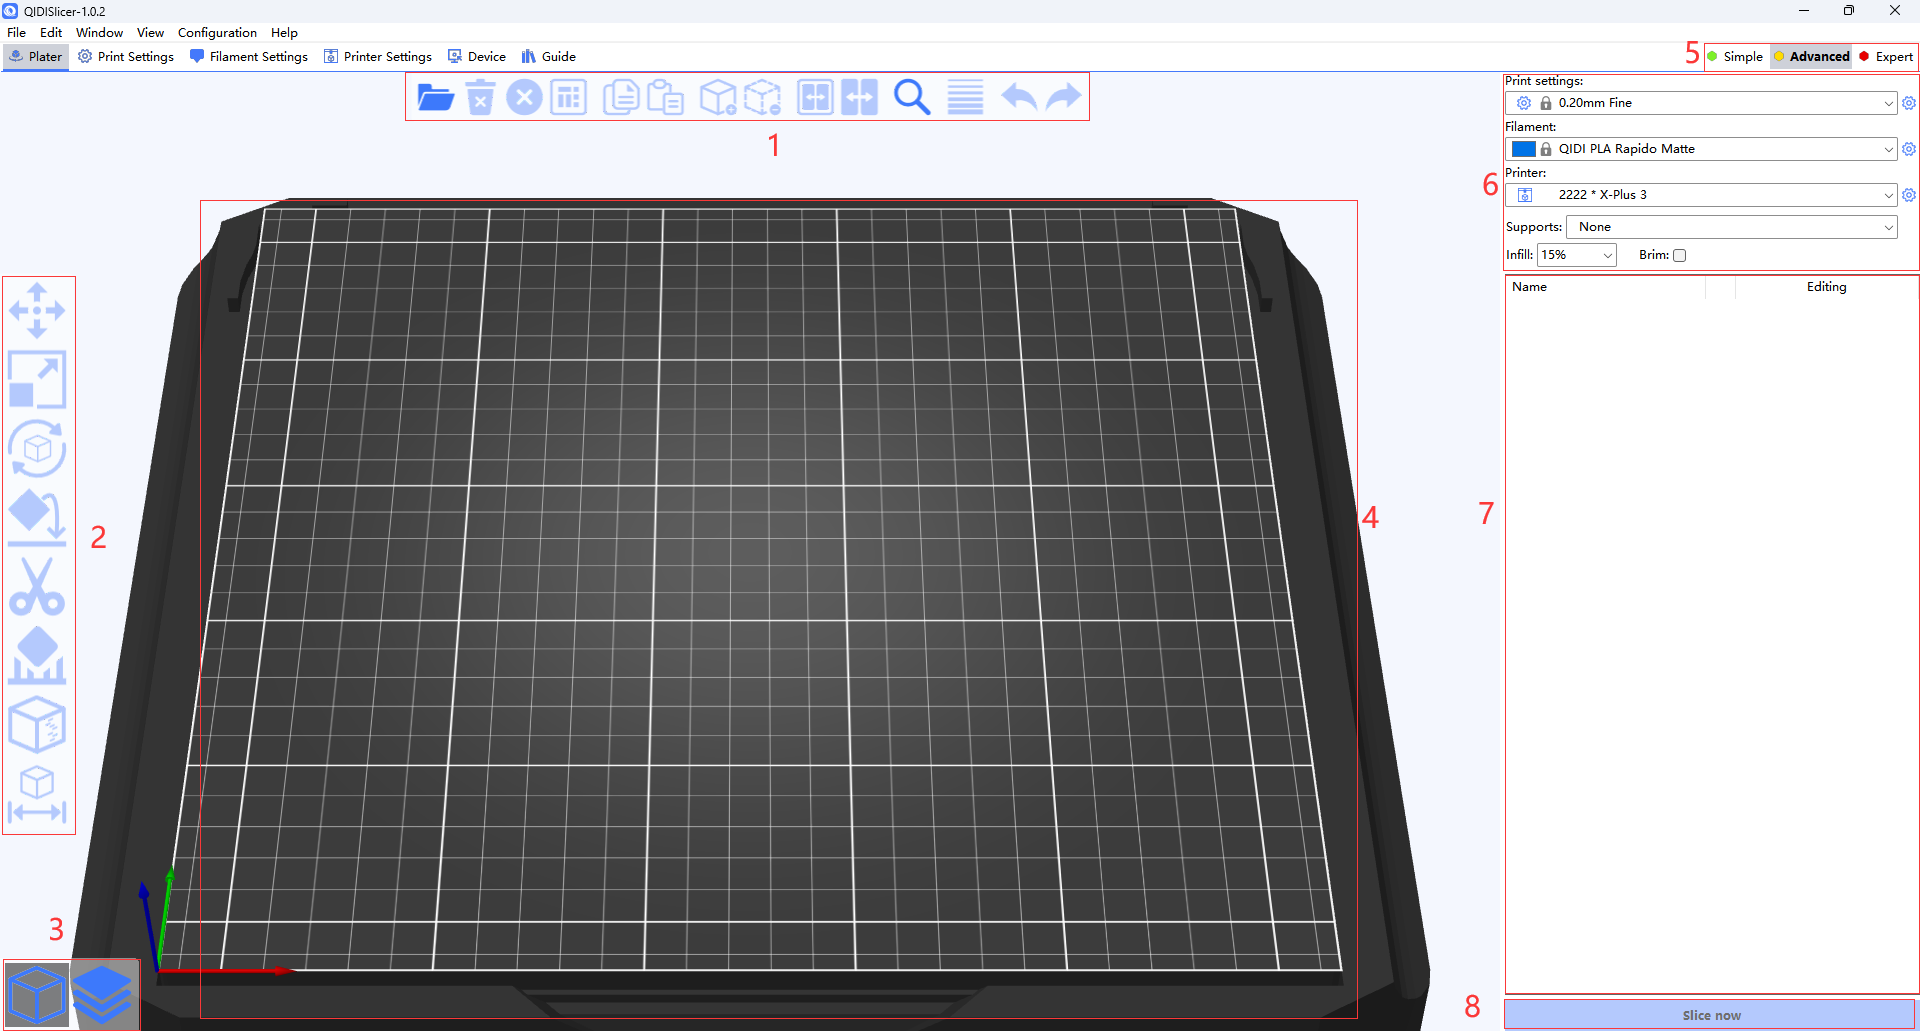
- Tool bar upper: used mainly to provide file editing function.
- Tool barleft: used mainly to provide model editing function.
- View Switcher: used to switch view between “3D edit view” and “preview”.
- Plater: used to place model.
- Mode Filter: used to switch the mode.
- Area Of Rapid Modification: used to edit the common setting fasterly.
- Status Of Target Model: used to watch the status of target model.
- Slicing And Exporting Buttton: used to start slicing and exporting.
¶ Print Settings Page
Print page is mainly about the setting of print, we can set the below parameter in this page.(simple mode)
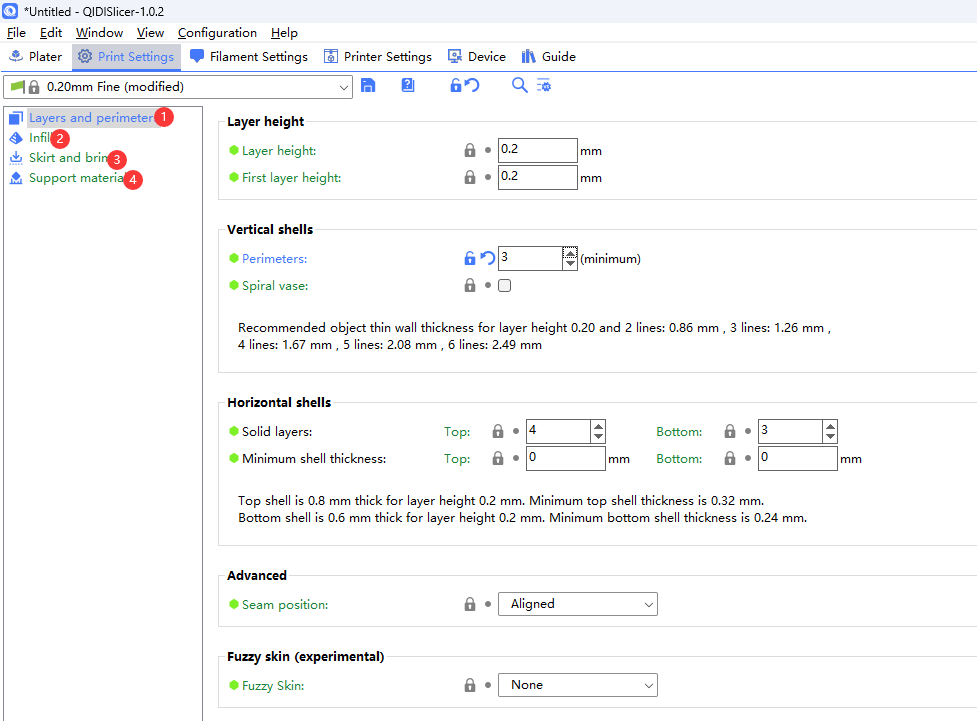
- Layers And Perimeters Subpage: used to edit the setting about layers and perimeters.
- Infill: used to edit the setting about infill.
- Skirt And Brim: used to edit the setting about skirt and brim.
- Support Material: used to edit the setting about support material.
- Speed: used to edit the setting about speed.
¶ Filament Settings Page
Filament settings page is mainly about the settings of filament, we can set the below parameter in this page.(simple mode)
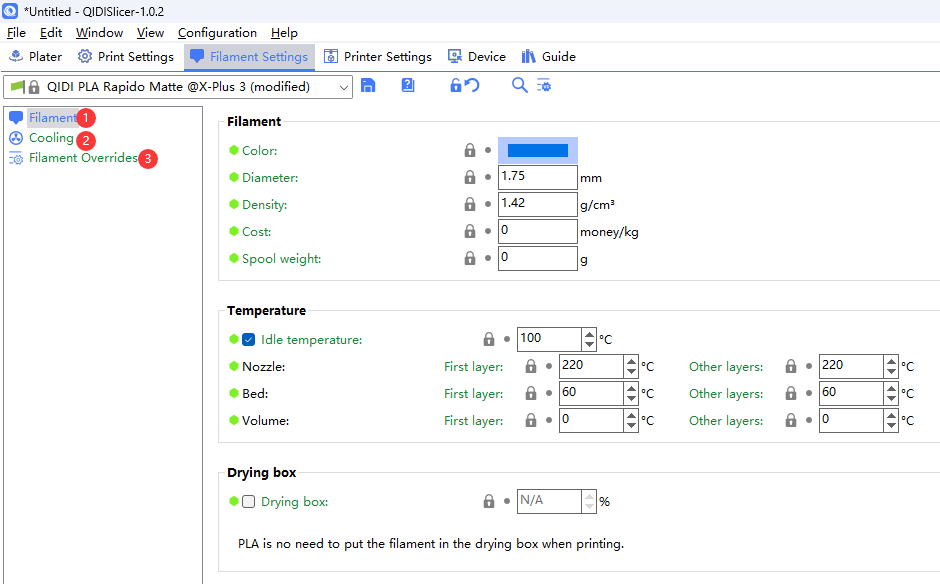
- Filament: used to edit the setting about filament.
- Cooling: used to edit the setting about cooling.
- Filament overrides: used to edit the setting about filament overrides.
Filament Settings page and Print Settings may get overlap in some parameters, it also make sense. The overlaped parameter in Filament Settings page would take effect first.
¶ Printer Settings Page
Printer settings page is mainly about the settings of printer, we can set the below parameter in this page.(simple mode)
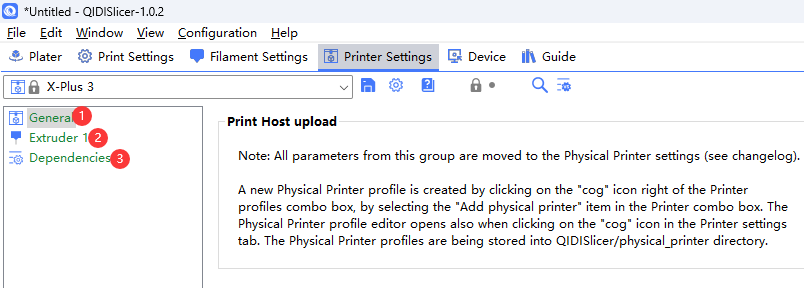
- General:used to edit the setting about general.
- Extruder 1: used to edit the setting about extruder.
- Dependencies: used to edit the setting about dependencies.
¶ Remote Moninating
Before remote monitoring, it's quite vital to connect with remote printer, below are a tutorial that teach you how to connect with.
ConnectToPrinterViaWIFI
Once we have connected to a printer, click the device tab, we will enter the fluid page.
