Before starting our journey, the installation of the software is necessary.
If you do not have QIDISlicer installed, this link will help.
Installation
The example model for this procedure comes from Thingiverse website, the author GoAftens, thanks to his model's and that help us to understand the process of 3d printing.
Here is the link to the model.
https://www.thingiverse.com/thing:2120591
¶ 1.Start--Slice Our First Model
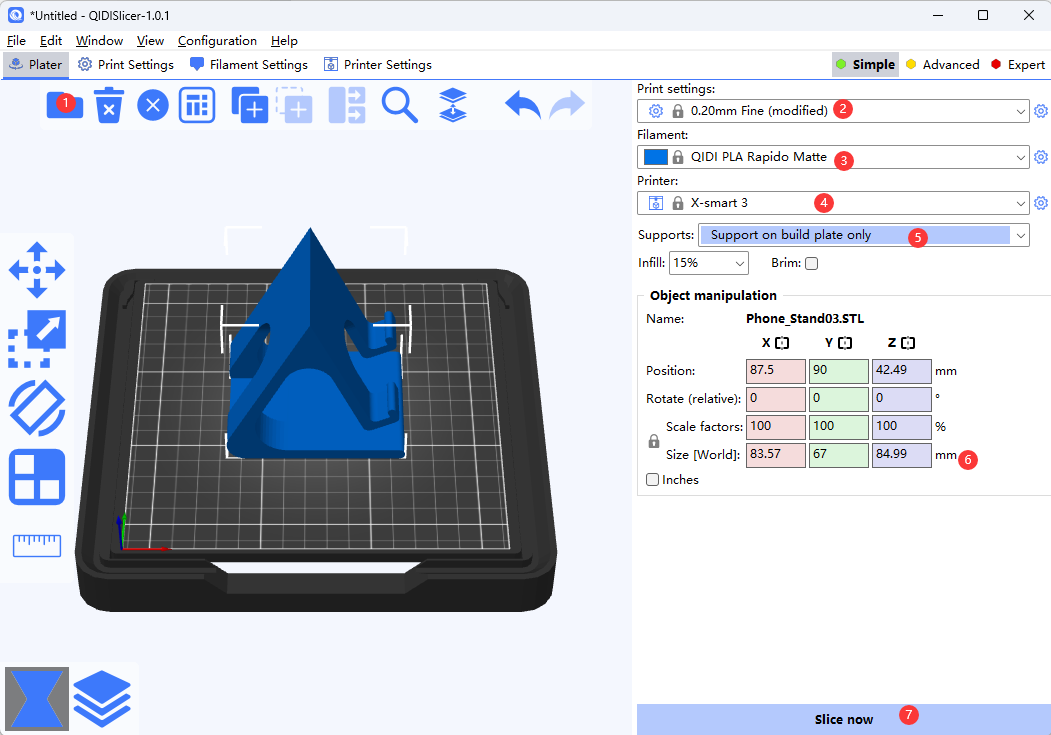
Follow the instruction below

After the file is downloaded and extracted,Process this file, as we do below.
1.Load the .stl file
2.Choose the layer height (optional)
3.Choose the filament you have
4.Choose the printer profile
5.Add support (if the model exist hanging part, it need to add support )
6.Modify size(optional)
7.Start slicing
¶ 2.Transfer--Get Printer Received
There are two ways to transfer our result .stl file to our target printer. see blow.
1)USB flash drive
For the first way, we can click button show below, in the pop-up file selection dialog box, select our u-disk address to save, and then insert the u-disk into the 3d printer to complete the file transfer.

(You can find him in the bottom right corner of the plater page)
2)Printing via Wifi
For the second way, we have to add our host and the target 3d printer to connect to the same wiff network(2.4Ghz, NOT compatible with 5Ghz).
Follow the instrcuton blow,we can learn how to connect printer via wifi and transfer our file to target printer.
ConnectToPrinterViaWIFI
¶ 3.Run--Wait For Our First Result
Under construction